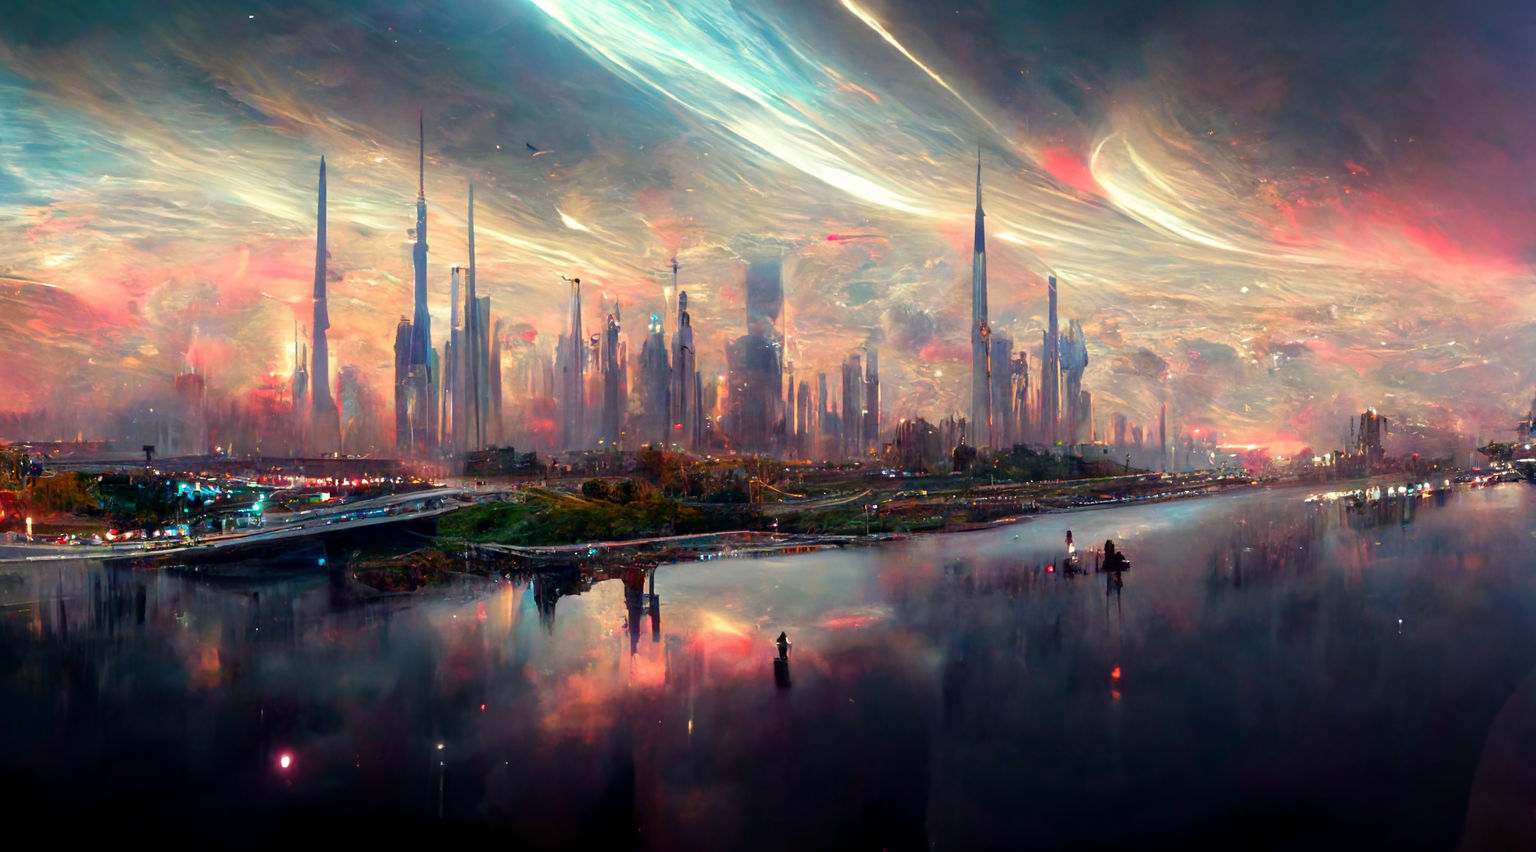
The field of GenAI technologies is rapidly evolving, regularly introducing exciting new applications, features and updates. In this blog post, I’ll explore a particular text-to-image (T2I) tool that has seen some cool updates in the past couple of months.
So we are returning to Midjourney to see what the new features are, but also to give you an overview of the most important parameters which make all the difference when prompting for something more specific. You might want to read up on the basics which I have written about in this previous blog post called Harnessing AI – the Midjourney case.
I’ll be using the latest version available which currently is Midjourney version 6 Alpha (April 5, 2024) moreover, my preferred method of prompting is through the web browser. This is now possible in version 6 to users who have generated more than 1000 images in Midjourney (MJ). The Discord interface is too overwhelming with all the servers, emojis and you needed to remember the names for the parameters, which in my case lead to a lot of typos. Now, with the clean browser interface, you have the prompt line at the top of the page and the parameters are buttons and sliders – very easy to use.
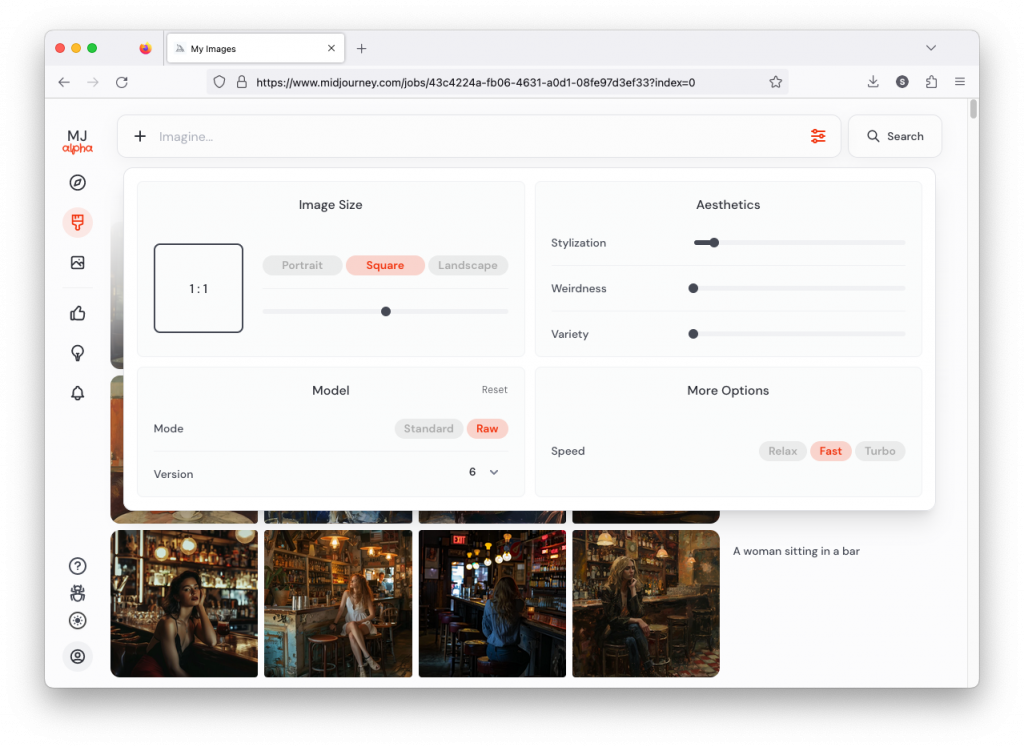
All prompting that is done through the web browser can be done through the Discord interface too, don’t worry, just remember to start your prompt with /imagine. When using parameters you need to indicate this with two dashes in front of the parameter itself. For instance, if you want to instruct MJ to create an image with an aspect ratio of 5:7, meaning that the sides are 5 units wide and 7 units high you need to write: –ar 5:7. In the browser you just move the slider to the desired ratio. If you prefer writing dashes and parameters you can still do this in the web browser. Please note, Mac has the habit of combining the two dashes, so don’t worry if in this post you see a long line instead of a double dash.
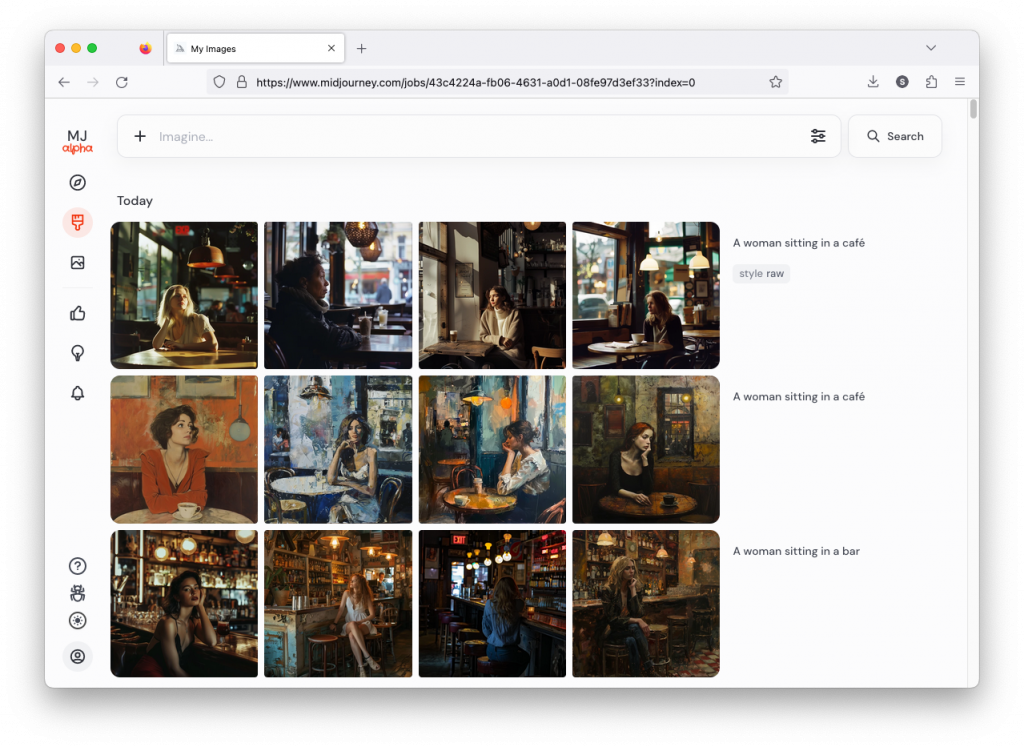
Having a common baseline is important, thus my prompting will use the default settings which you can see in the second image with the parameter options open. There is one exception, under Model the Mode should be Standard, not Raw, but we’ll come back to this. If I use Raw I will let you know in the prompt.
MJ has quite a few parameters and I won’t discuss them all here, just the ones I think need explaining and may be the most impactful ones. You can familiarise yourself with the ones I am not discussing at MJ’s own Parameter list. Here are the ones I will cover, some in more depth some less:
- No
- Tile
- Character Reference
- Style Reference
- Stylize
Raw vs. Standard

Let’s go back to the Raw vs. Standard Mode question. Raw can be considered another parameter expressed as: –style raw. It is used in MJ’s own words:
to reduce the Midjourney default aesthetic.
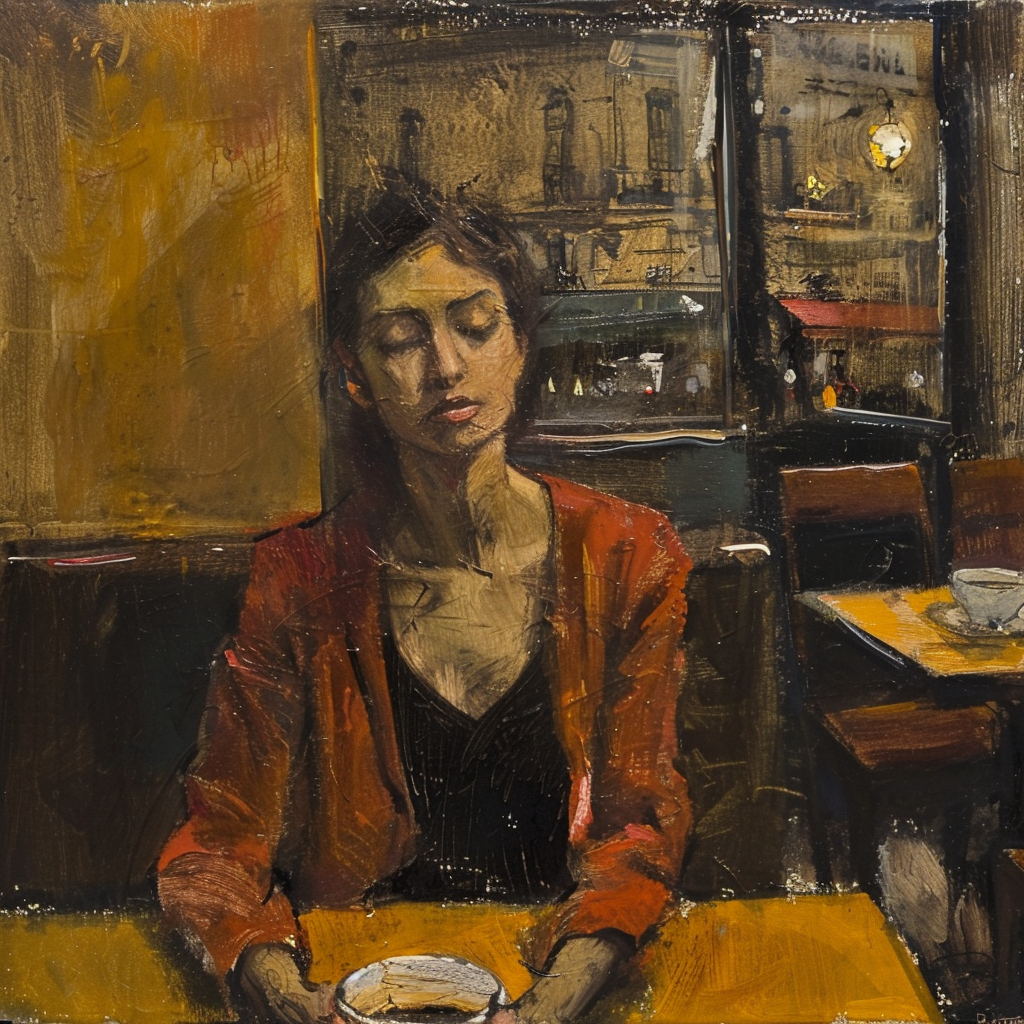
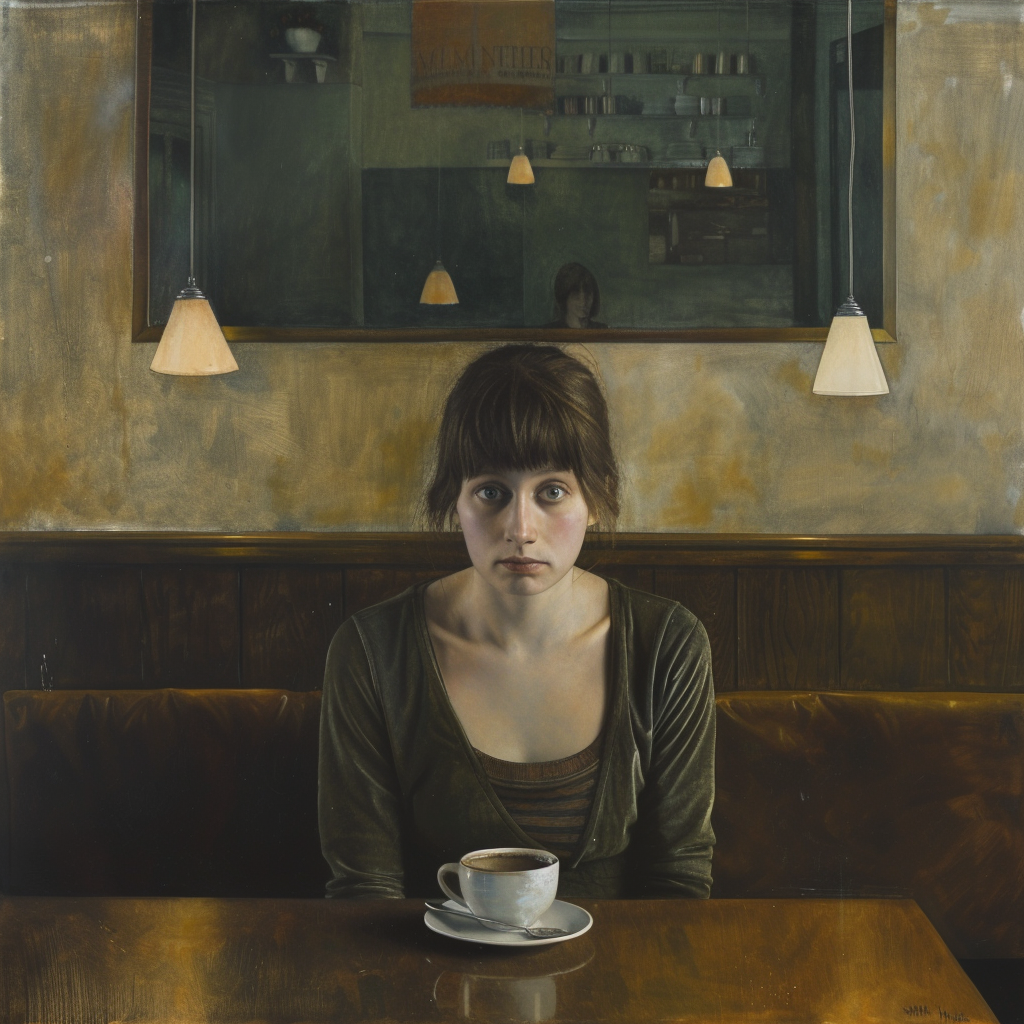
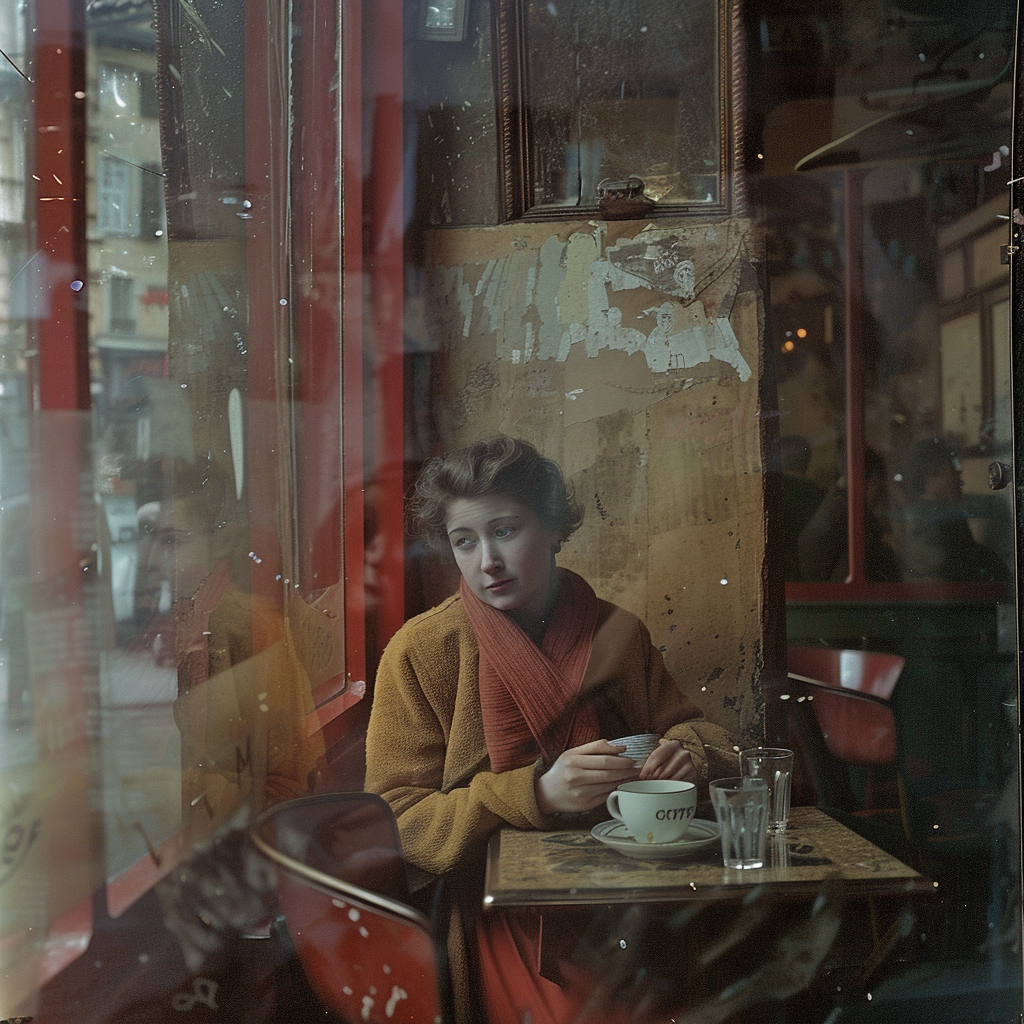
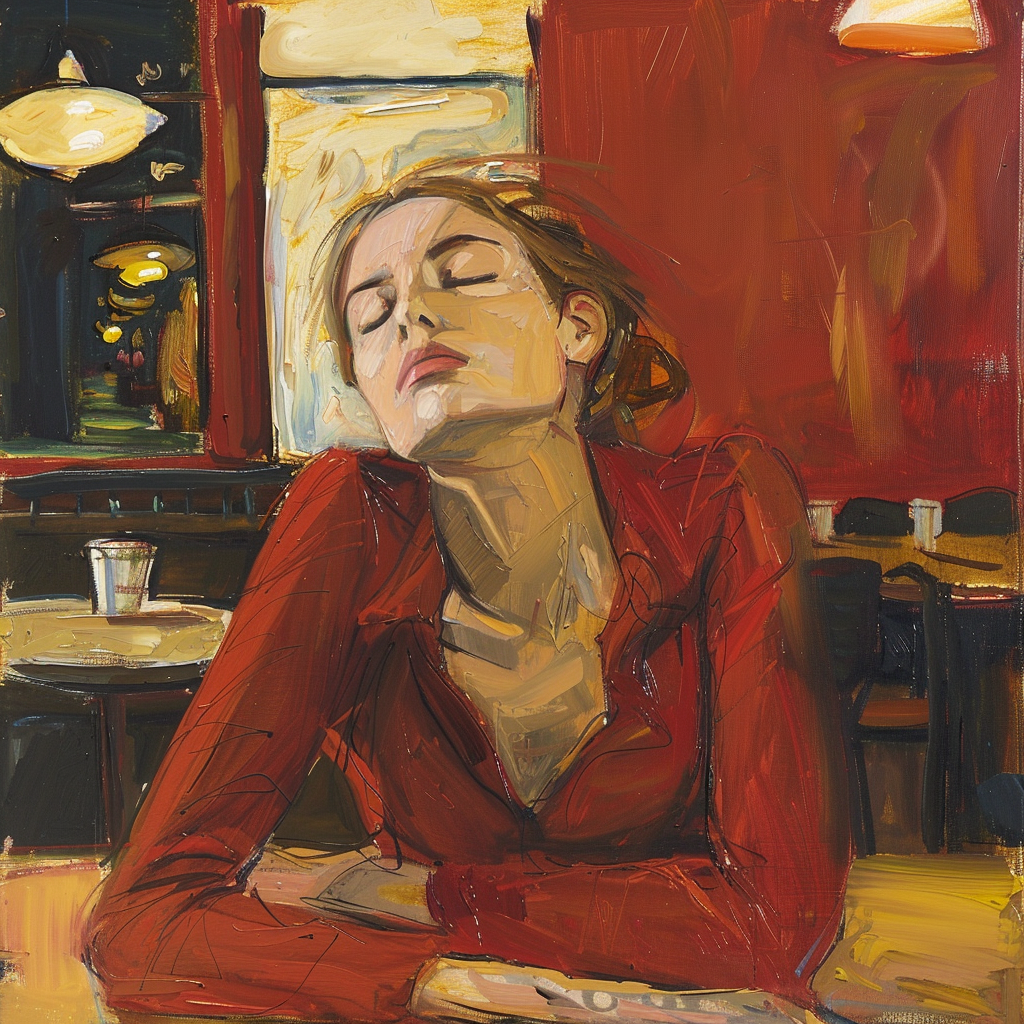
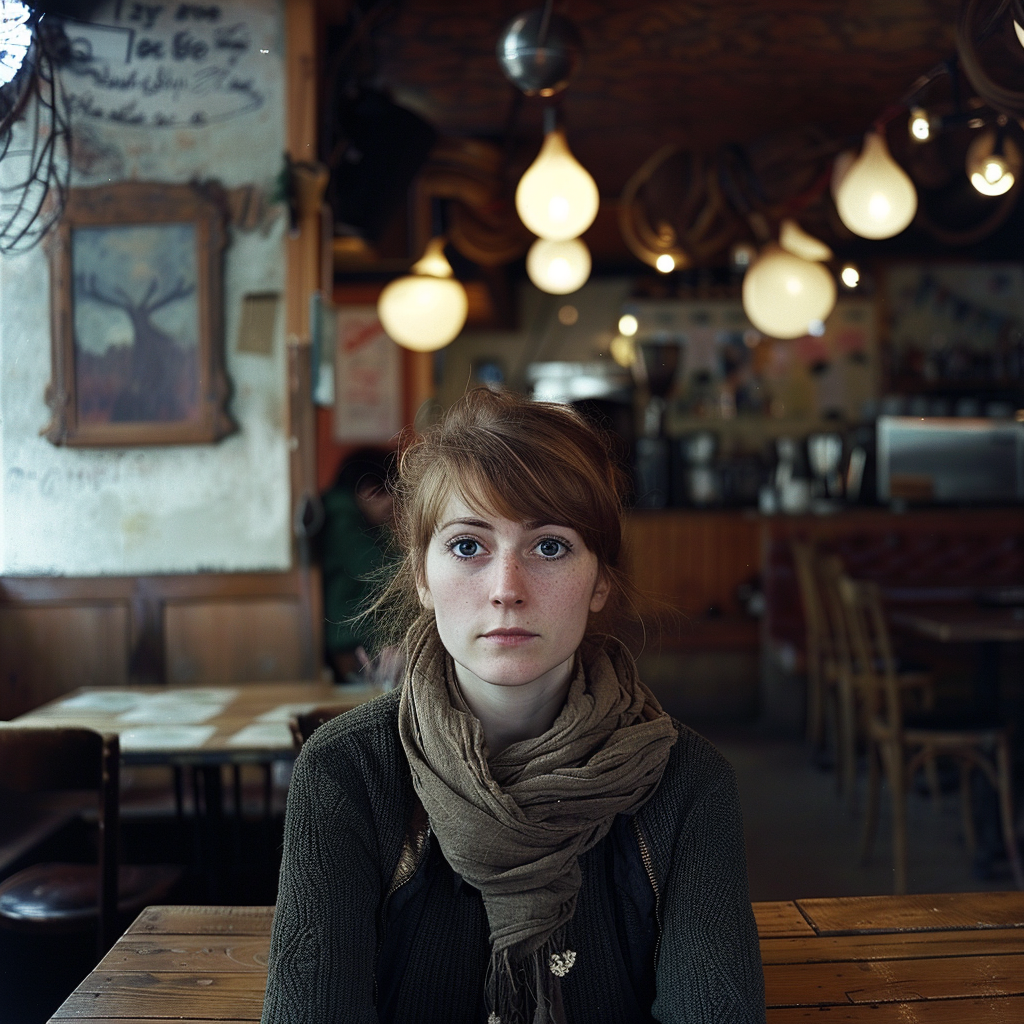
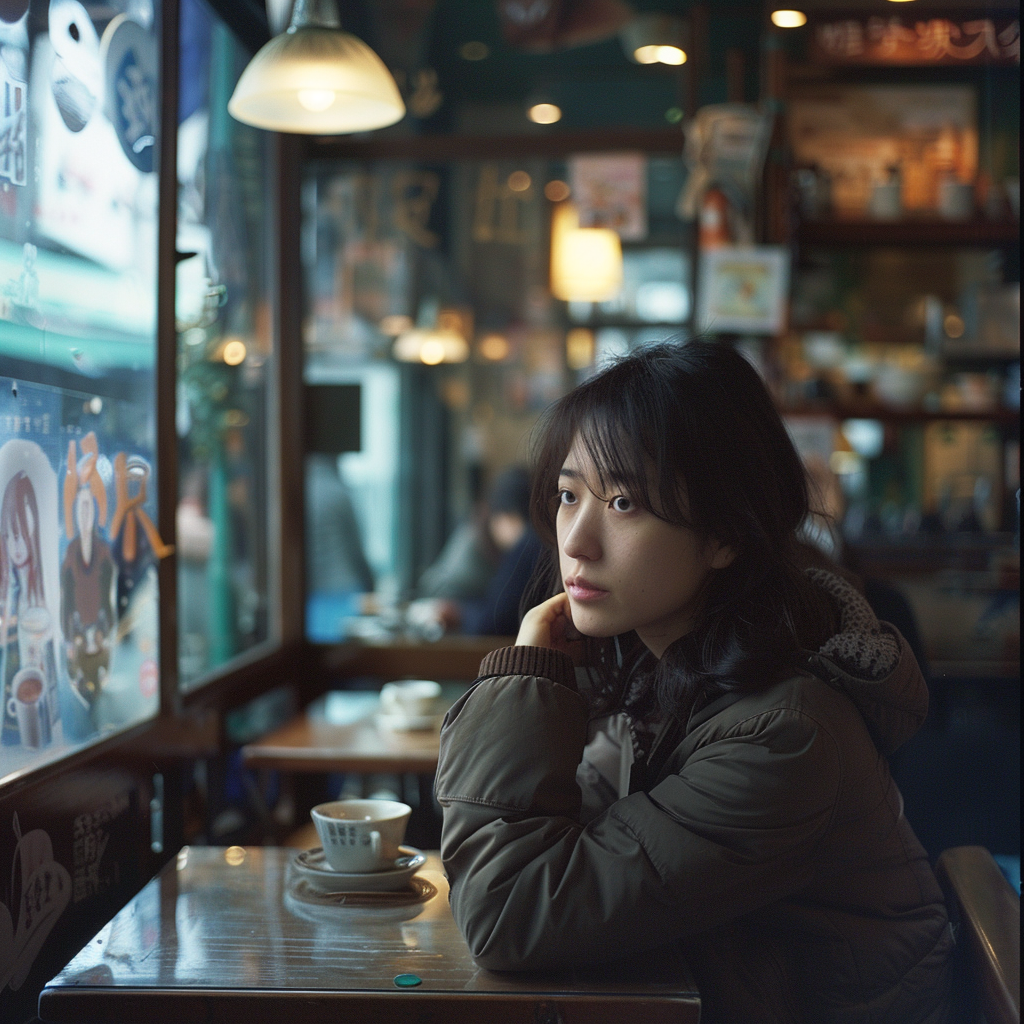
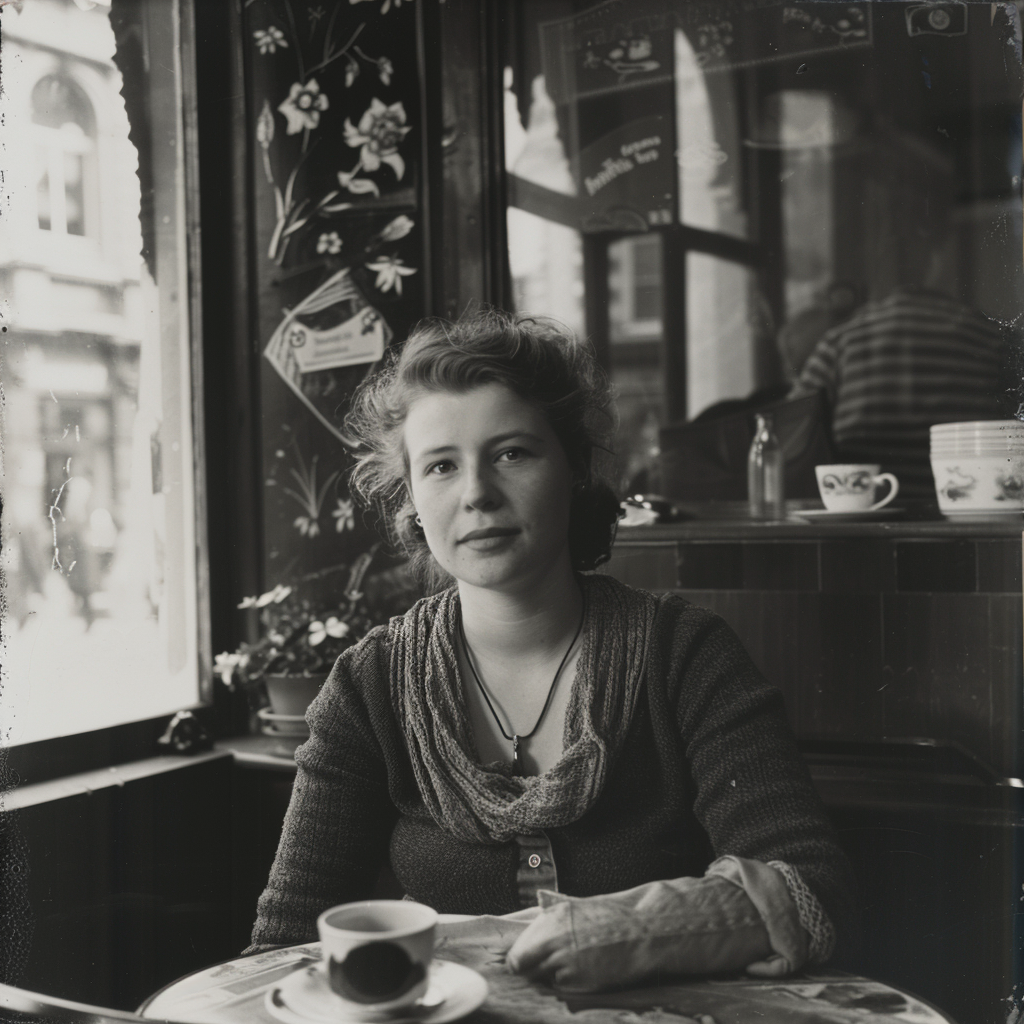
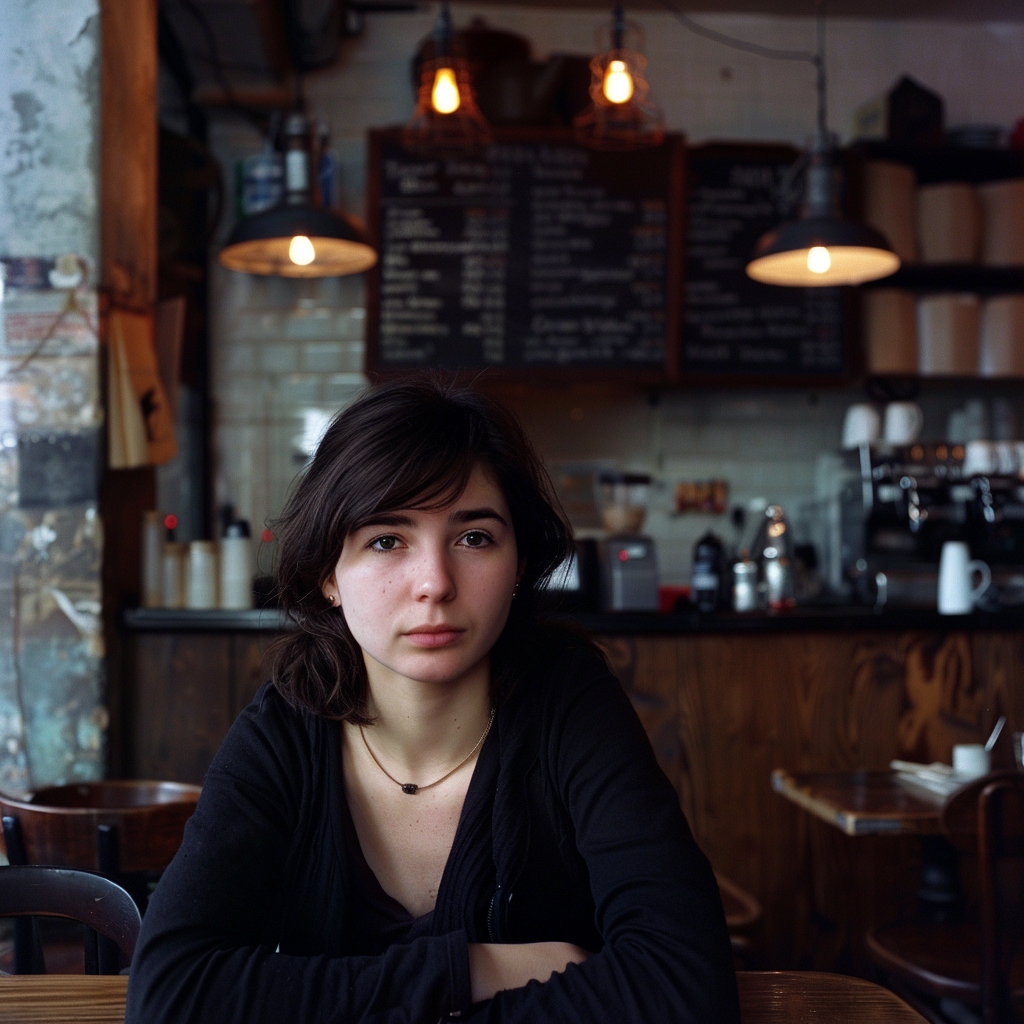
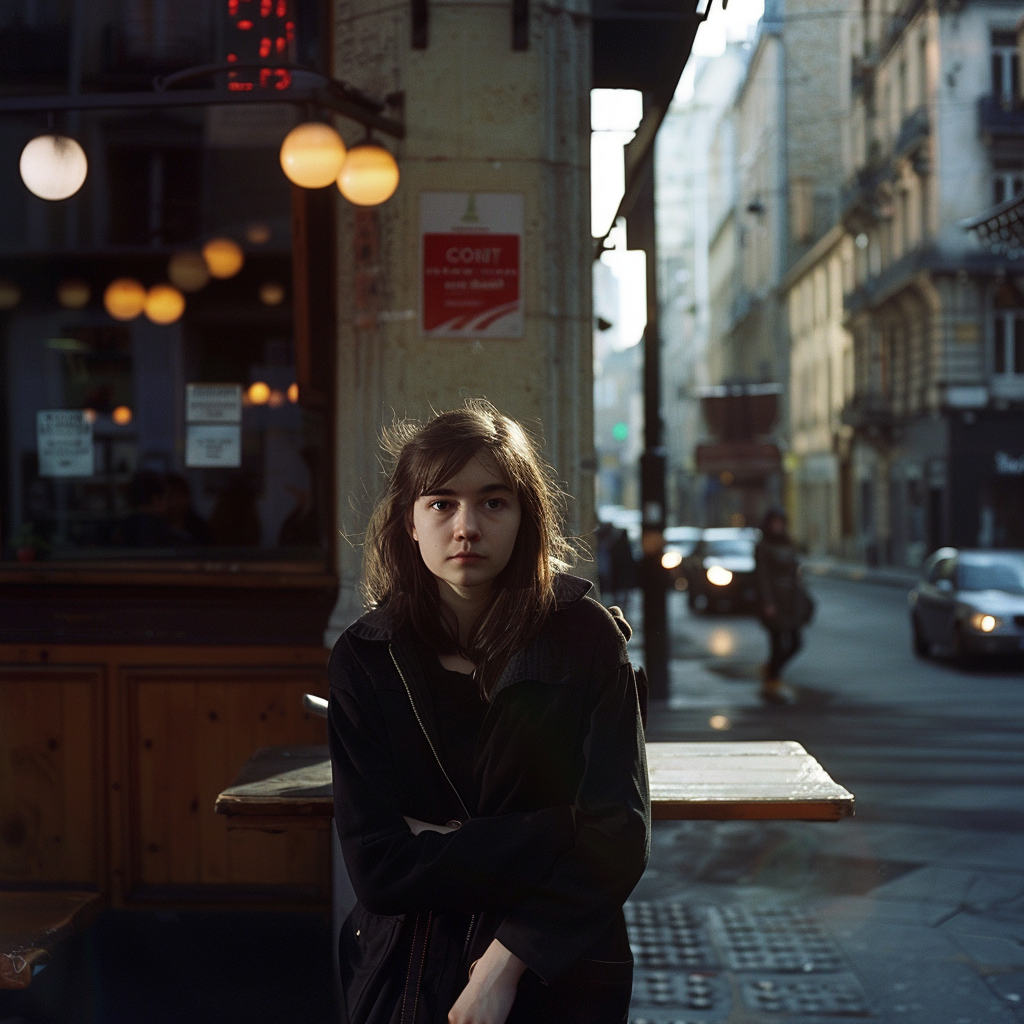
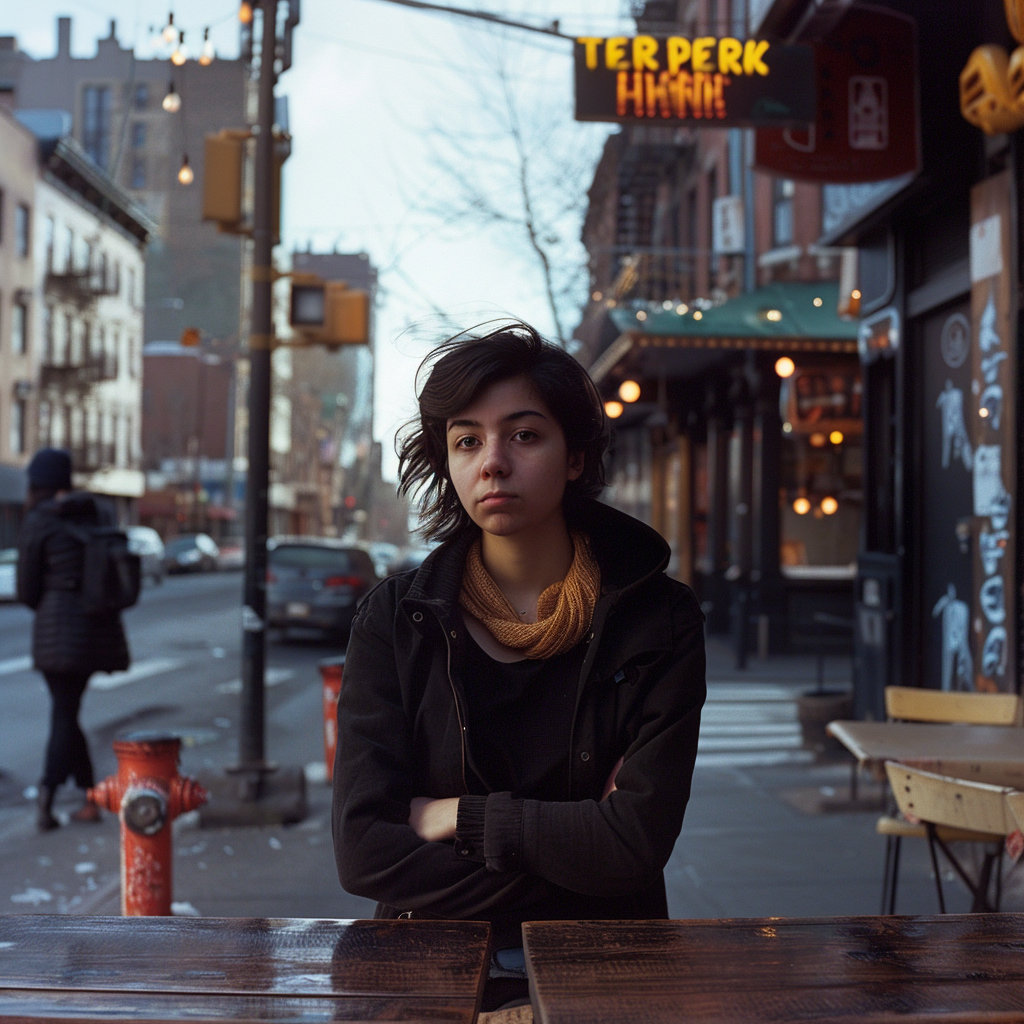
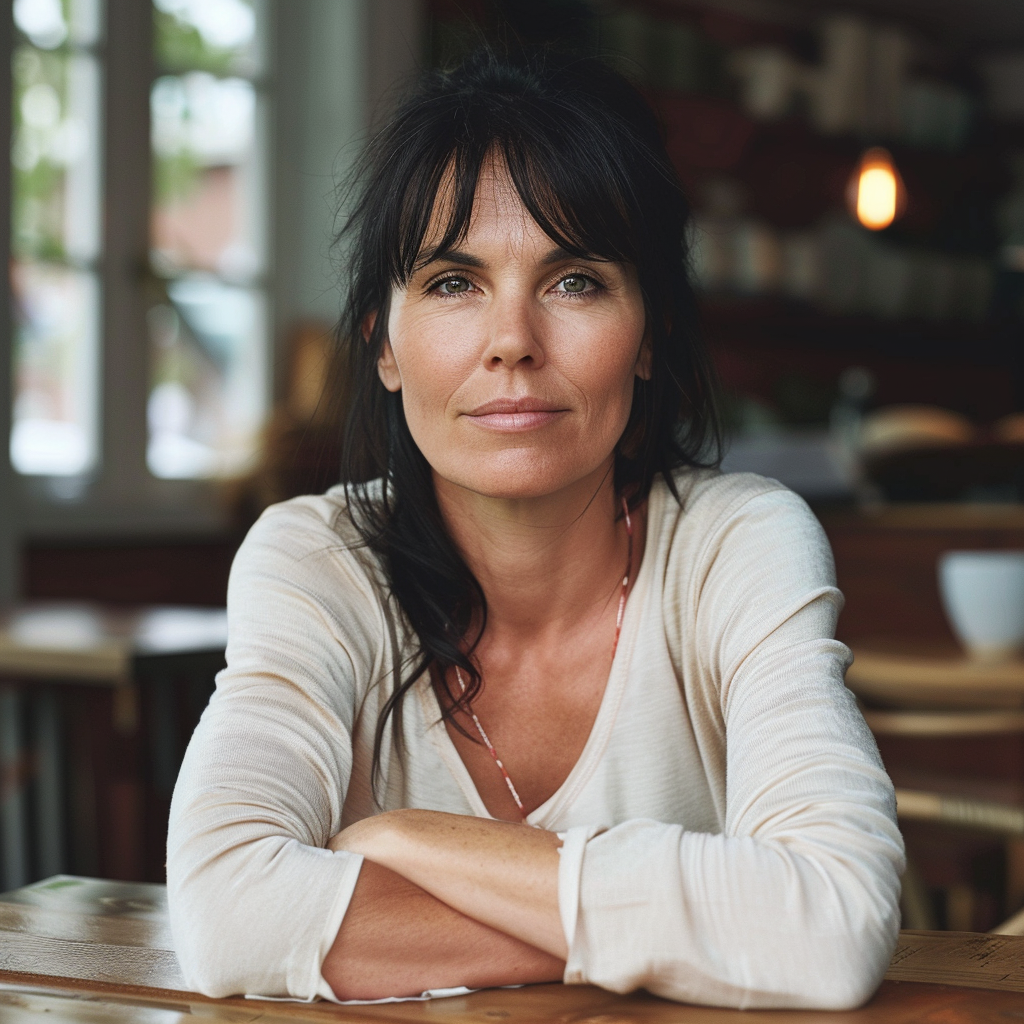
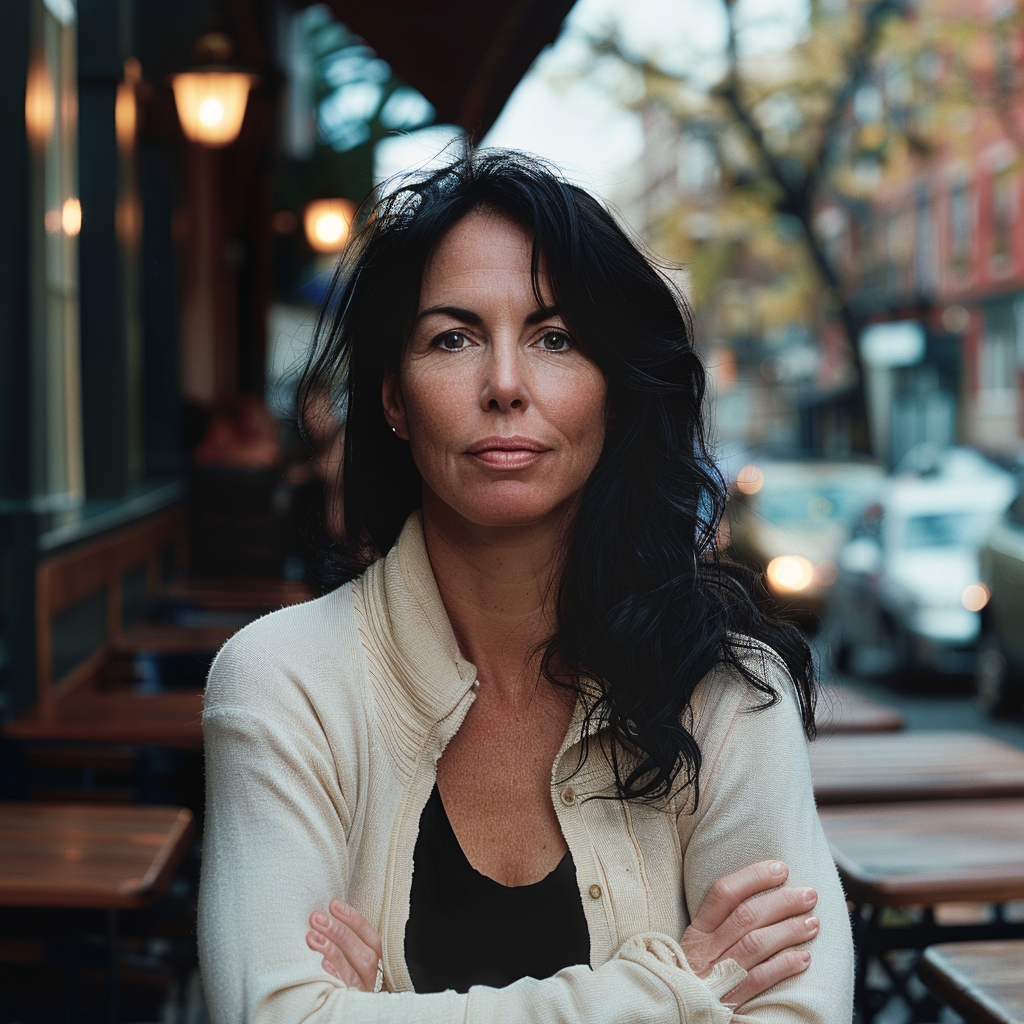
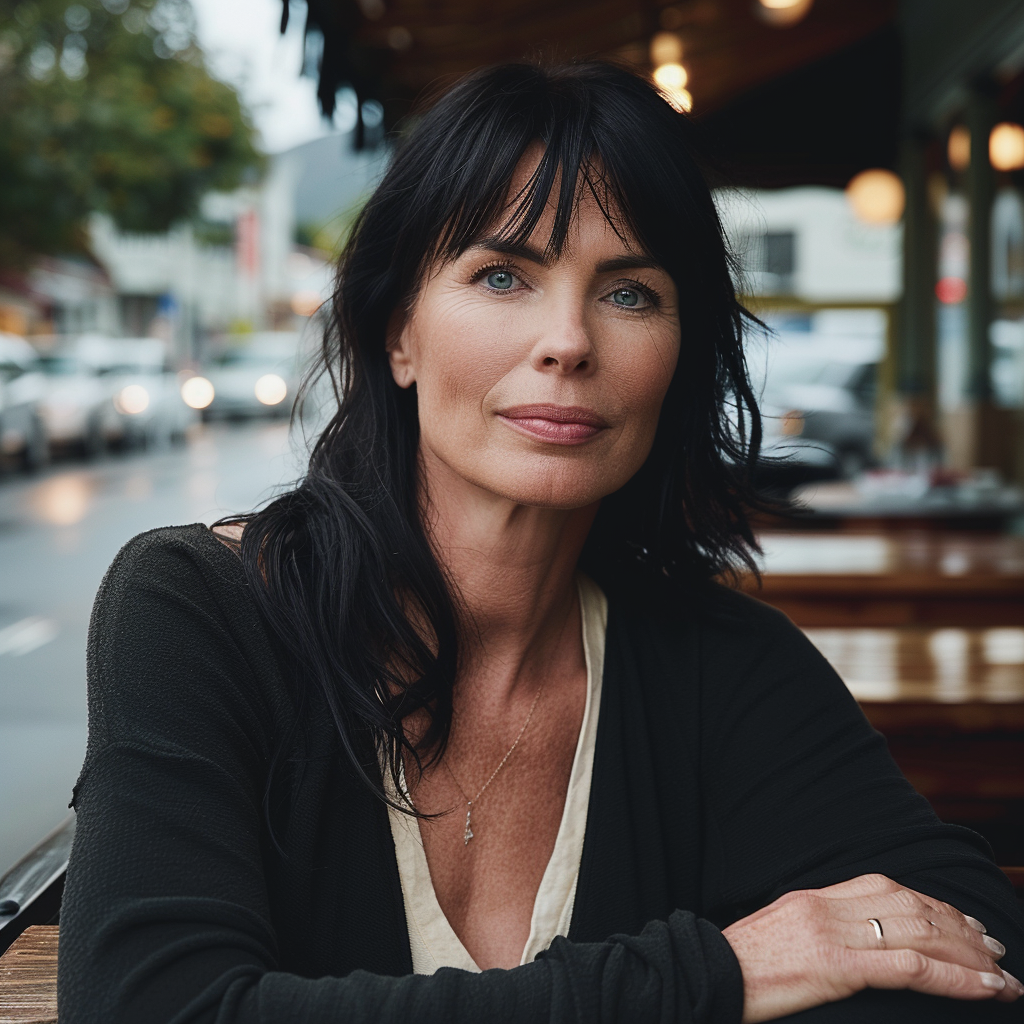
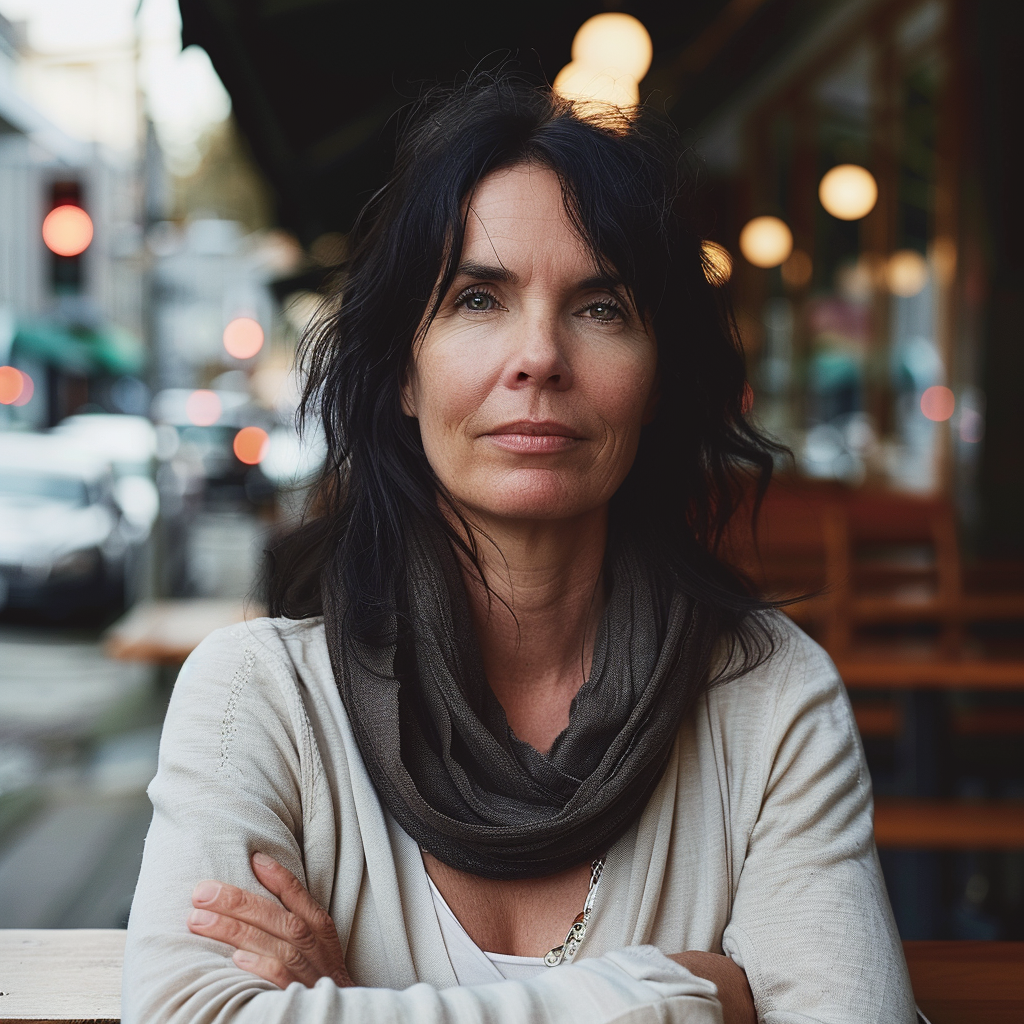
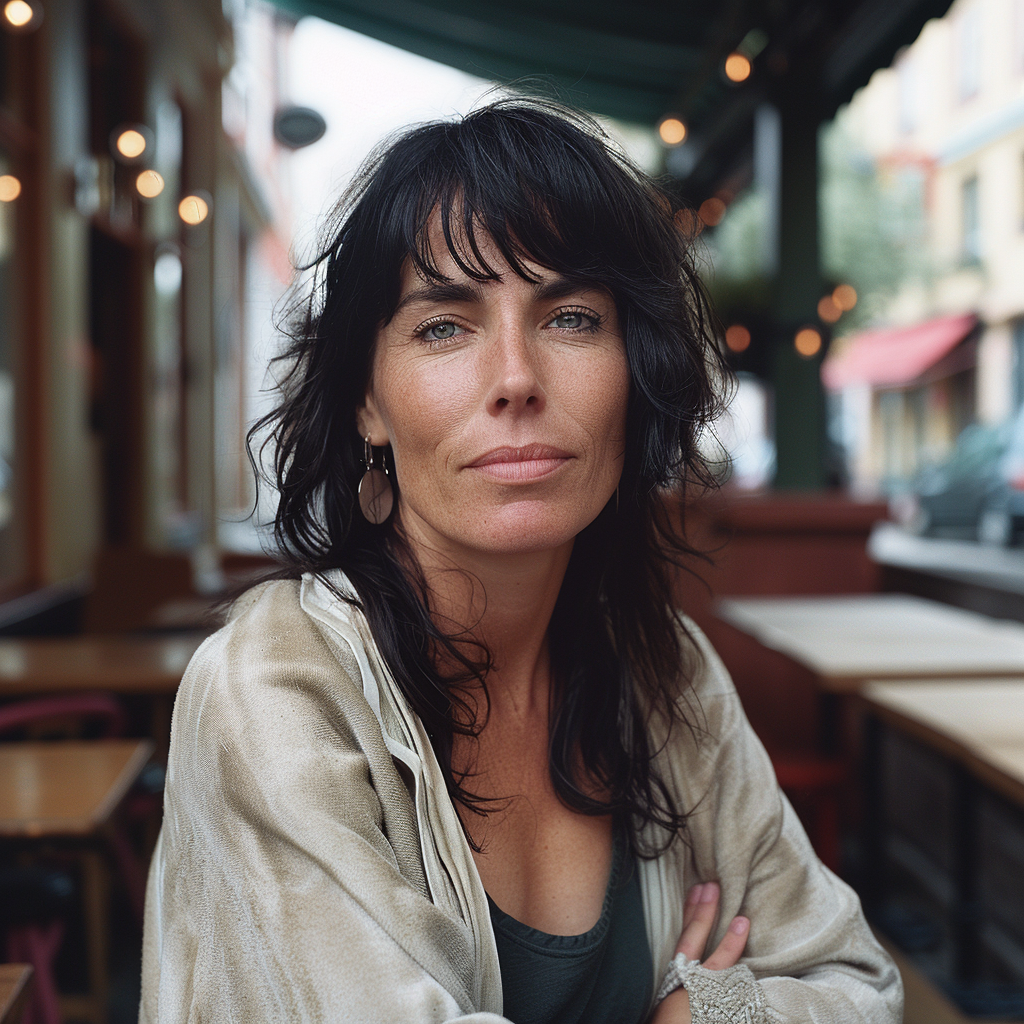
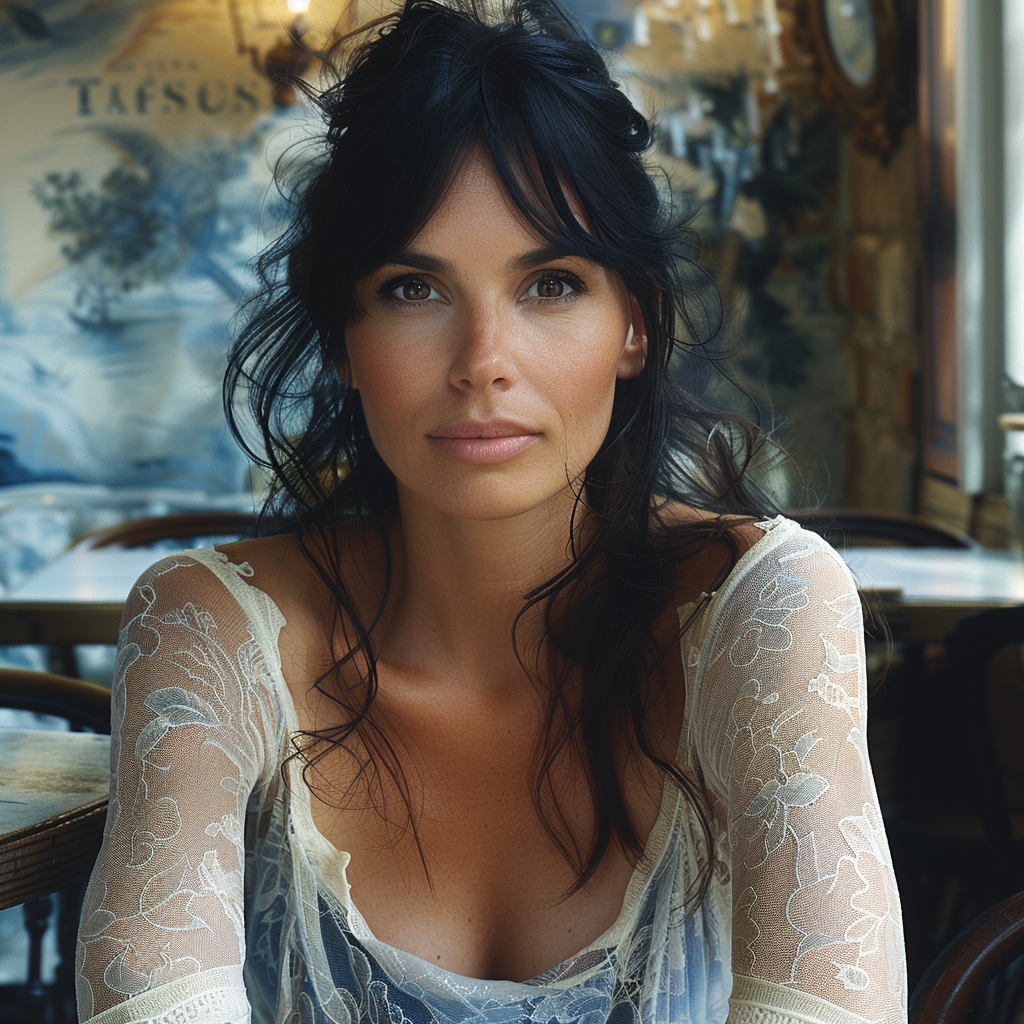
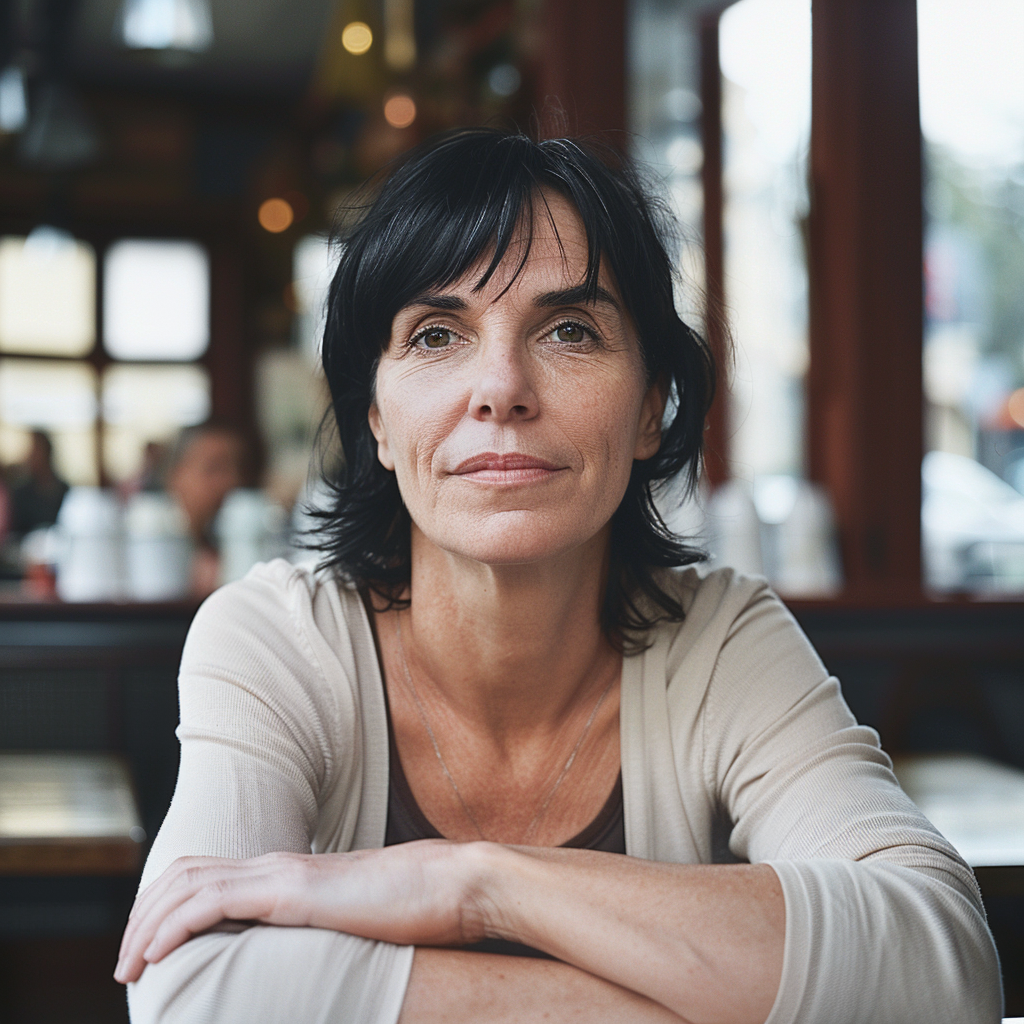
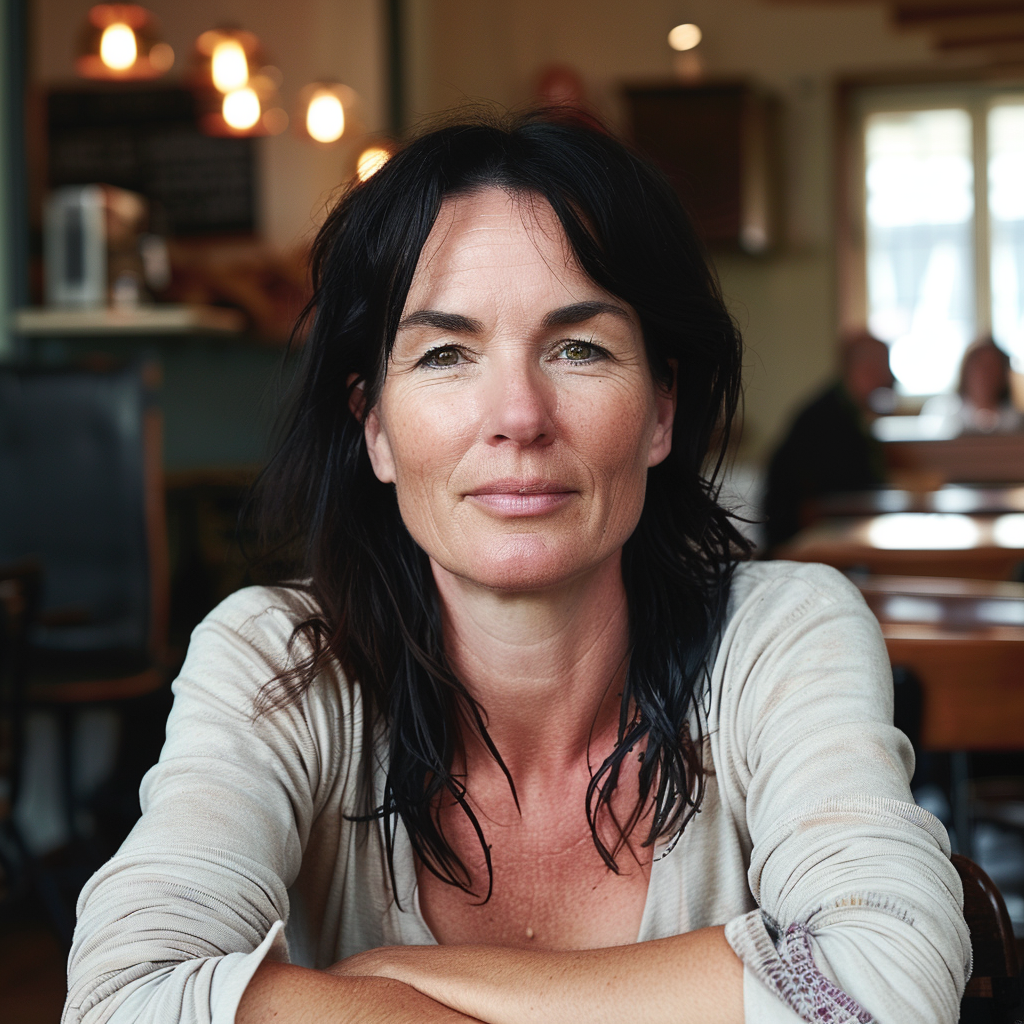
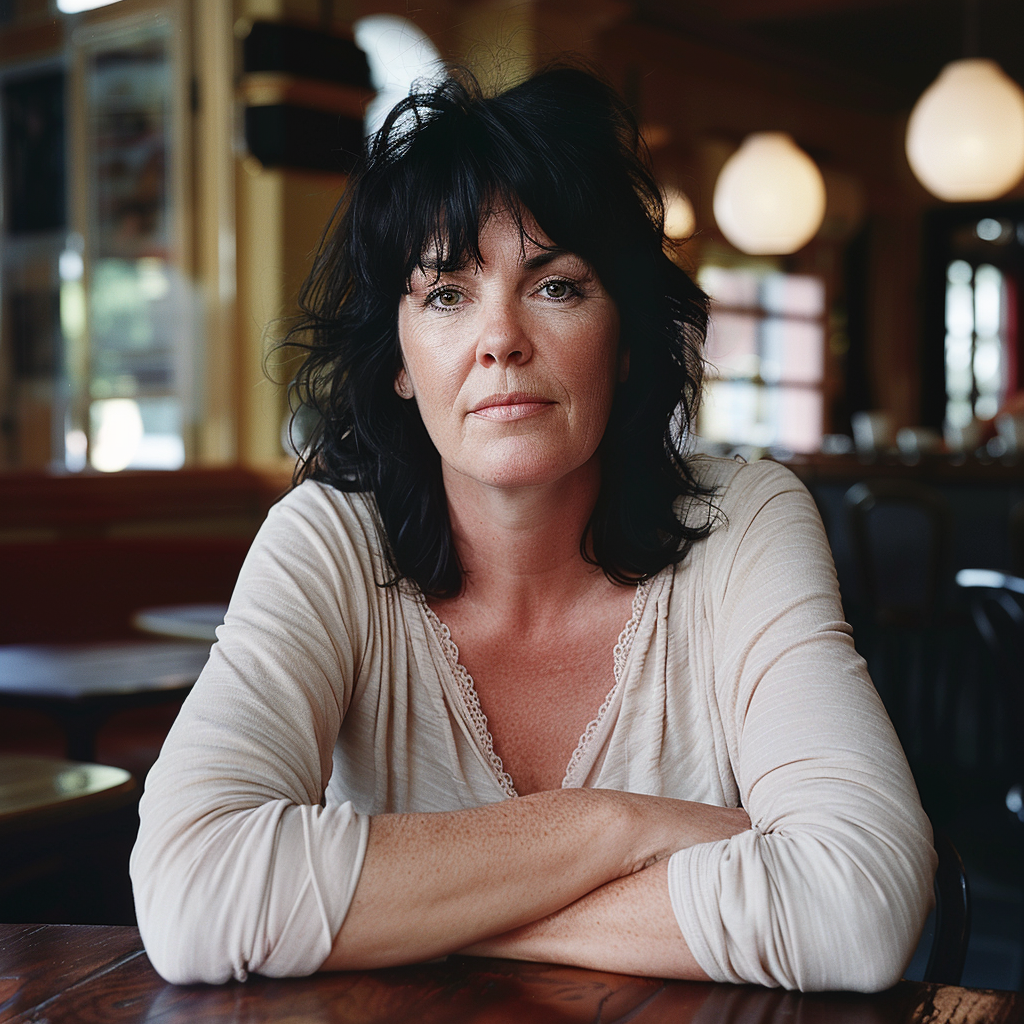
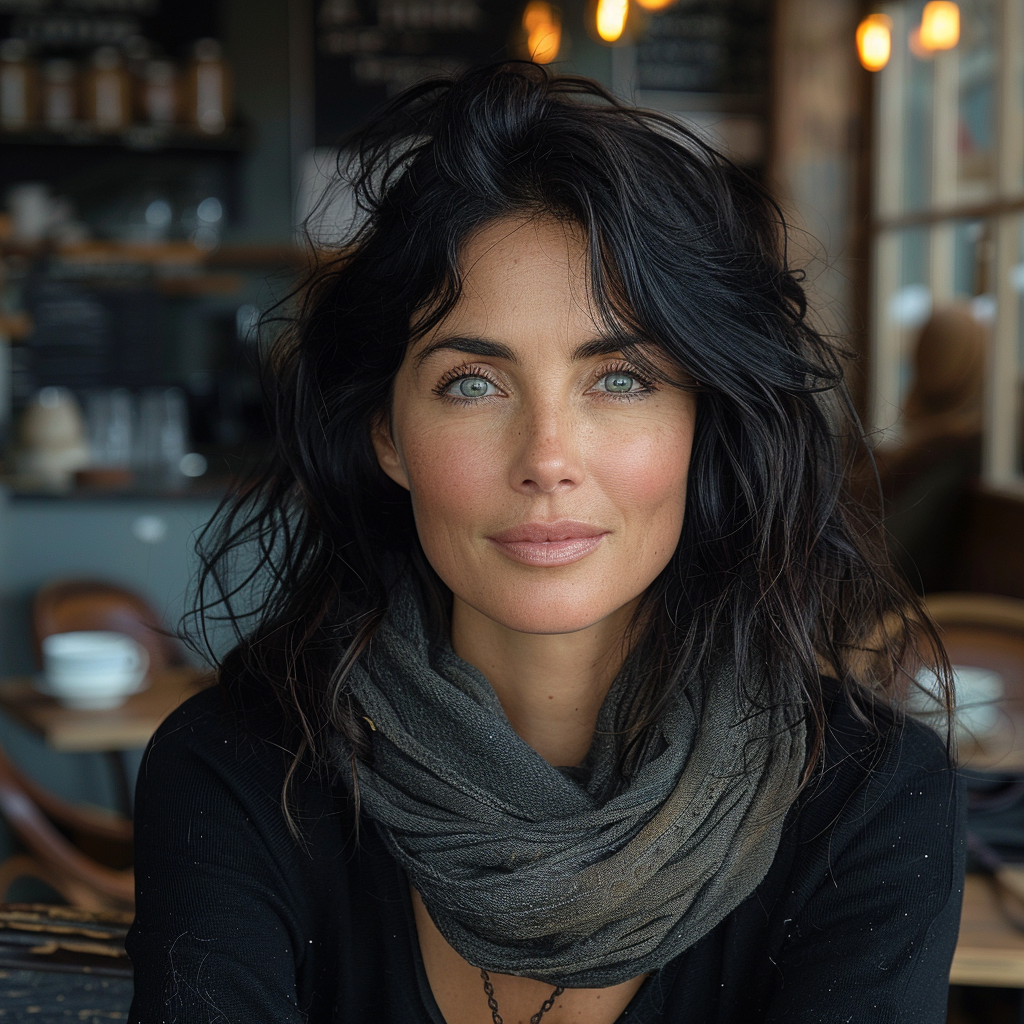
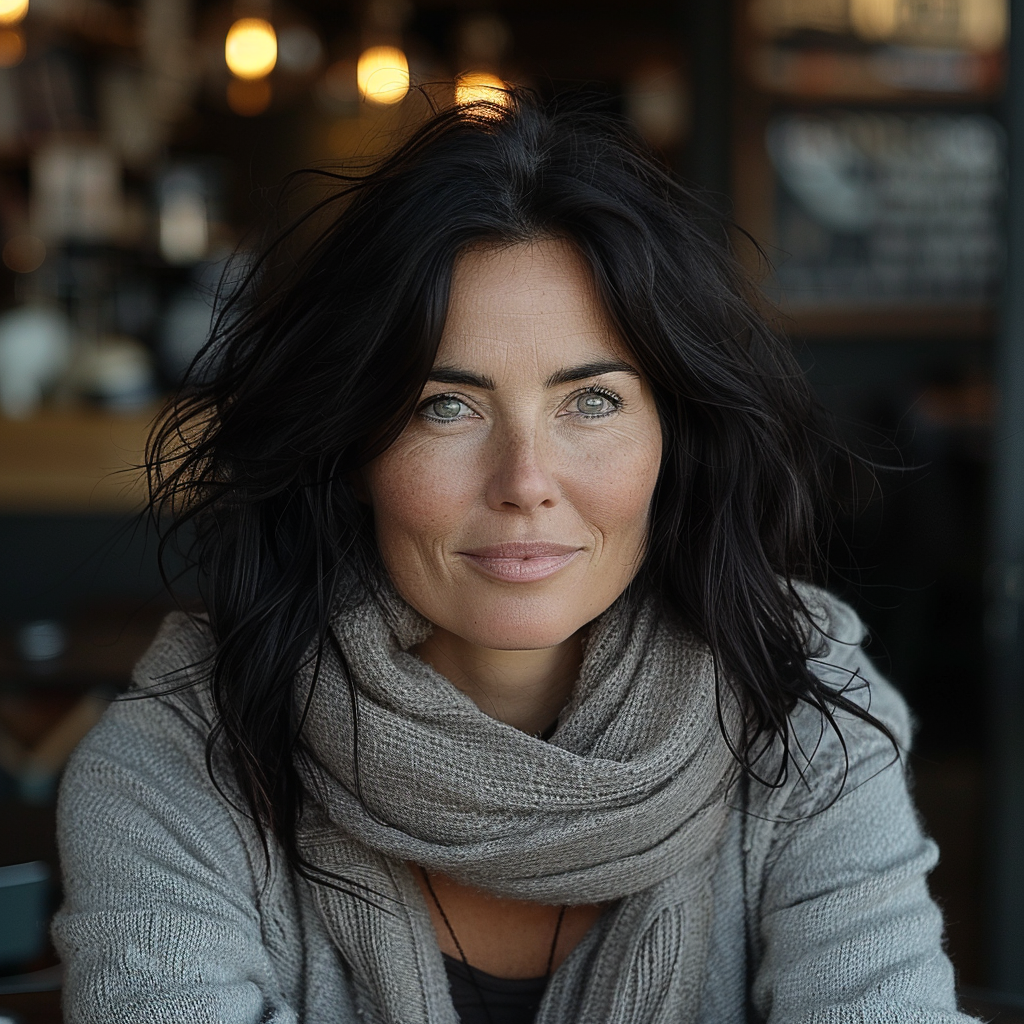
If you compare the two sets of images above, you notice the difference, although both sets have the exact same prompt: a woman sitting in a café, frontal view. The first four use the Standard Mode and the last four Raw. For me, Raw is the equivalent to photo-realistic in other words, if you aim for life-like, photo-realistic images (of people) you most likely succeed when using Raw and not the MJ default aesthetic, Standard. It’s not perfect, mind you, always check for mistakes like excessive fingers, limbs etc.
No
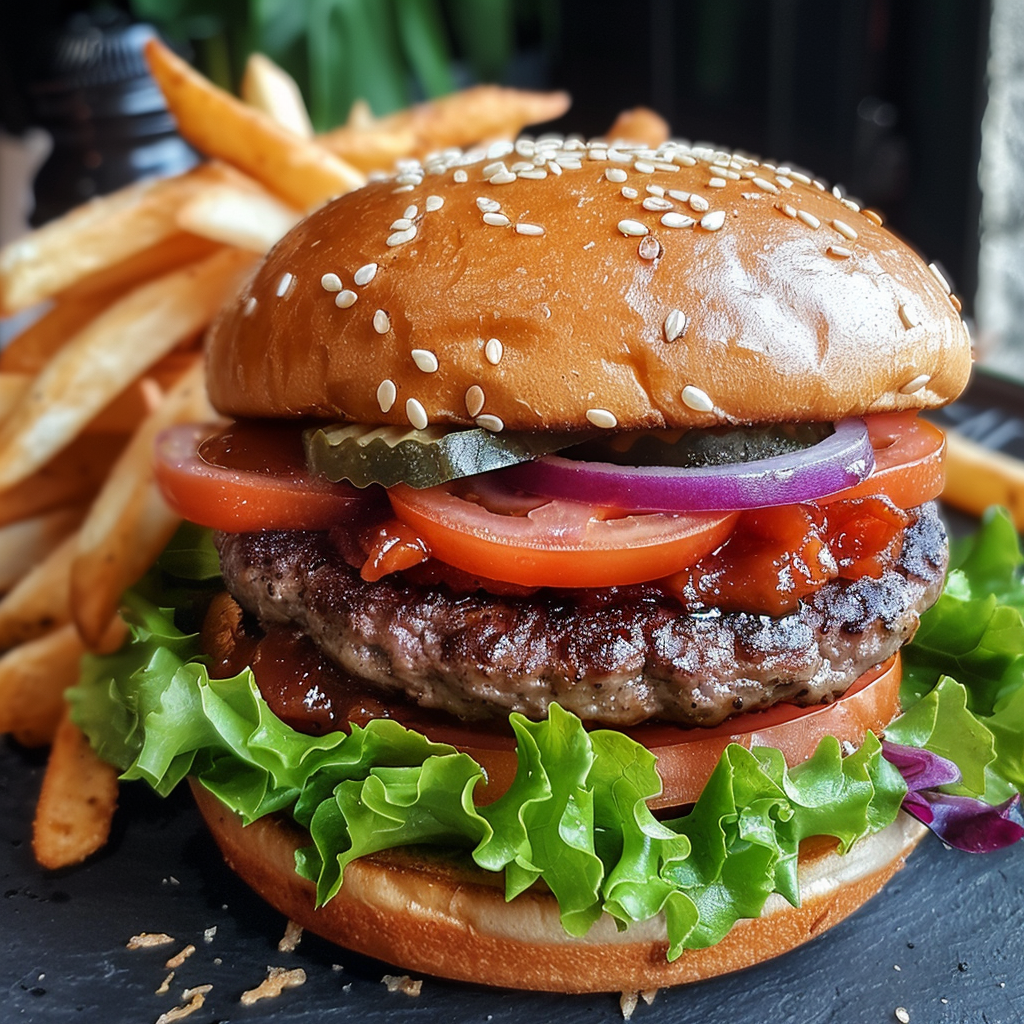
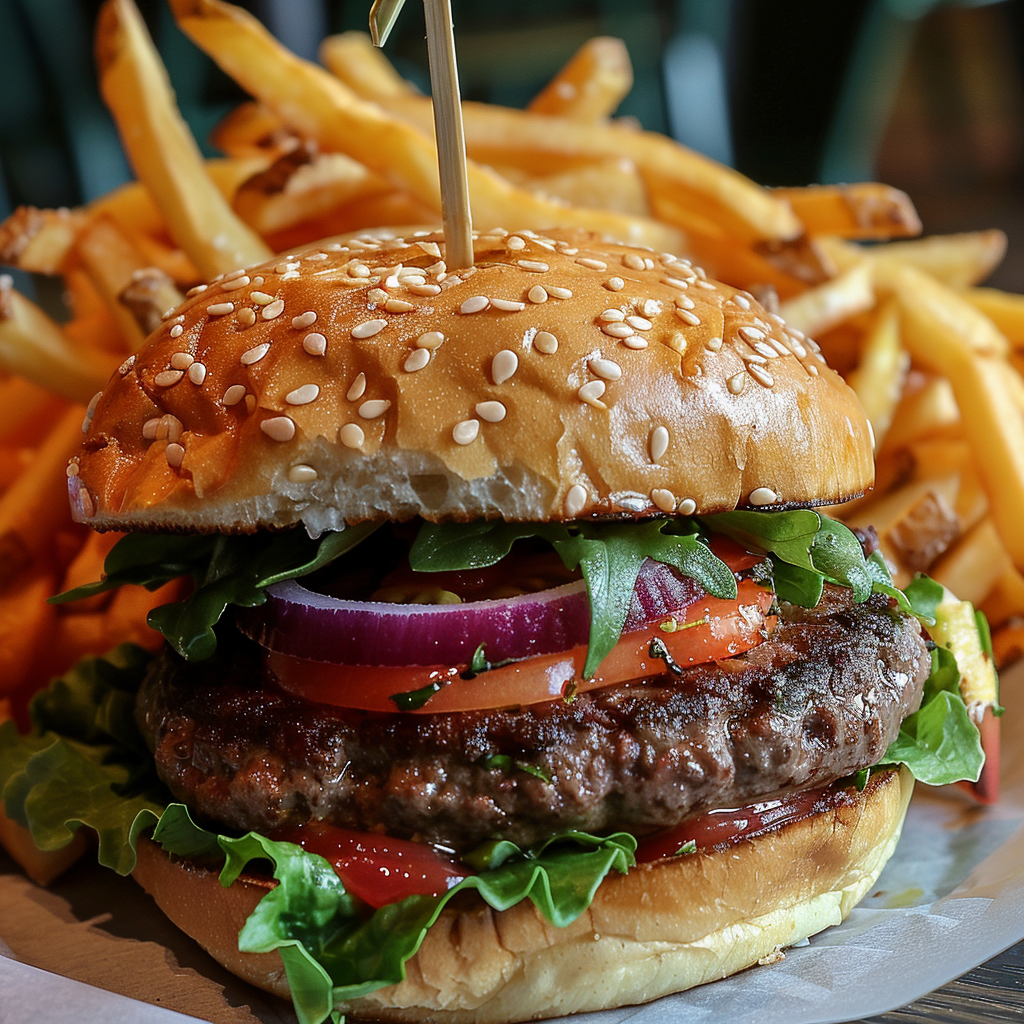
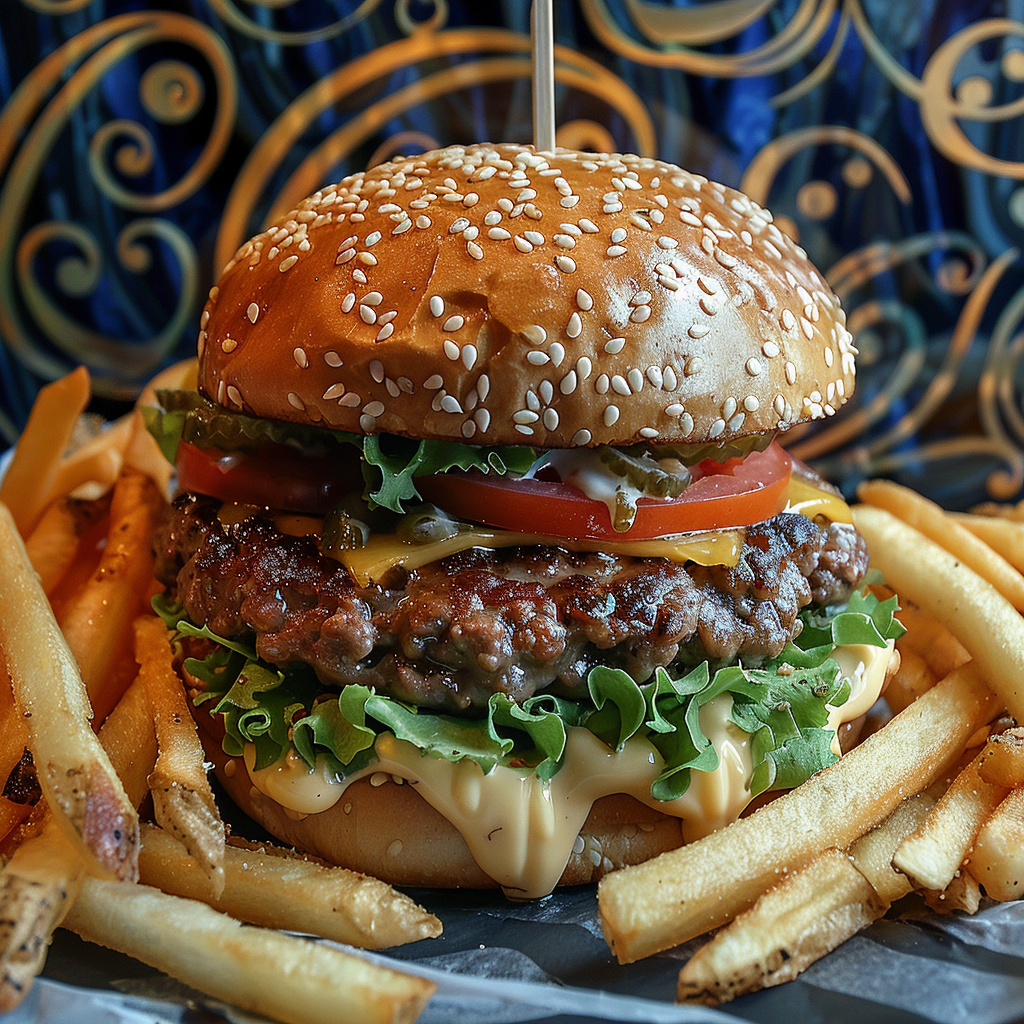
Ever wanted to create an image but you couldn’t get rid of an element? Well, the parameter –no works quite well in certain cases, where you have something specific you want to exclude. Just add the parameter and in this case you need to add it manually even in the browser version, since this one as some others is not available as a button. The prompt for the following images is: a delicious hamburger, lush, vibrant colours, french fries –no cheese –style raw.


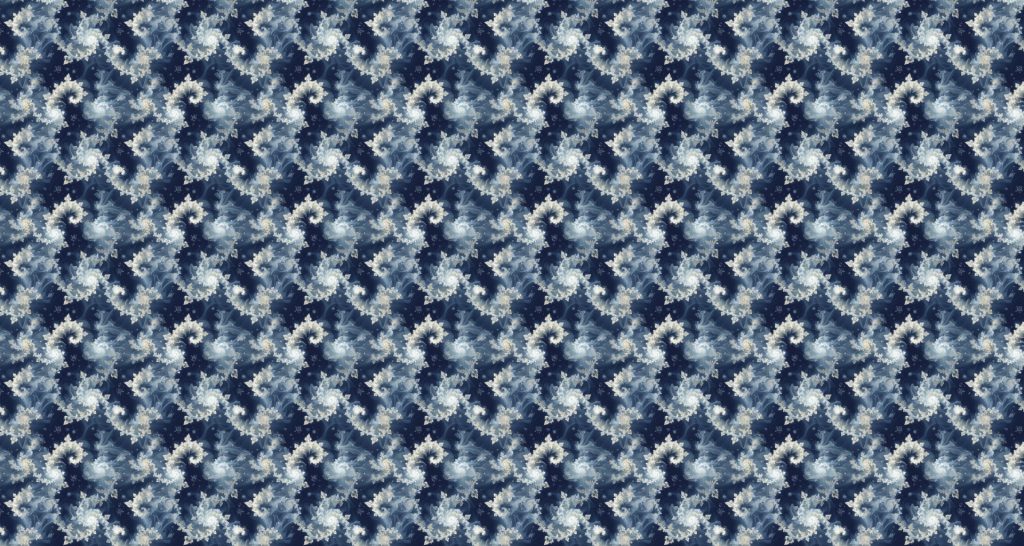
Tile
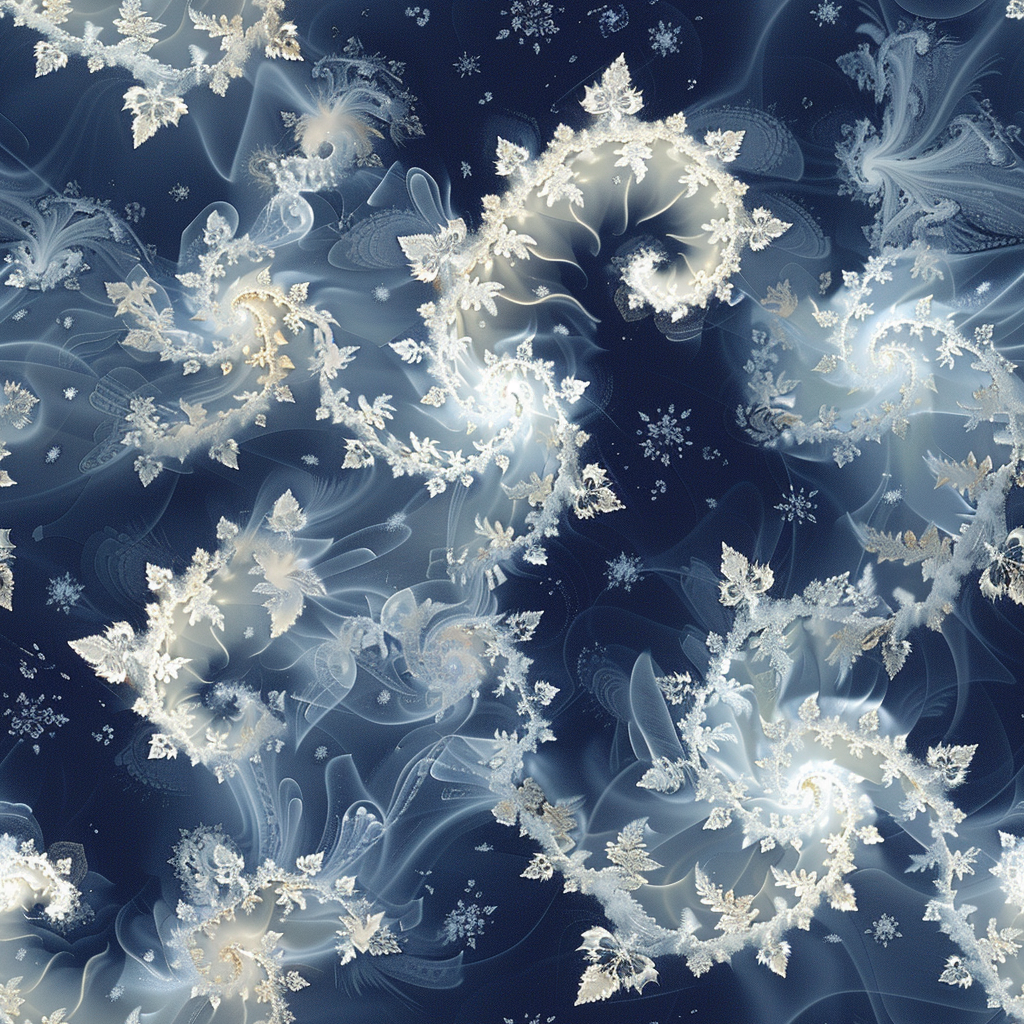
This parameter is more of an artistic one. It helps you to create a never ending pattern.
The image may stand out on its own, yet its full potential unfolds when used repeatedly to craft a larger composition, integrated onto an object’s surface, or utilised as a desktop background. To get a seamless pattern you need to use for instance Photoshop where you can create a pattern from the image and apply it to whatever you want.
Character Reference
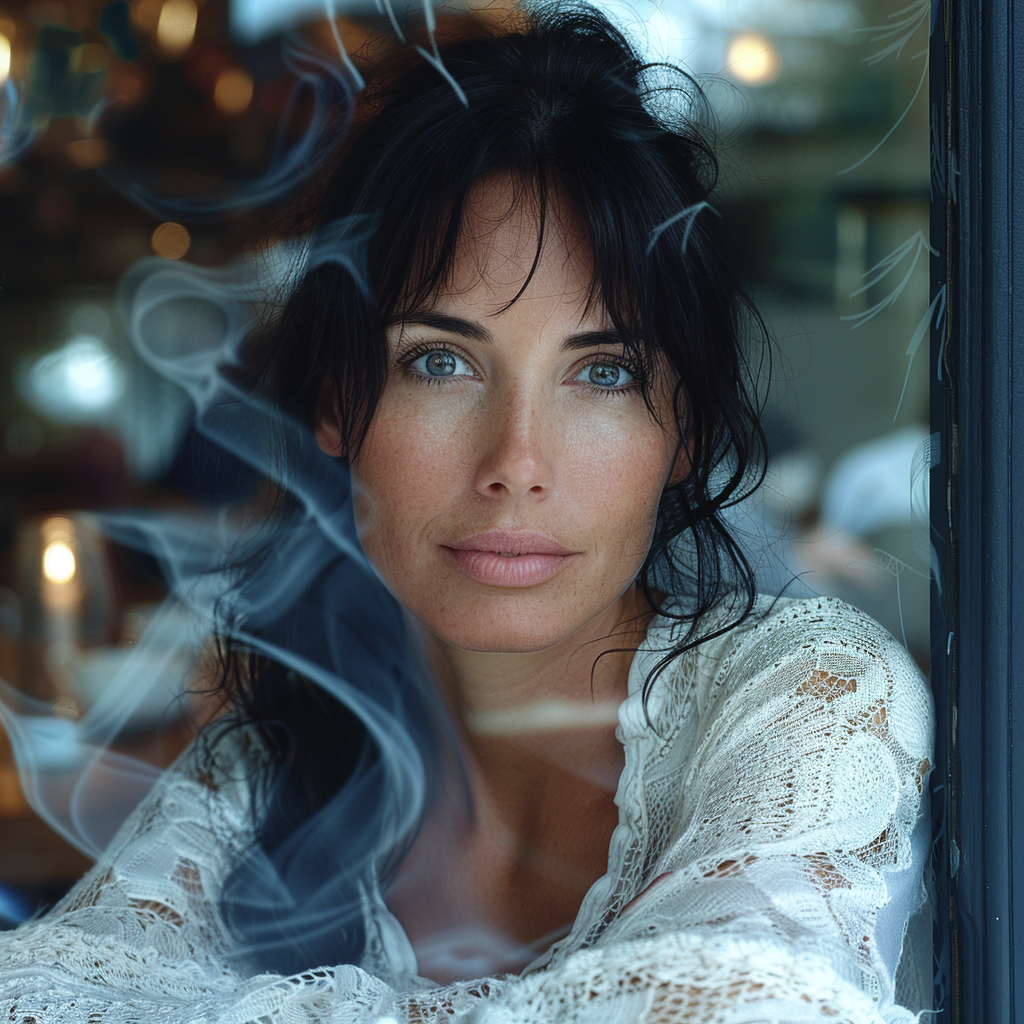
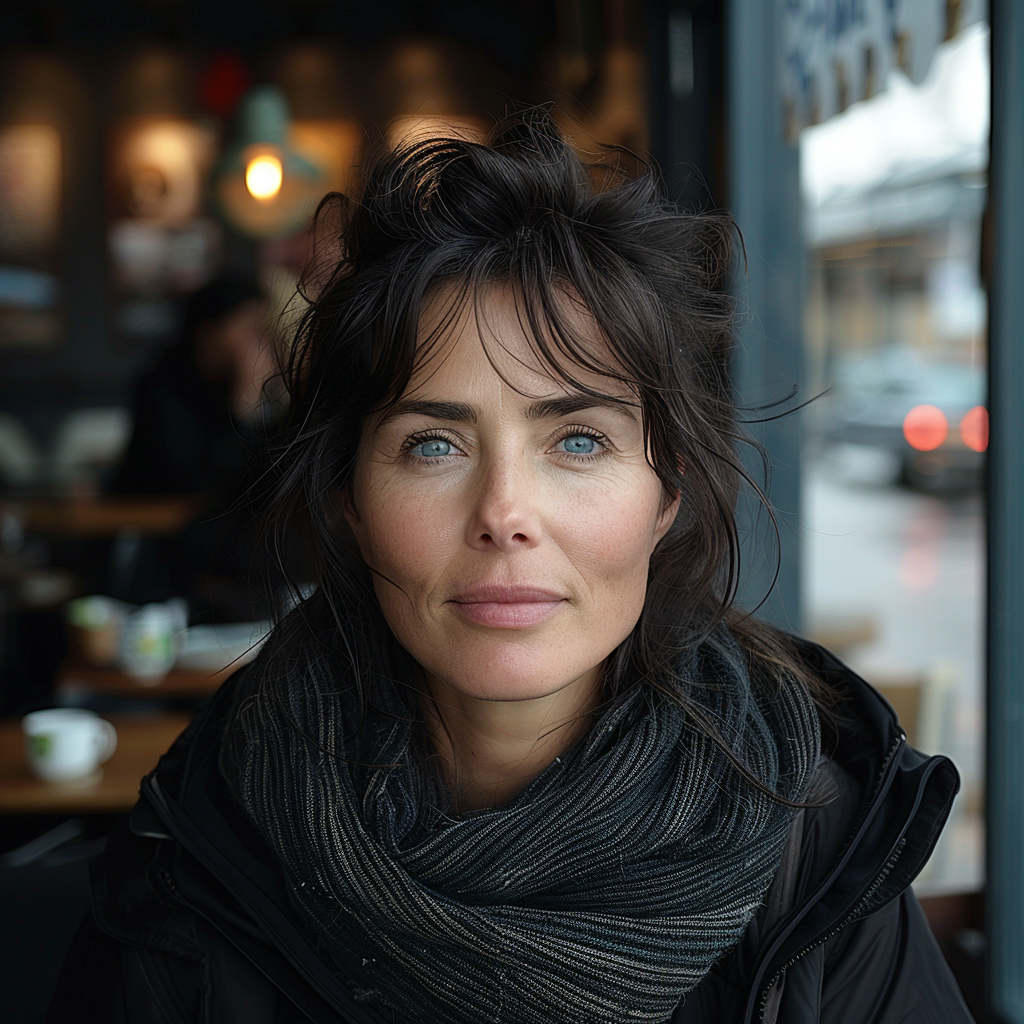
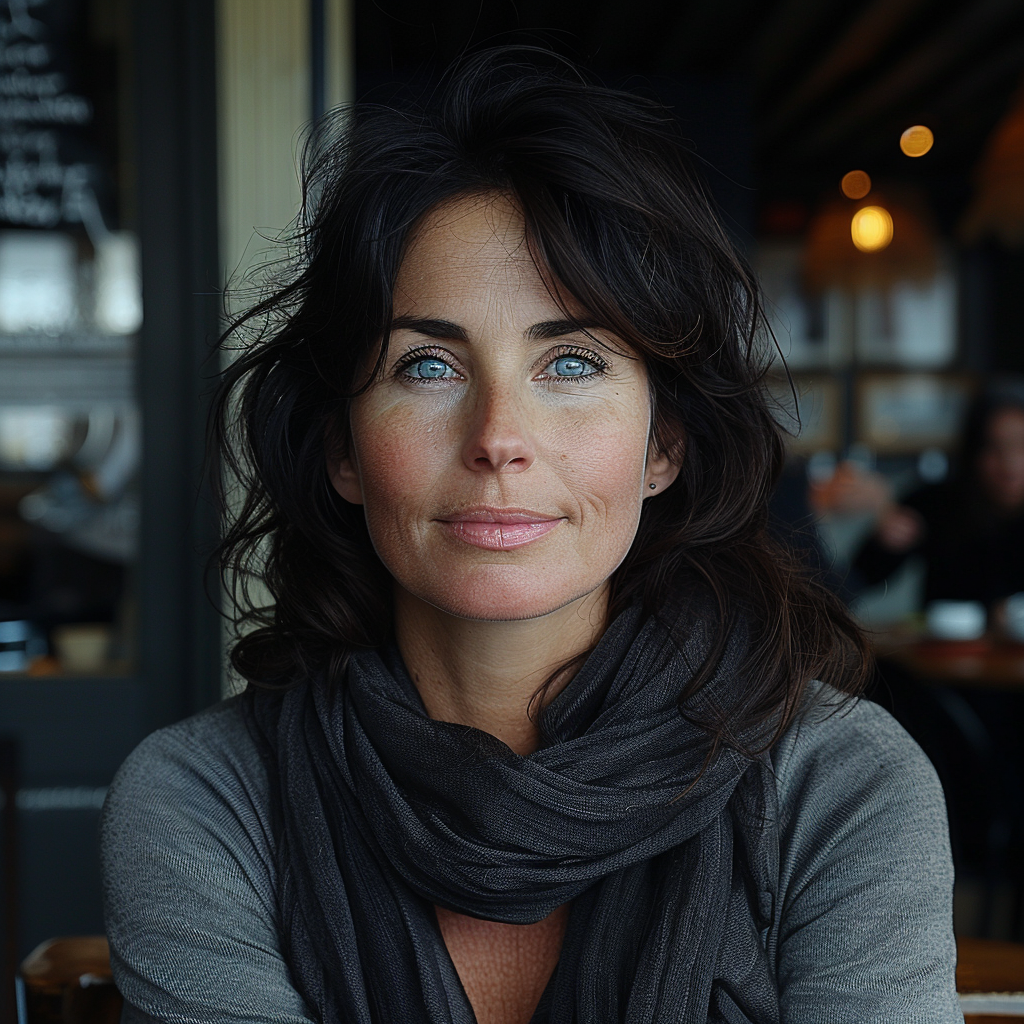
Now we are getting to the newer and interesting stuff. You may or may not have noticed character reference (–cref + image URL) is not on MJ’s list of parameters. In short, –cref allows you to use a reference image and to tell Midjourney you want for instance this same person with say different clothing and maybe in a different environment. To achieve better results it pays off to define the character more thoroughly, a mere a woman sitting in a café, frontal view will not necessarily yield good results. To highlight this I first used as the reference image the same woman from the café series earlier above – it’s the second image from the left side. After this you will see my second test run with a more elaborate prompt.
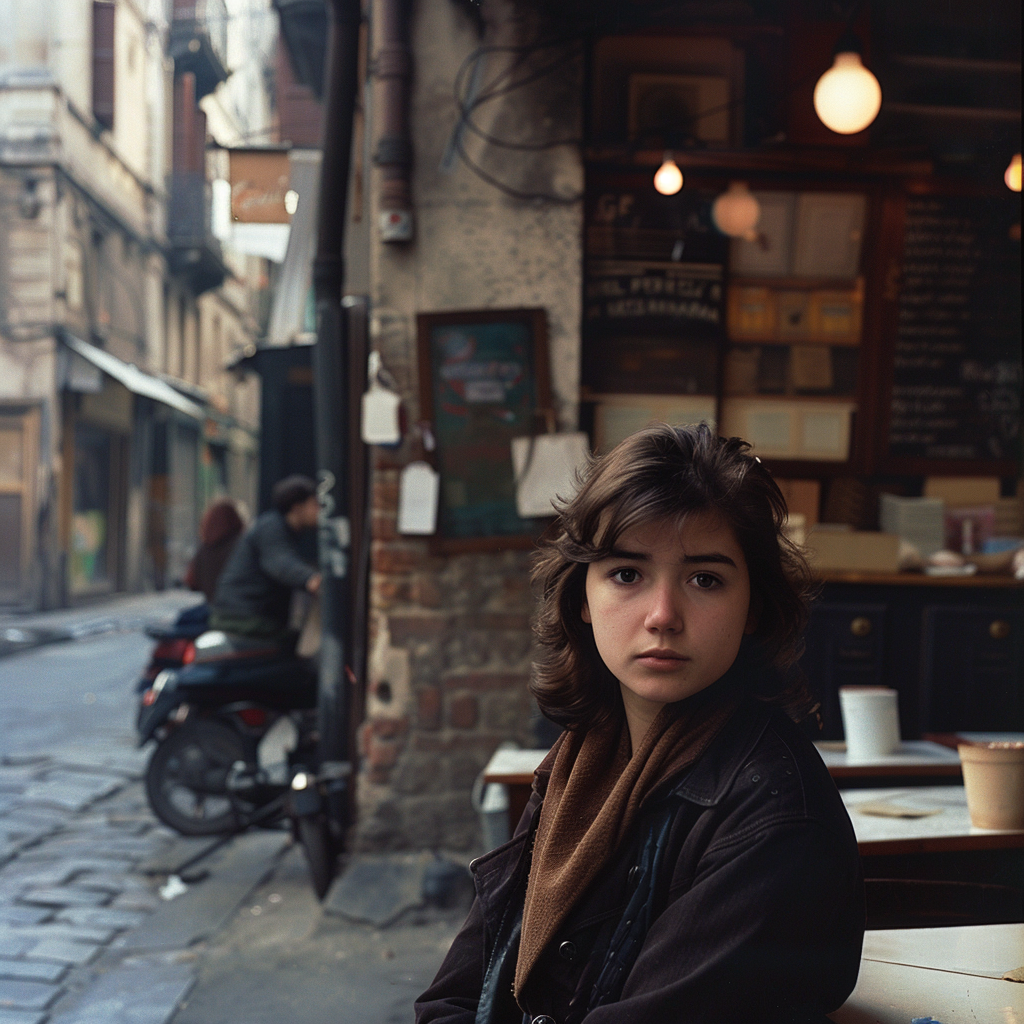
And here is my second –cref run with a more elaborate prompt: a 30 years Caucasian woman with black hair standing in a street corner. The more you define the character the less you give MJ room to come up with variations, for instance having Caucasian in the prompt you eliminate characters from other ethnic backgrounds, the same goes for the hair colour etc. Well, as you can see it’s not nearly perfect, but this is something you can now work with. Try a couple of Reruns and pick the best matching image from the iterations.
Despite a specific prompt, it’s good to understand that prompting and re-prompting, doing variations is essential to achieving good results – especially when you prompt for something particular. Some sort of expectation management is in place here, I believe. It’s illusory to expect that all four images depict the very same character as referenced to and it’s actually impossible, if you think of it, there exists no such person after all!
Style Reference
Similar to character reference, style reference (–sref + image URL) allows you to use a reference image to tell Midjourney you want to transfer the style of the reference image to the new image. Now, style includes stuff like the over all feeling, colour scheme and so on, but not necessarily the style itself and certainly NOT the objects or subjects.
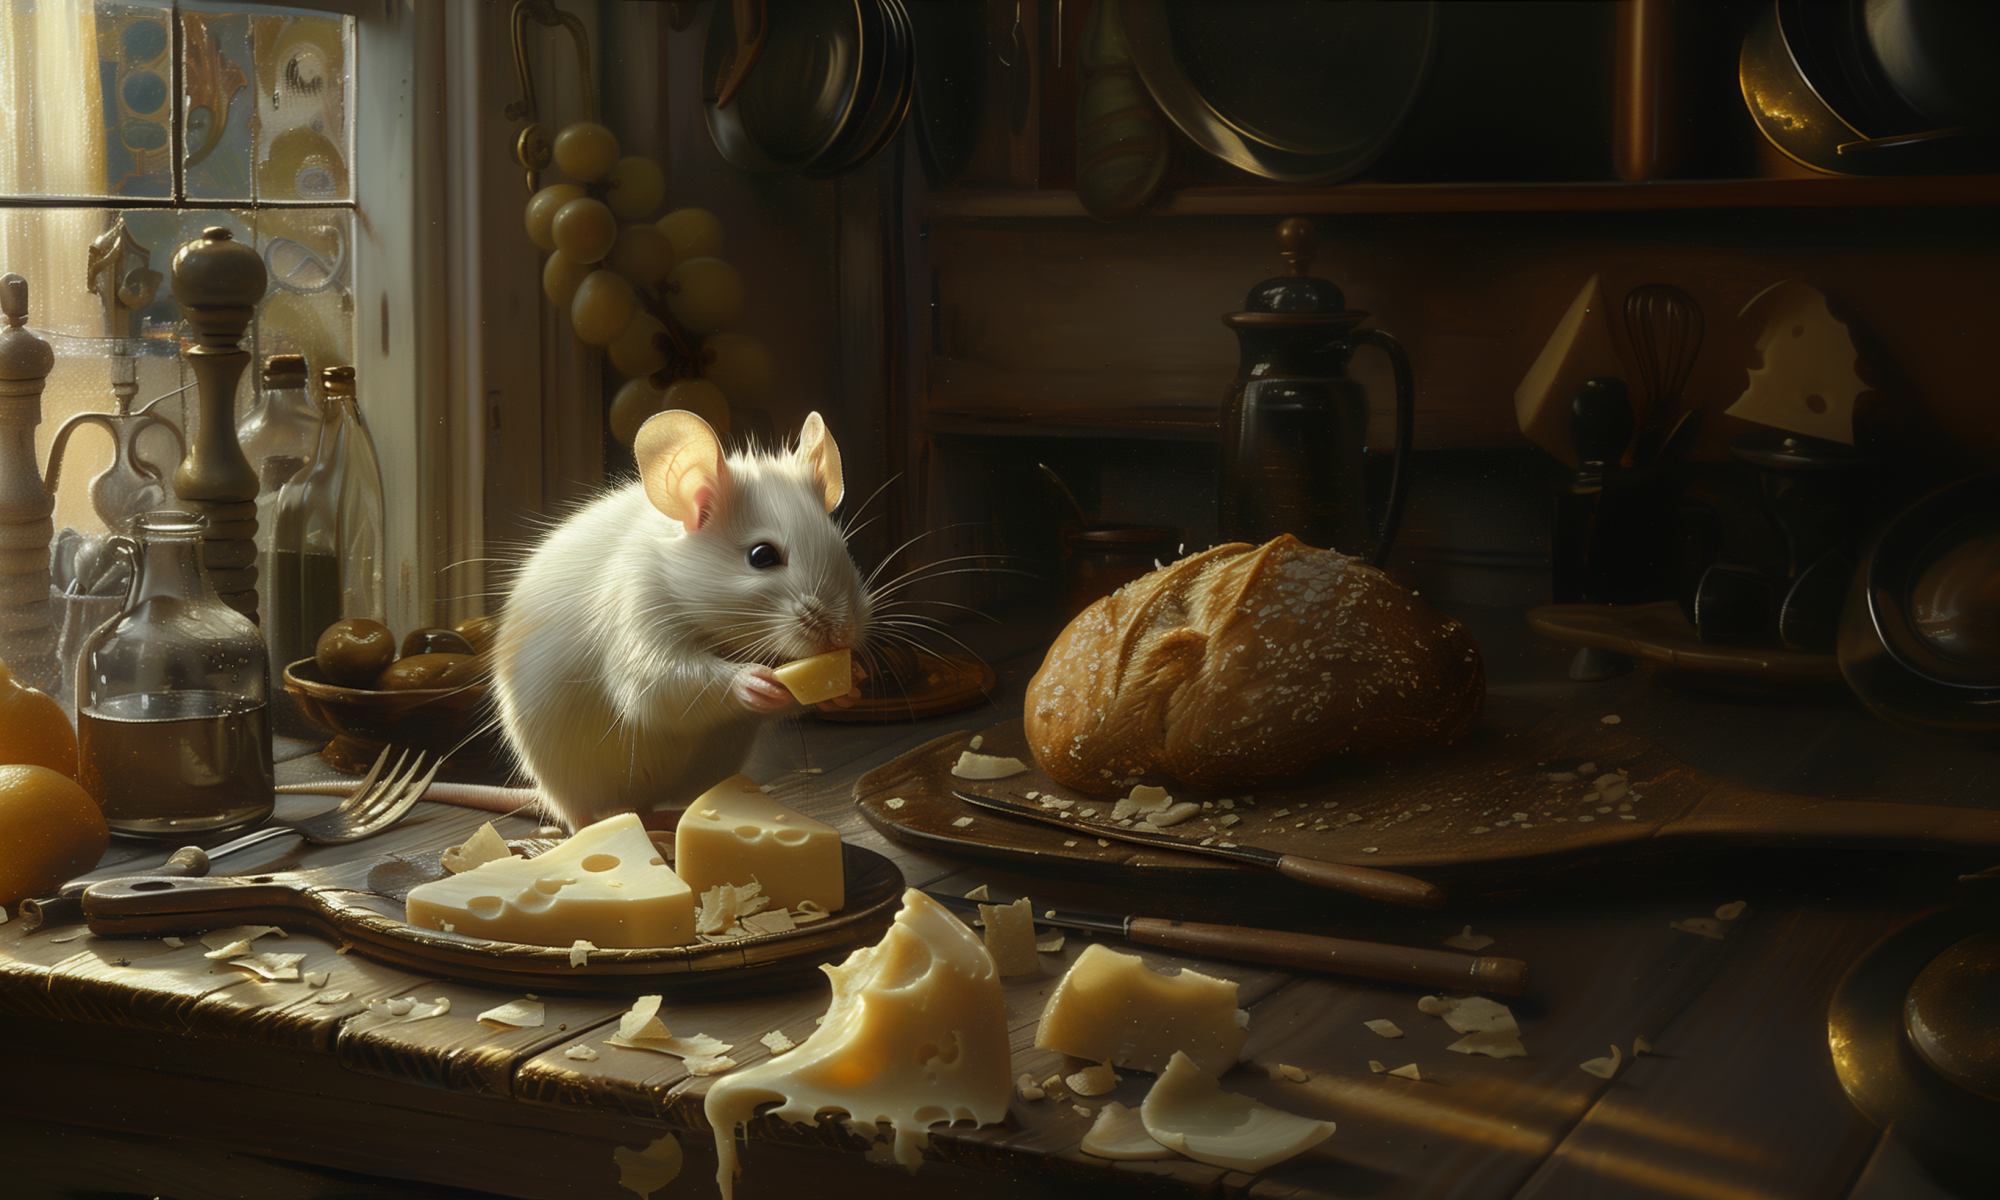
Style as a term in this particular case is problematic as there is the possibility of confusing two different usages of style when working with MJ. When prompting for a specific art style like in the very first image in this blog post: Caravaggio’s painting depicting the cutest white mouse ever, eating cheese on a kitchen table, soft light coming in from a window. You could also prompt: The cutest white mouse ever, eating cheese on a kitchen table, soft light coming in from a window in the style of Caravaggio’s painting. In my (granted, no so extensive) testing I have not been able to transfer Caravaggio’s style as such to new image using –sref. Instead the new image would receive the over all feeling and colours of the reference image. I say this – again – to curb expectations. Furthermore, –sref doesn’t work too convincingly when referencing from Standard mode to Raw mode or vice versa.
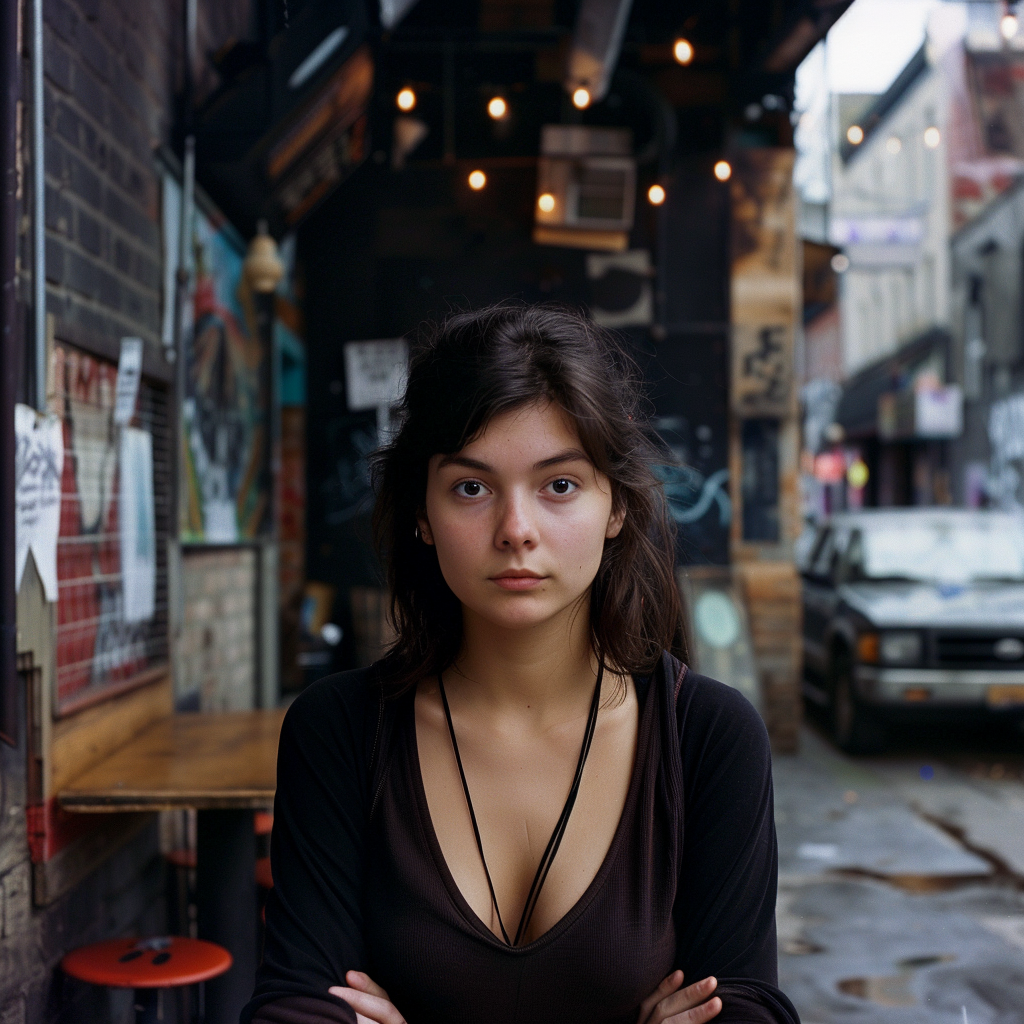
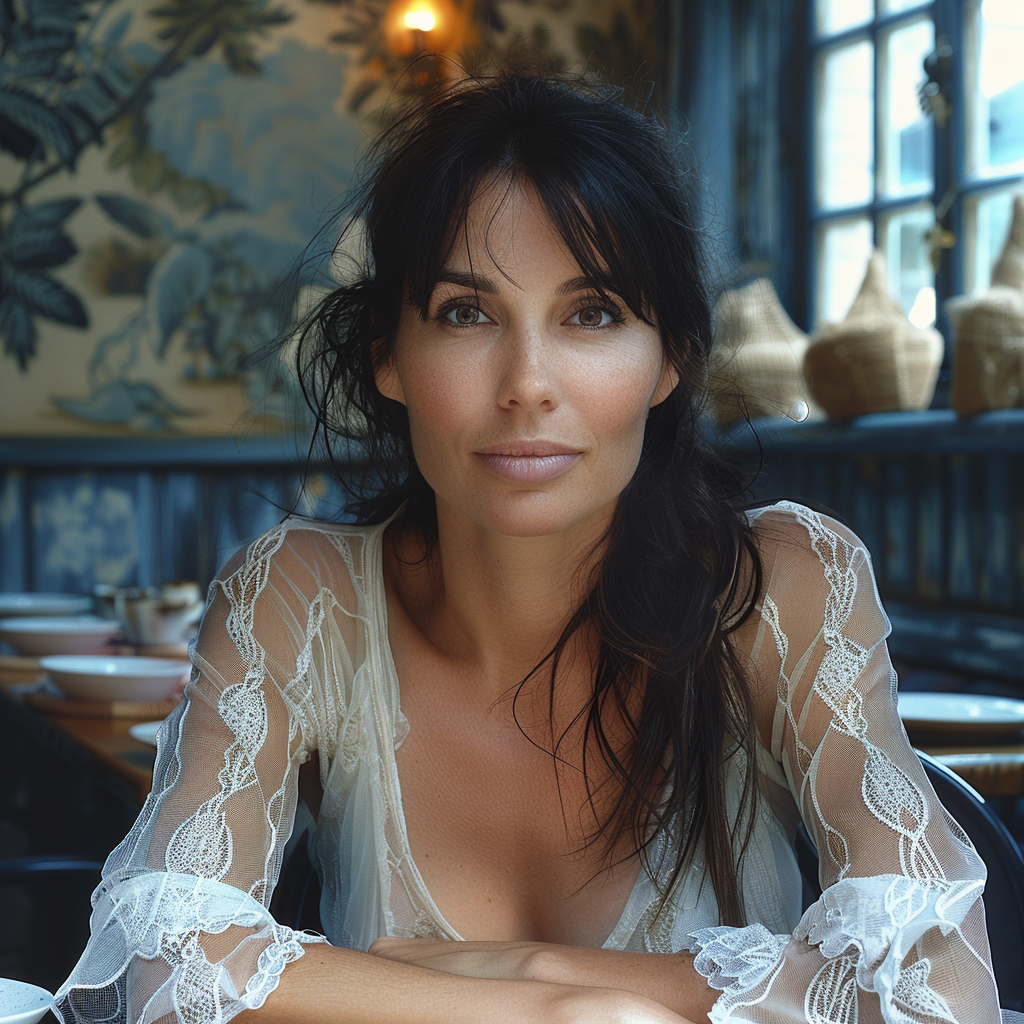
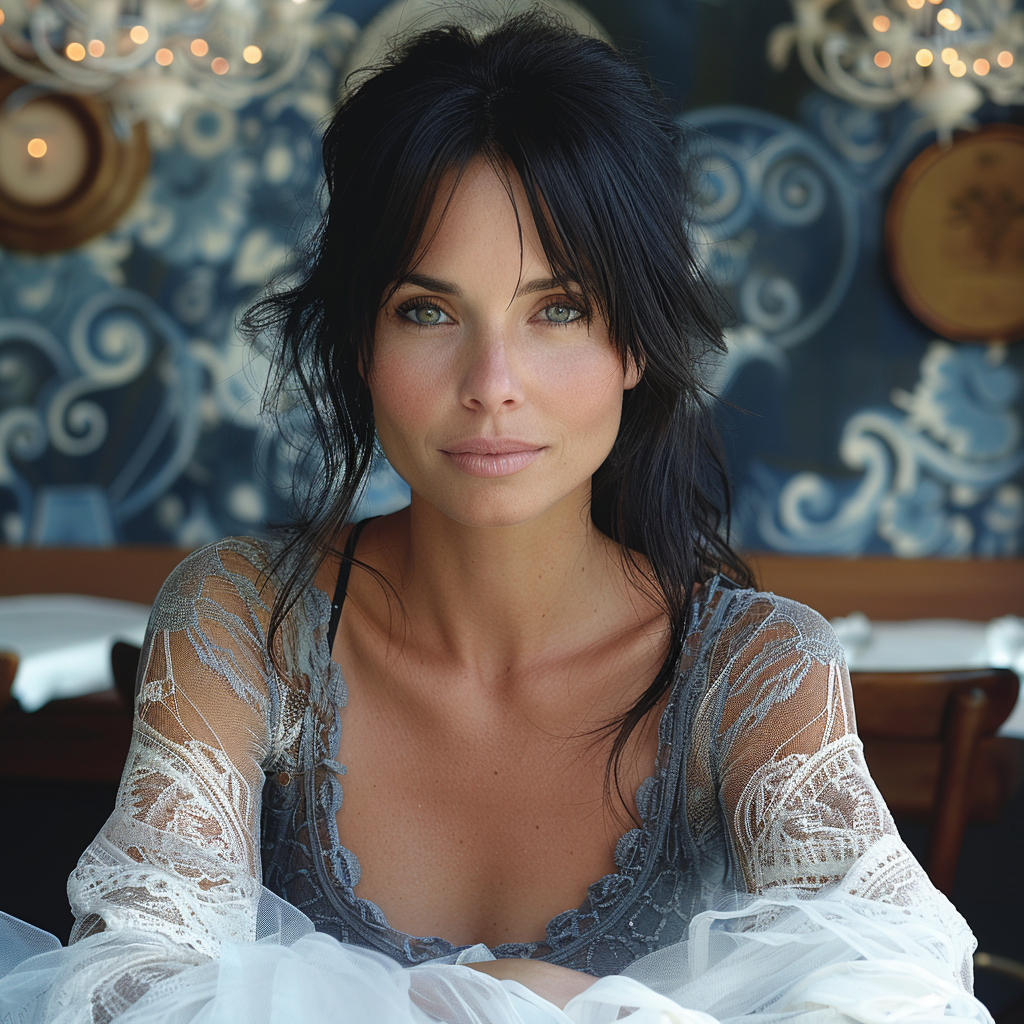
My reference image is the snow flake from the Tile section above and I applied it to the second case (woman in her thirties) in the character reference section. As you can see some of the colours and ornamental elements are clearly depicted in the new image.
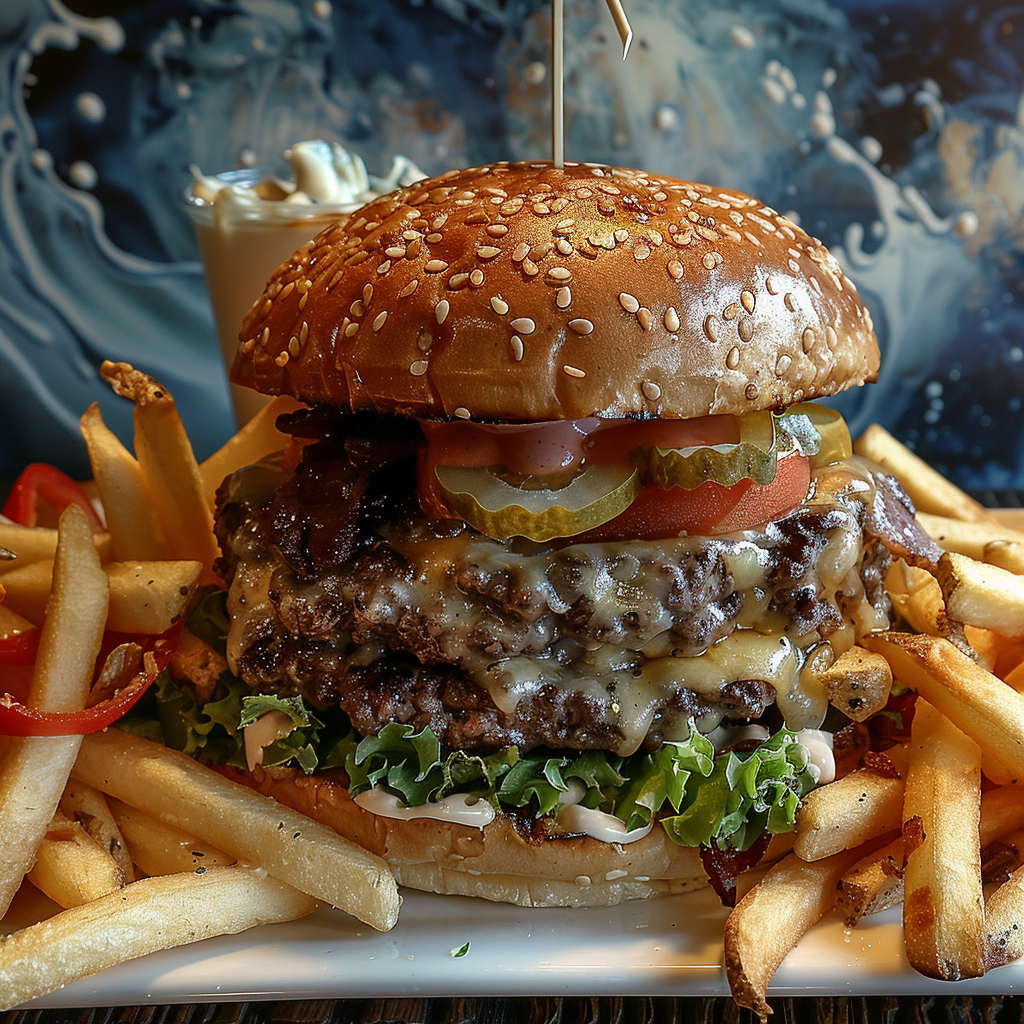
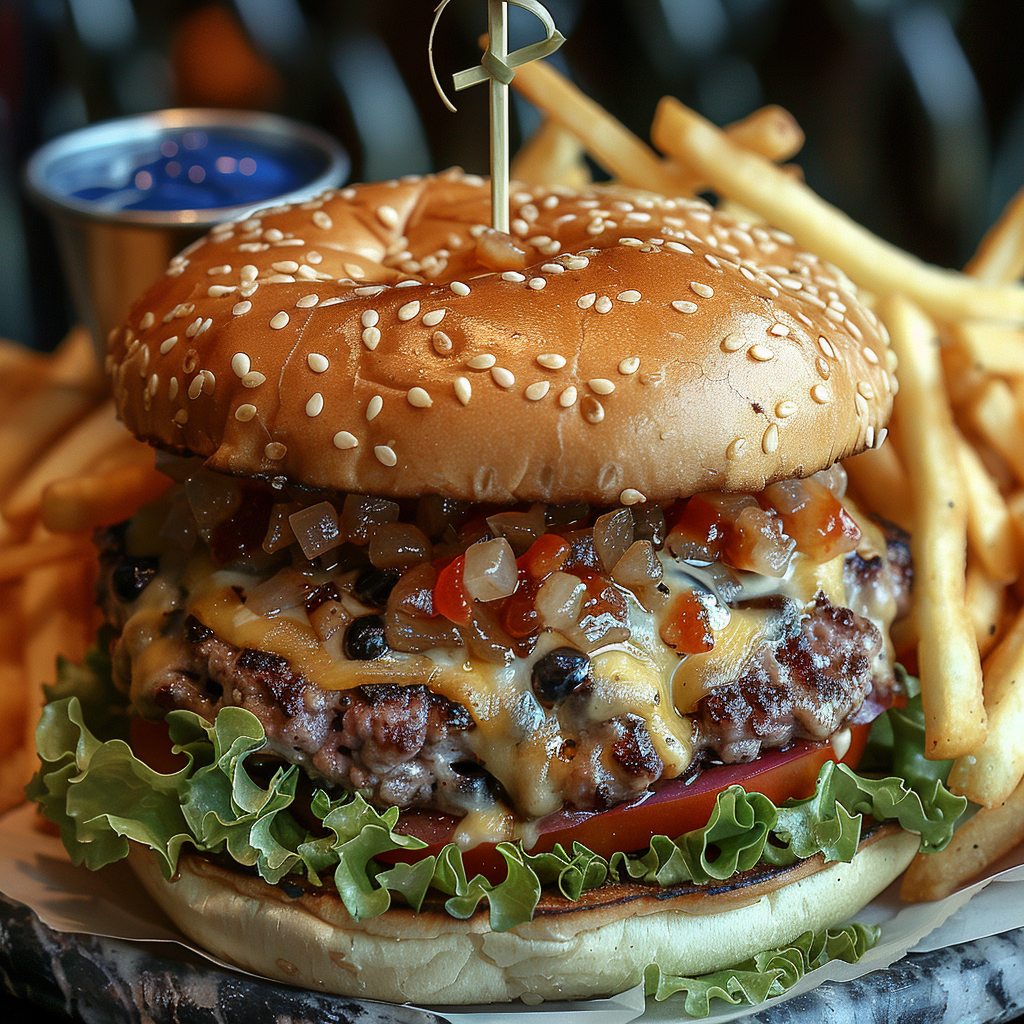
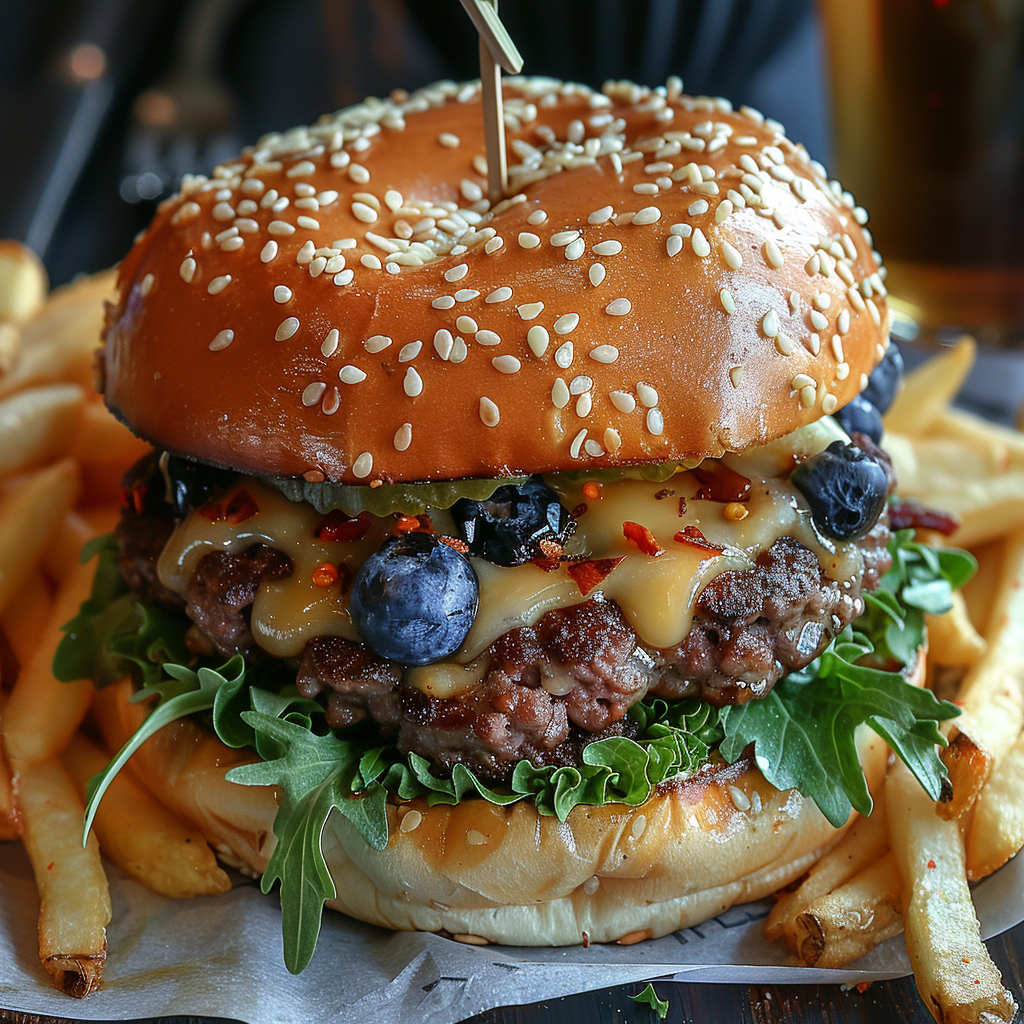
The second image I applied the reference to is the burger. Here too you can see the influence of the reference image, be it in a creative way, for instance in the last one 🫐.
Stylize
And finally, we come to Stylize (–stylize or just –s). In the browser version you have it as a slider called Stylization under Aesthetics. According to MJ Low stylization values produce images that closely match the prompt but are less artistic (https://docs.midjourney.com/docs/en/stylize-1). My interpretation of this is that the lower the value the “more raw” the image becomes and the higher the value the more freedom MJ is given to apply an artistic touch to the image. Compare the following two series.

How do you interpret the clear difference between these two series? I think it is a significant one. The ones with low stylize values look more ordinary, like you and me as opposed to the ones with a high stylize value that could easily be models, used in commercials, tv ads or on a runway. Now, it seems that our society’s current beauty standards would consider the stylised ones to be more beautiful.
Before I let you go I want to make the following point. It’s crucial to reflect on an important issue within GenAI: bias. Although Midjourney has made notable progress in recognising and addressing diversity, including but not limited to gender, ethnicity, and age. However, true inclusivity extends far beyond these categories. It encompasses understanding and actively working against biases related to generational differences, sexual orientations, religious and spiritual beliefs, disabilities, and socioeconomic backgrounds. When utilising any image creation tool, it’s important to apply the same level of critical scrutiny and questioning that we use with text-to-text GenAI systems (ChatGPT, Claude etc.) to the images and texts we get.
Thank you for reading, happy prompting!