
I frequently record and edit videos for my online teaching. Even if I do not particularly like seeing my own face on video (!), it is probably much nicer for the students to watch a video lecture that also displays the teacher every now and then, so that it feels more like listening to a real person.
However, as a teacher, you might not want the students to see the actual environment where you are speaking. In addition, you may wish to display particular content simultaneously with your own image, such as lecture slides, the screen of your computer, or another video clip – a beautiful landscape perhaps. The trick is to use a green (or blue) screen as a sort of temporary background.
What is a “green screen”?
First, in order to make the background disappear, the video needs to be recorded with a uniformly green (or blue) background and in good and even lighting. Afterwards, it is possible to filter out the colour of the background from the video, given that the speaker (or any other objects that are to remain visible) are not wearing anything green (or blue, if a blue background was used).
The background can be made “transparent”, so you can show other things instead, or you may want to make it plain black, if you want the audience to focus on the speaker.
How to obtain a green screen?
I went through some trouble in order to find an affordable piece of either fabric or paper that would have clearly uniform green colour. For the time being, I only managed to find a cheap green screen (around 10 €) that was marketed particularly for this purpose by a web shop that was located somewhere very, very far away.
The green screen had a slight odour when it arrived, so I decided to wash it first. It is made of some sort of plastic fibre, so it cannot be ironed. Fortunately, since the only function of the cloth is to provide a temporary background, it does not matter if it is “slightly” wrinkled!
I will probably replace this green screen later by a green cotton sheet that will look nicer and smell less unhealthy.
The setup
This is how I set up the screen in the luxury of my tiny little office:
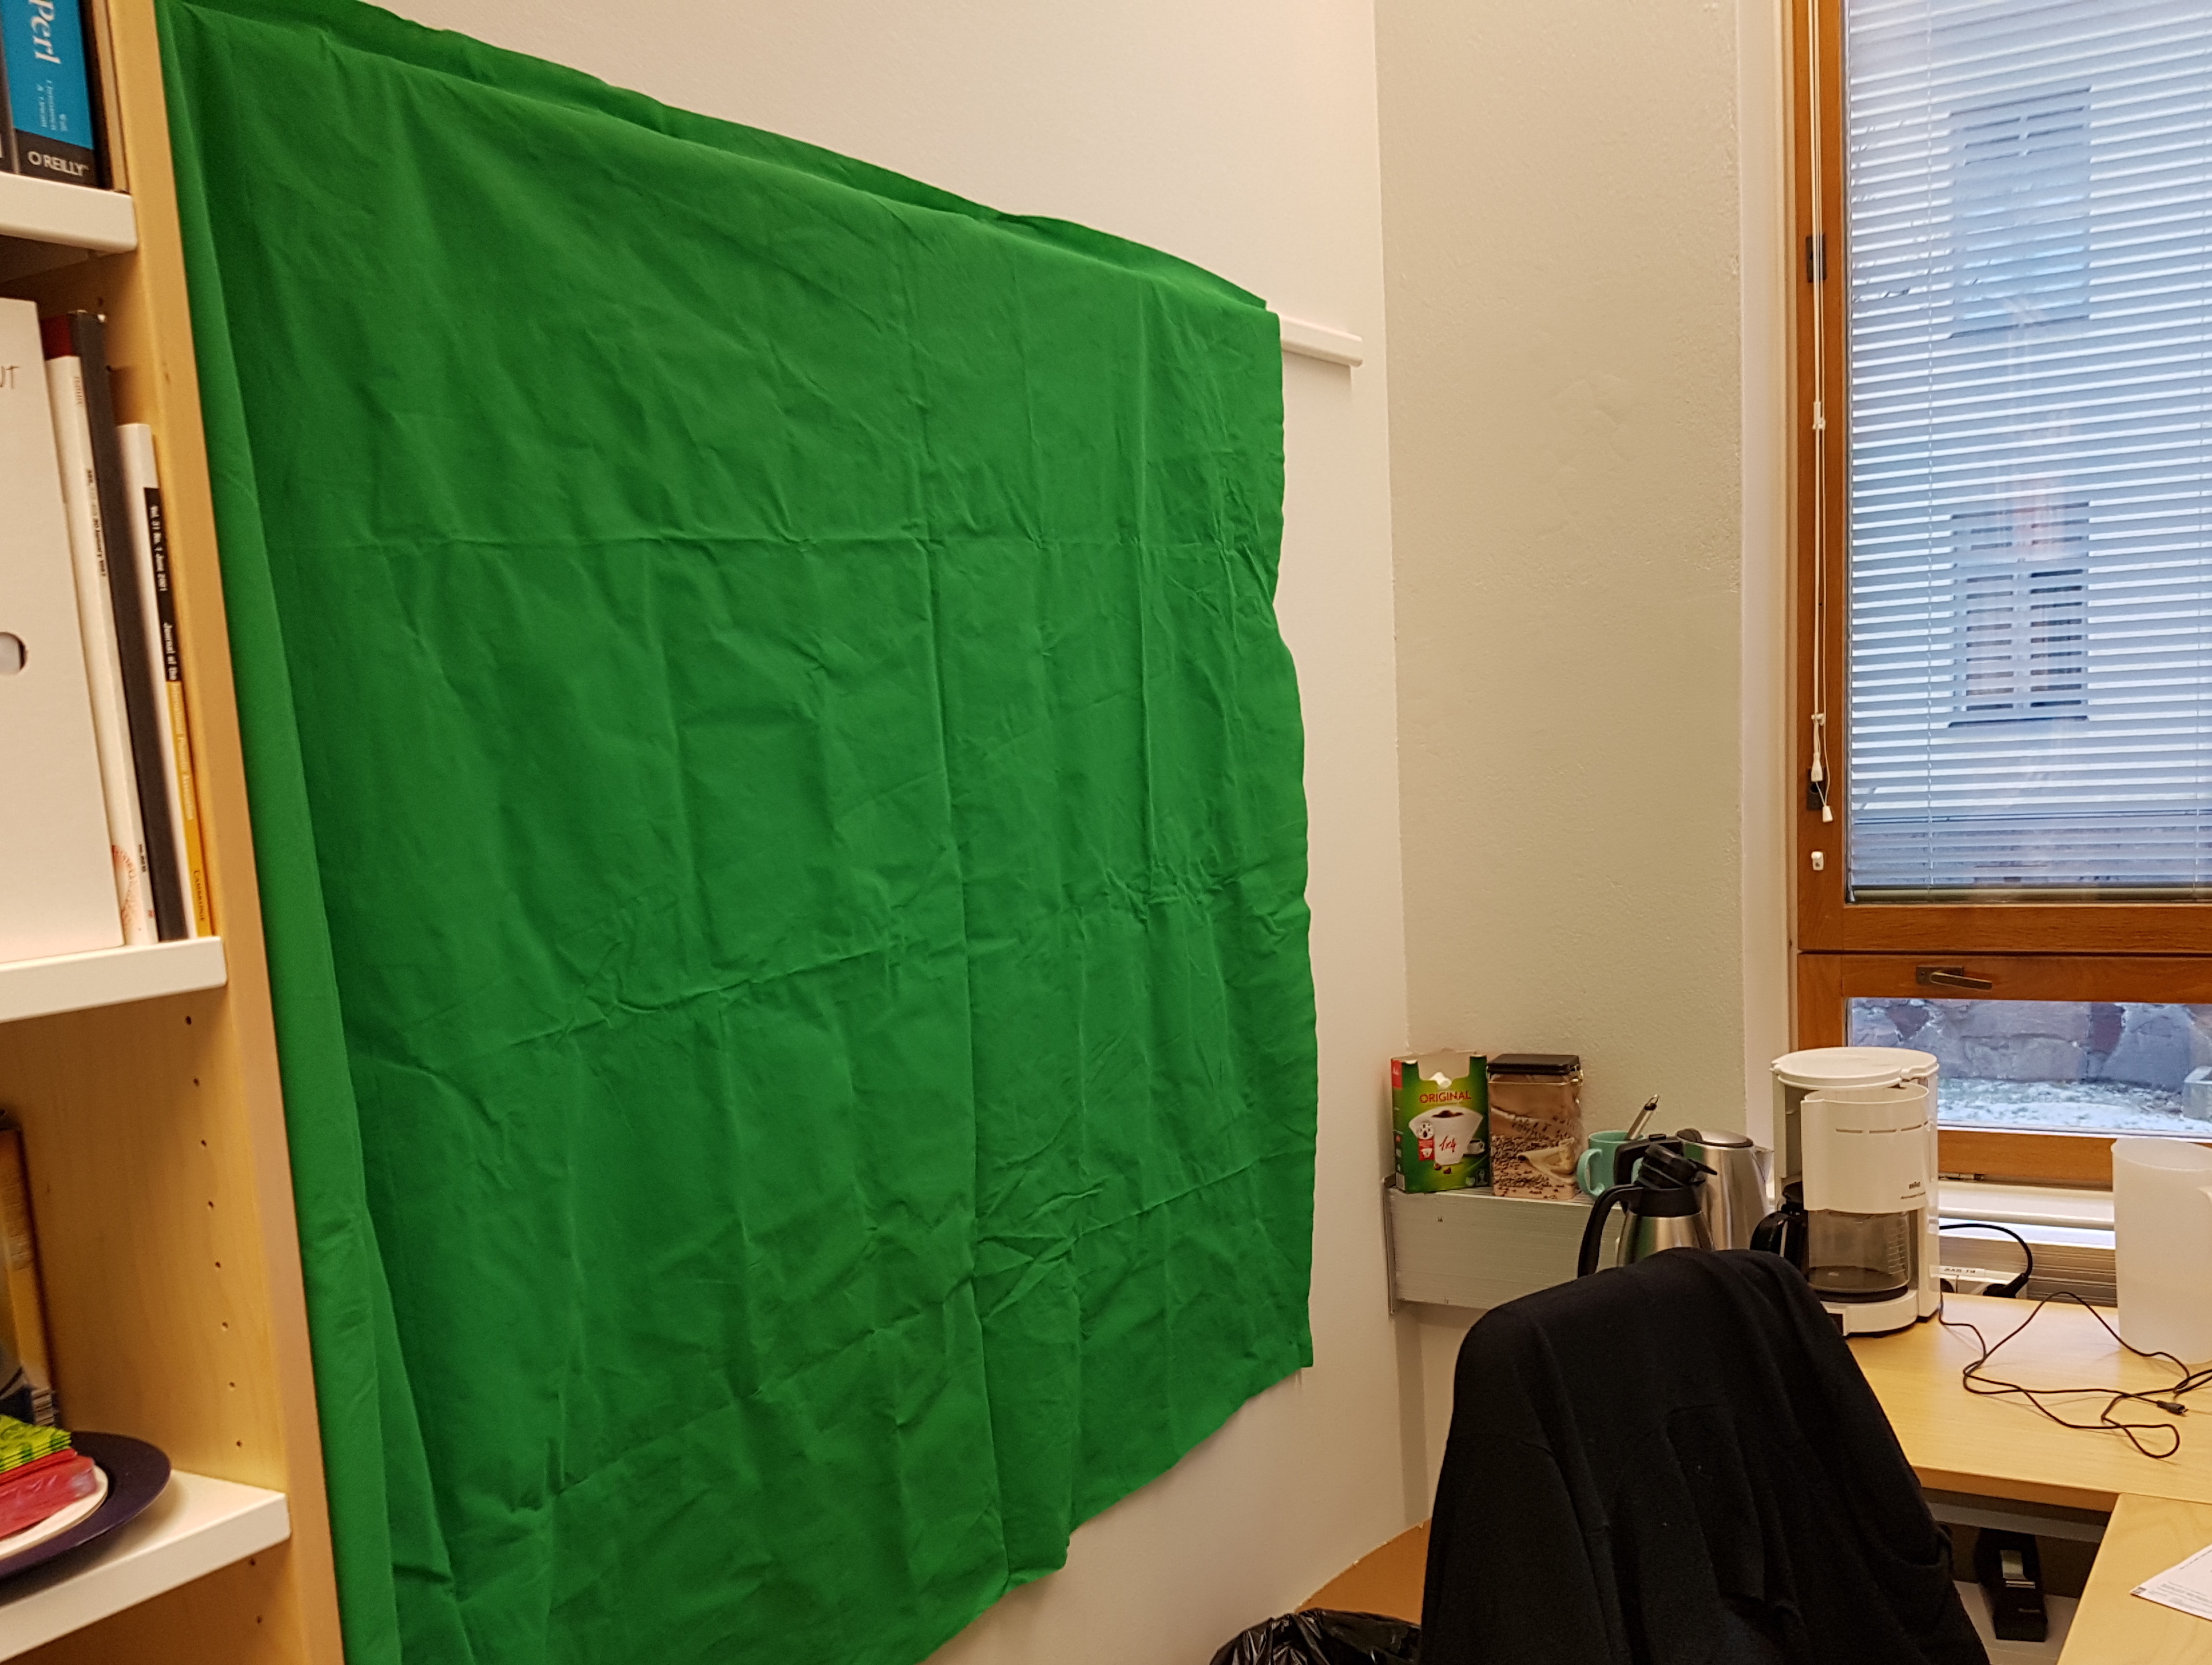
I managed to attach the screen temporarily to the wall with some good old-fashioned blue adhesive!

For making some recordings, I installed my mobile phone on a small selfie-stick-tripod combo (BENRO BK-10) and placed it on my desk in front of the green screen. After a few tests, I managed to record a clip displaying me talking. I wanted to make sure that the background in the video was completely covered by the green screen.
Post-editing with Camtasia
After making the test recordings, I transferred a video clip via Google Photos to my MacBook Pro laptop and imported the MP4 file to an empty project in Camtasia, the tool I like to use for video editing.
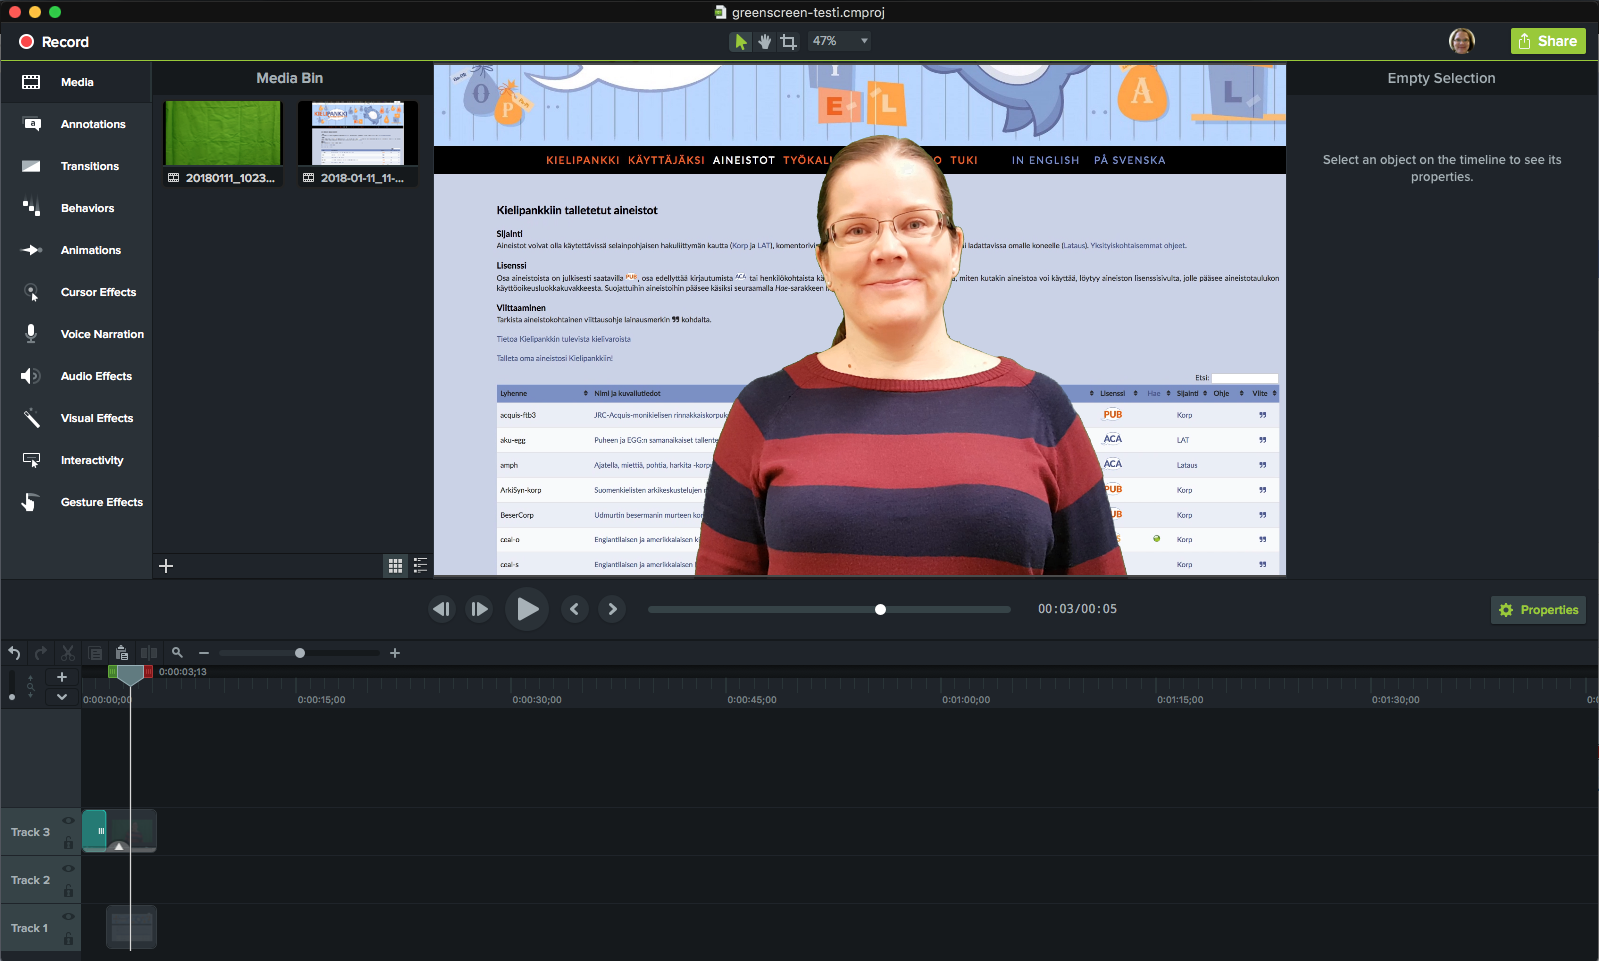
This is how it looked after dragging and dropping the video from the media bin to the project timeline:

Next, you need to right-click on the video and select the visual effect called “Remove colour”:
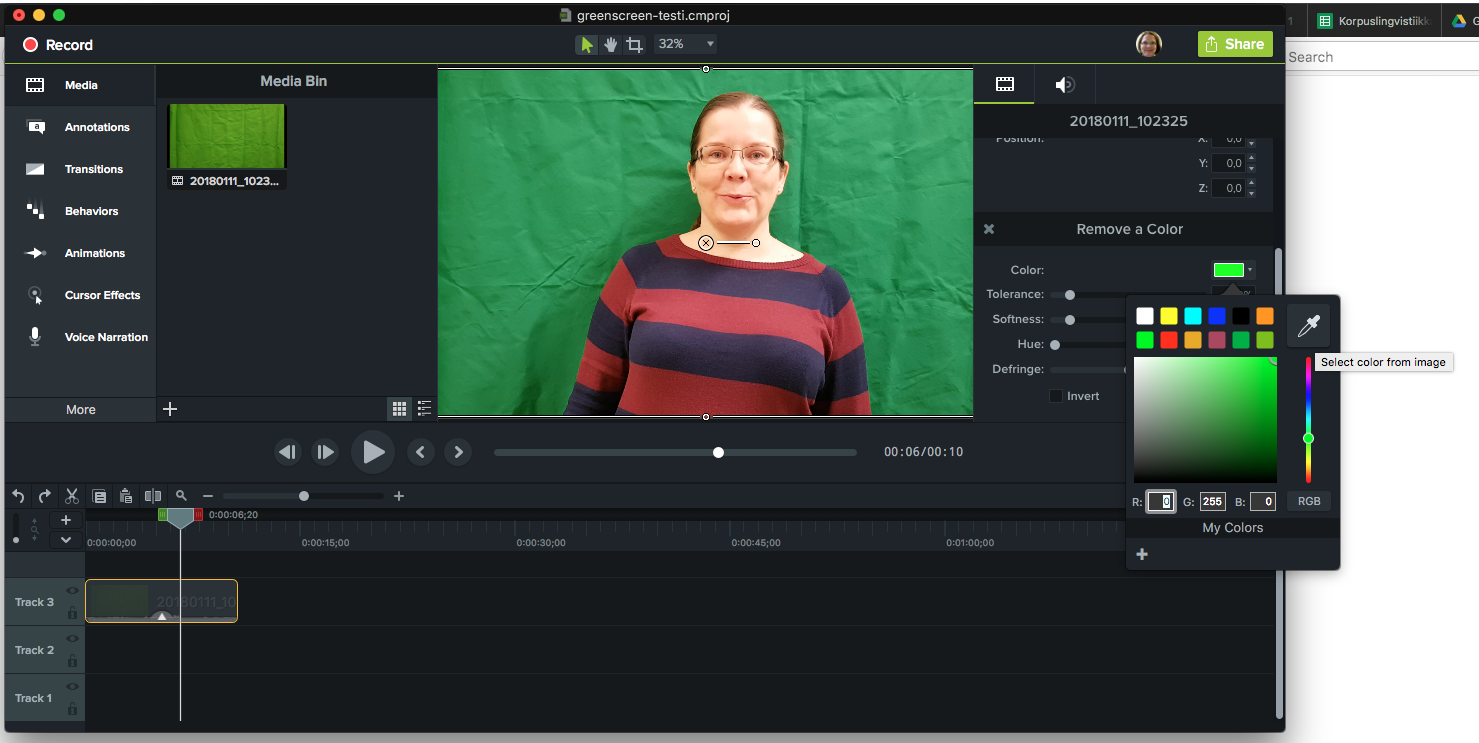
With the eyedropper tool shown above, it is easy to pick the colour to be removed from the original image, and – shazam!
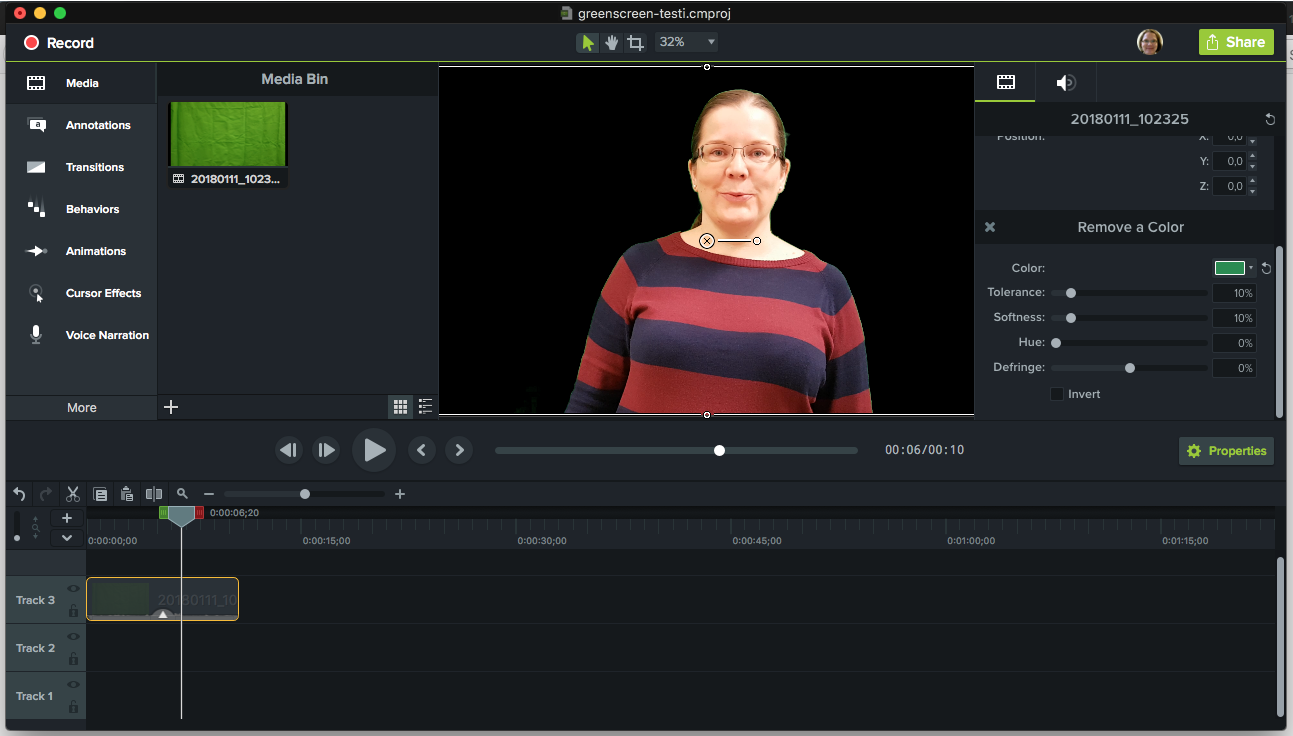
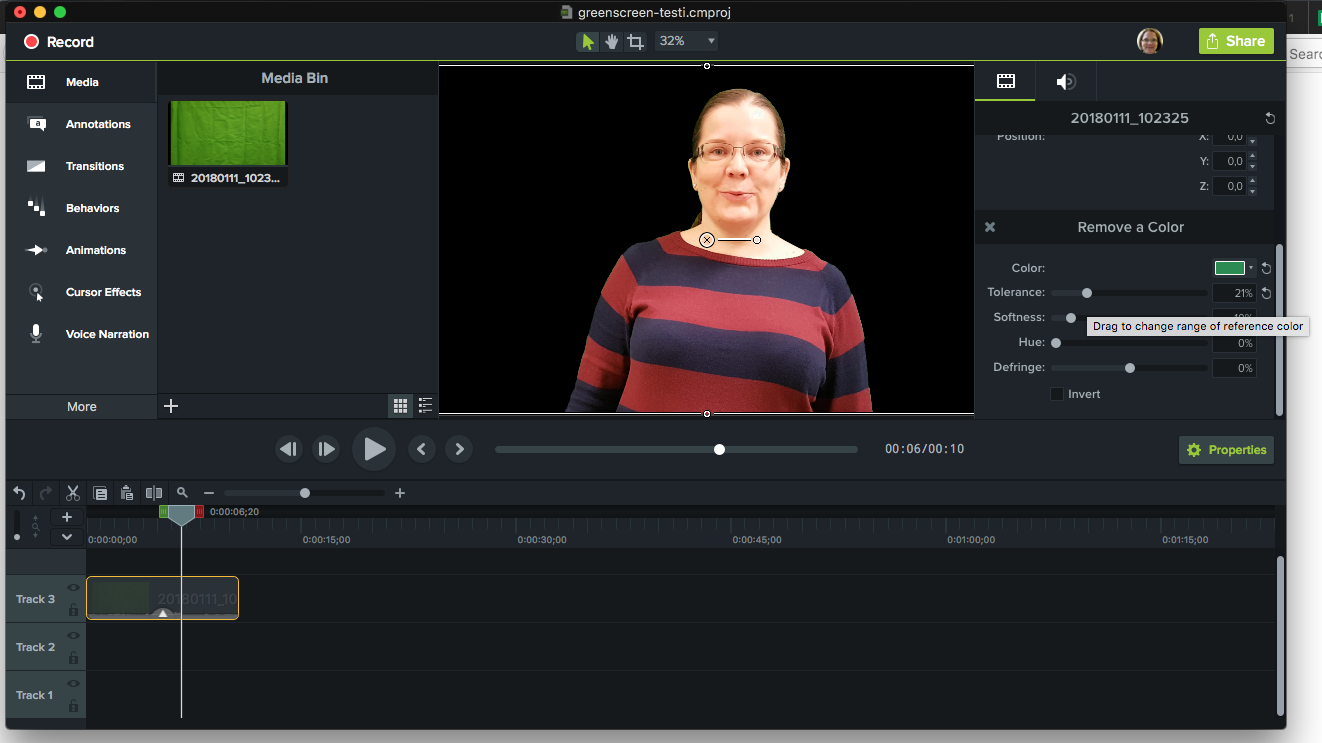
Since too much of a green outline was still visible, I adjusted the tolerance of the colour removal functionality:
Finally, I added another video to the timeline and made the two clips overlap in time:
I was impressed how easy this was! I will probably use a green screen in some of my lecture videos in the near future 🙂
Other options for teachers
The University of Helsinki maintains UniTube studios that can be used by staff members for making video recordings. At least the UniTube studio in the Aleksandria building has been decorated with blue curtains behind the speaker’s booth, i.e., a blue screen is already available! Just remember not to wear anything blue on the day of the recording…
In order to filter out the background, it is possible to use many other video editing tools besides Camtasia, such as iMovie. For the latter, see instructions by Apple Support: How to remove a green (or blue) screen in iMovie.