Twice a year, I teach an online course on Corpus Linguistics on Moodle. The course is recommended especially to students in languages at the university, and it has become quite popular with about 150-200 participants per year. Since I needed to use my limited resources more efficiently, I decided to try running the same course simultaneously in two languages: Finnish and English. If you are considering similar ideas as an online teacher, here are some notes that may help you get started.
Originally, the course on Corpus Linguistics and Statistical Methods evolved from a regular lecture course that I had organized together with my colleague Jussi Piitulainen in the years 2014 and 2015. The course met in a computer class with 16 workstations, and we held one lecture and one hands-on session every week.
Why did we need to move the course online?
High demand vs. space and equipment. At an early stage, even before the beginning of the first lecture, it turned out that many more students would have been interested in taking the course than what the classroom could accommodate. Initially, we allowed up to 32 students in the class, so that during the hands-on exercises, most of the participants would have to share a workstation with another student. Too many people in a small computer class is simply not beneficial for learning or teaching.
Wide and heterogeneous audience and overlapping schedules. As the participants represented various disciplines in languages and linguistics and they were also in different stages in their studies, it was impossible to avoid overlaps with other obligatory courses where many of the students would also need to be present.
Providing support and enhancing collaboration across organizations. The course Corpus Linguistics and Statistical Methods is offered by FIN-CLARIN, a national consortium of universities that is coordinated by the University of Helsinki. We wanted to be able to offer our course for the rest of the universities in Finland and even abroad – unless it requires a significant amount of additional resources, of course…
Replacing live lectures with videos
The first online version of the course was created simultaneously while giving the old style lecture course in January-March 2015. In order to make sure that the most important content would be available in the online course, I started creating short YouTube videos from the lecture materials we already had.
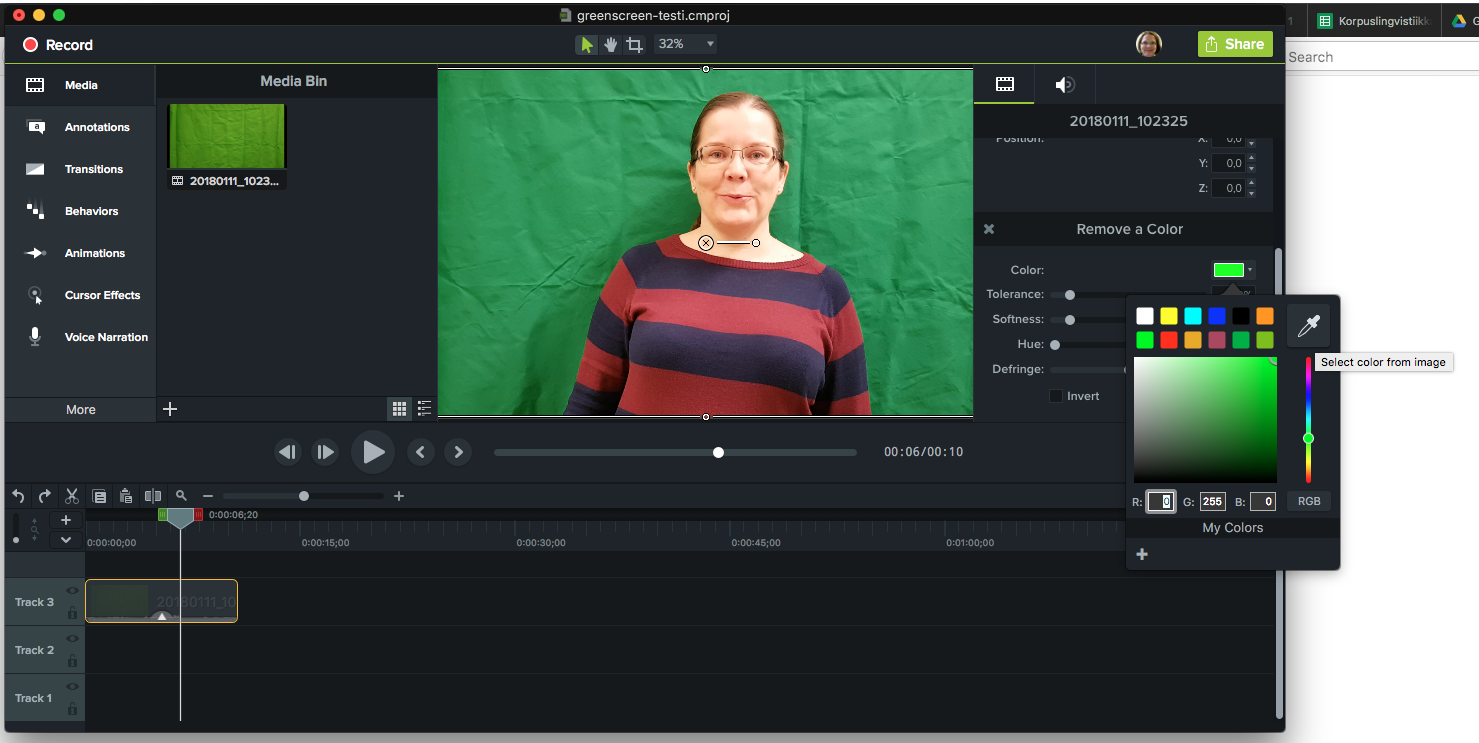
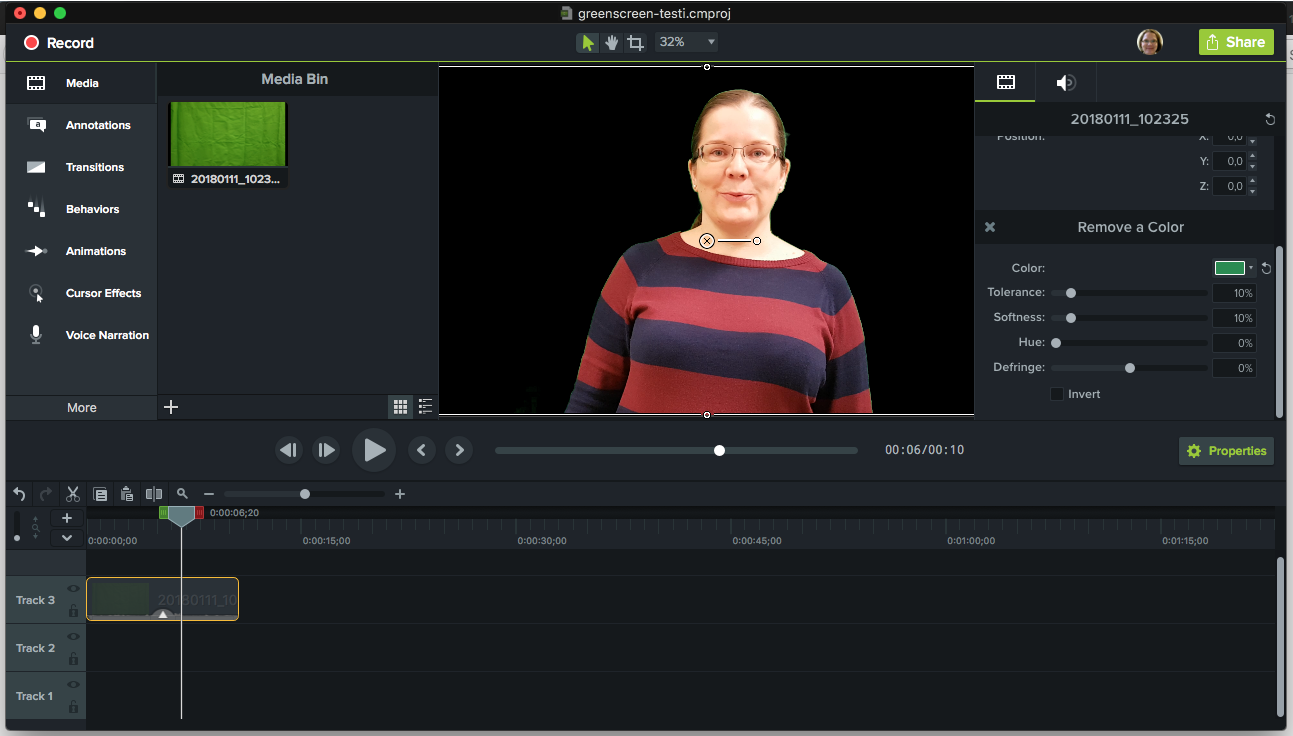
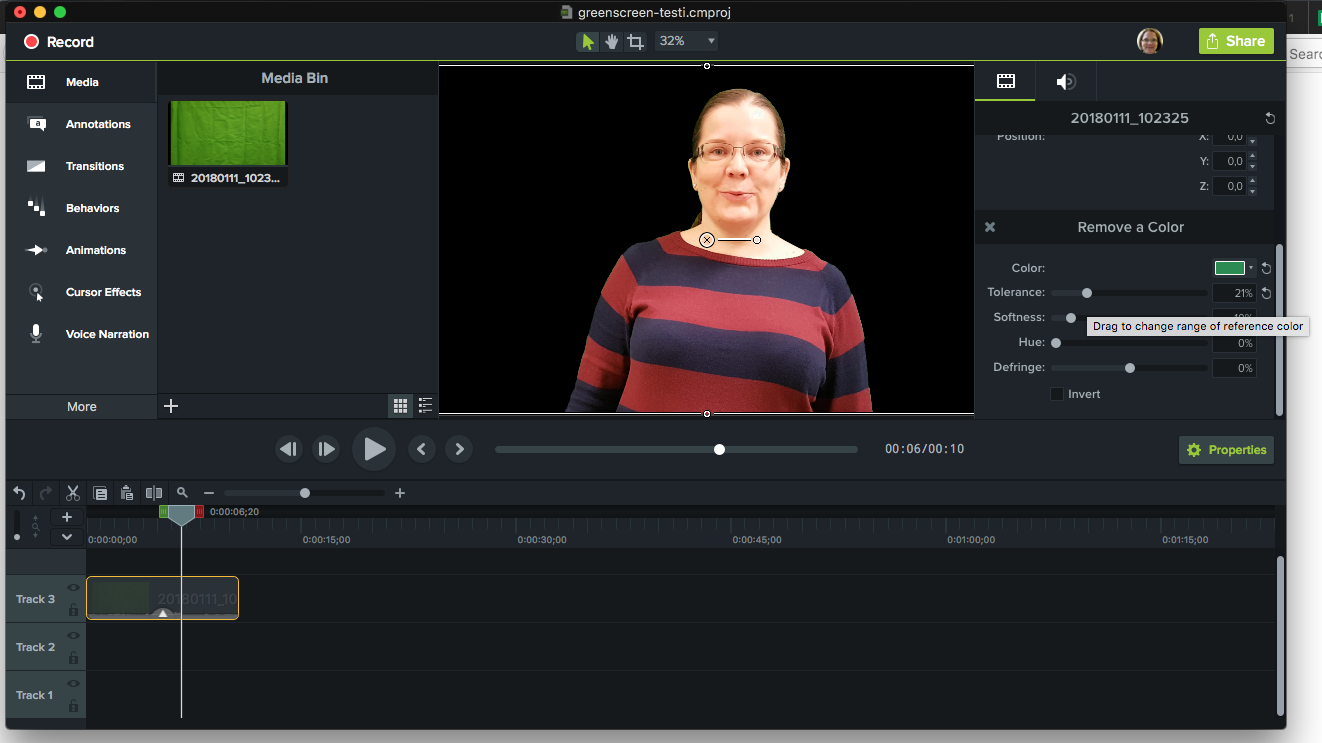
I began my video project just by showing the regular slides and doing voice-over in Finnish, although I realized it wasn’t the most interesting way of presenting… Whenever I could, I tried to make the visual content at least a bit more lively with small animations, screencast demos, graphs or other enhancements that seemed appropriate in between and on top of the regular slides.
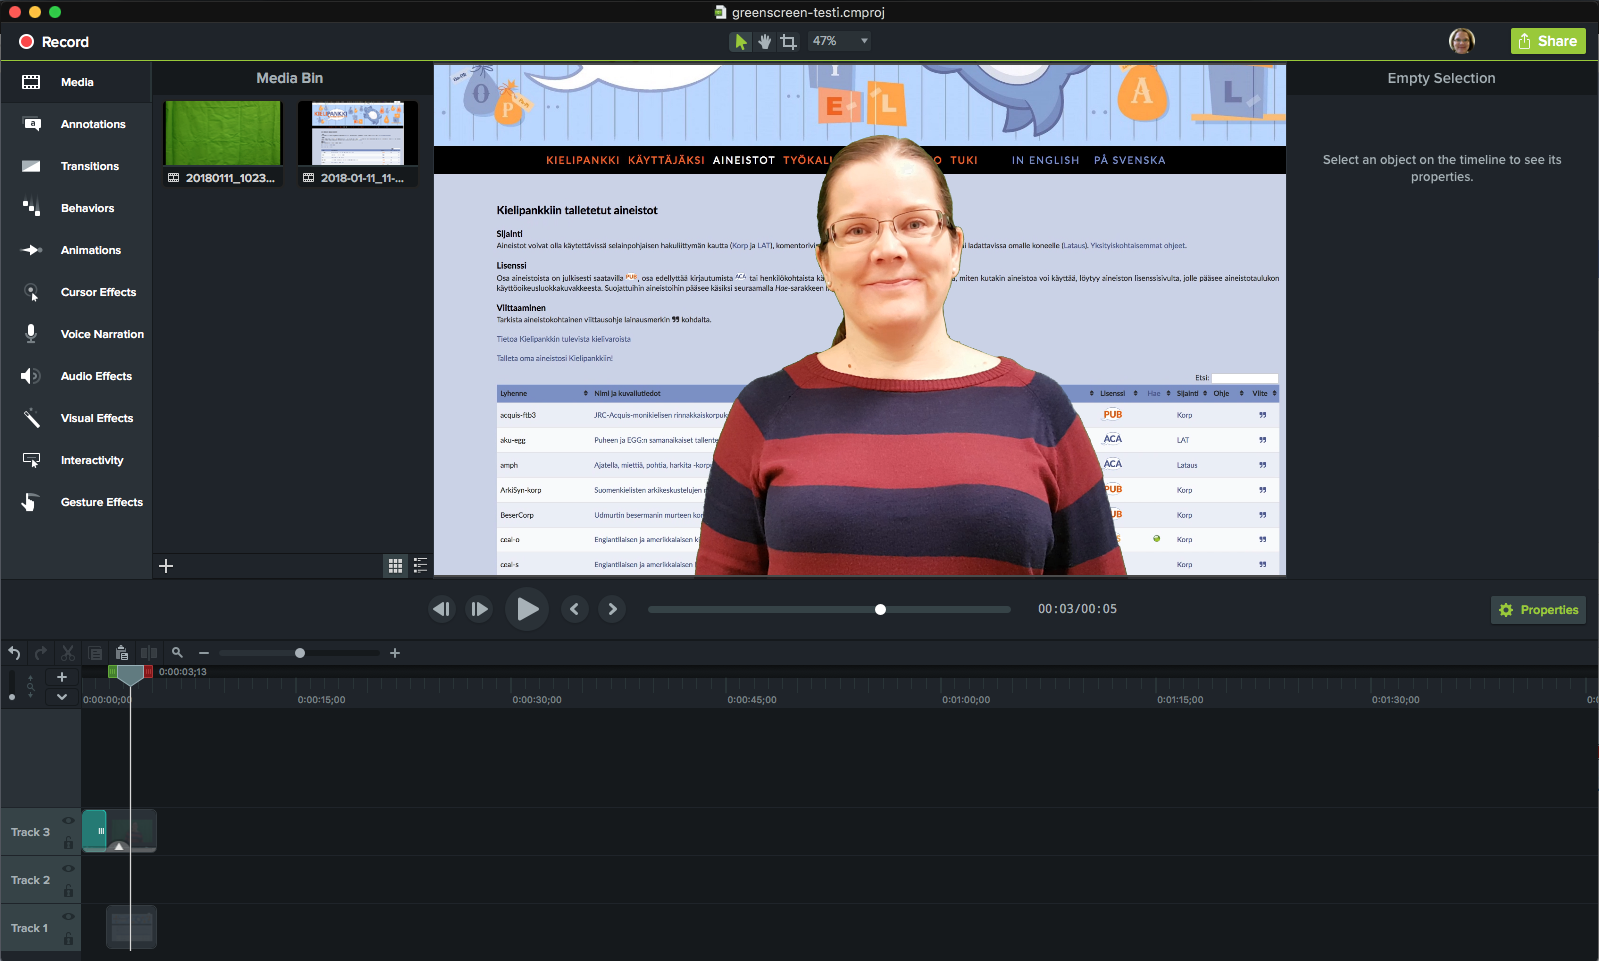
I have been using a tool called Camtasia for editing videos, but there are many other video editors available.
Insert captions for easy translation
Each time I had finished recording and editing the audio track that included my Finnish narration for an individual video file, I also added Finnish captions to it. Captions can be useful even in the original narration language, since the students may not always be able to listen to the audio. For hearing-impaired students, captions are essential. After some practice, captioning a 10-minute video only took me about half an hour or so.
Edited videos can be efficient
Planning and editing videos can be very time-consuming, especially if it were done properly… Of course, I was in a hurry and did not have much time to spend on editing, but I managed to compress (this reads: “crystallize”) the original content of the lectures to quite an extent. With all the “lectures” and demonstrations included for the entire course, the total duration of all the video clips is now about two hours, whereas in the original classroom course, we had spent about nine hours just giving our lectures in front of the class in each course. Ideally, less talk from the teacher can also mean that there is more time left for other types of learning activities by the student.
Below is an example of one of my (slightly embarrassing) lecture videos. It is represents an original Finnish video where the slides and the captions have been translated into English. If needed, you can activate the English of Finnish captions and select language from the wheel menu on the bottom right. To see how I ended up with this result, just keep on reading.
Check copyrights!
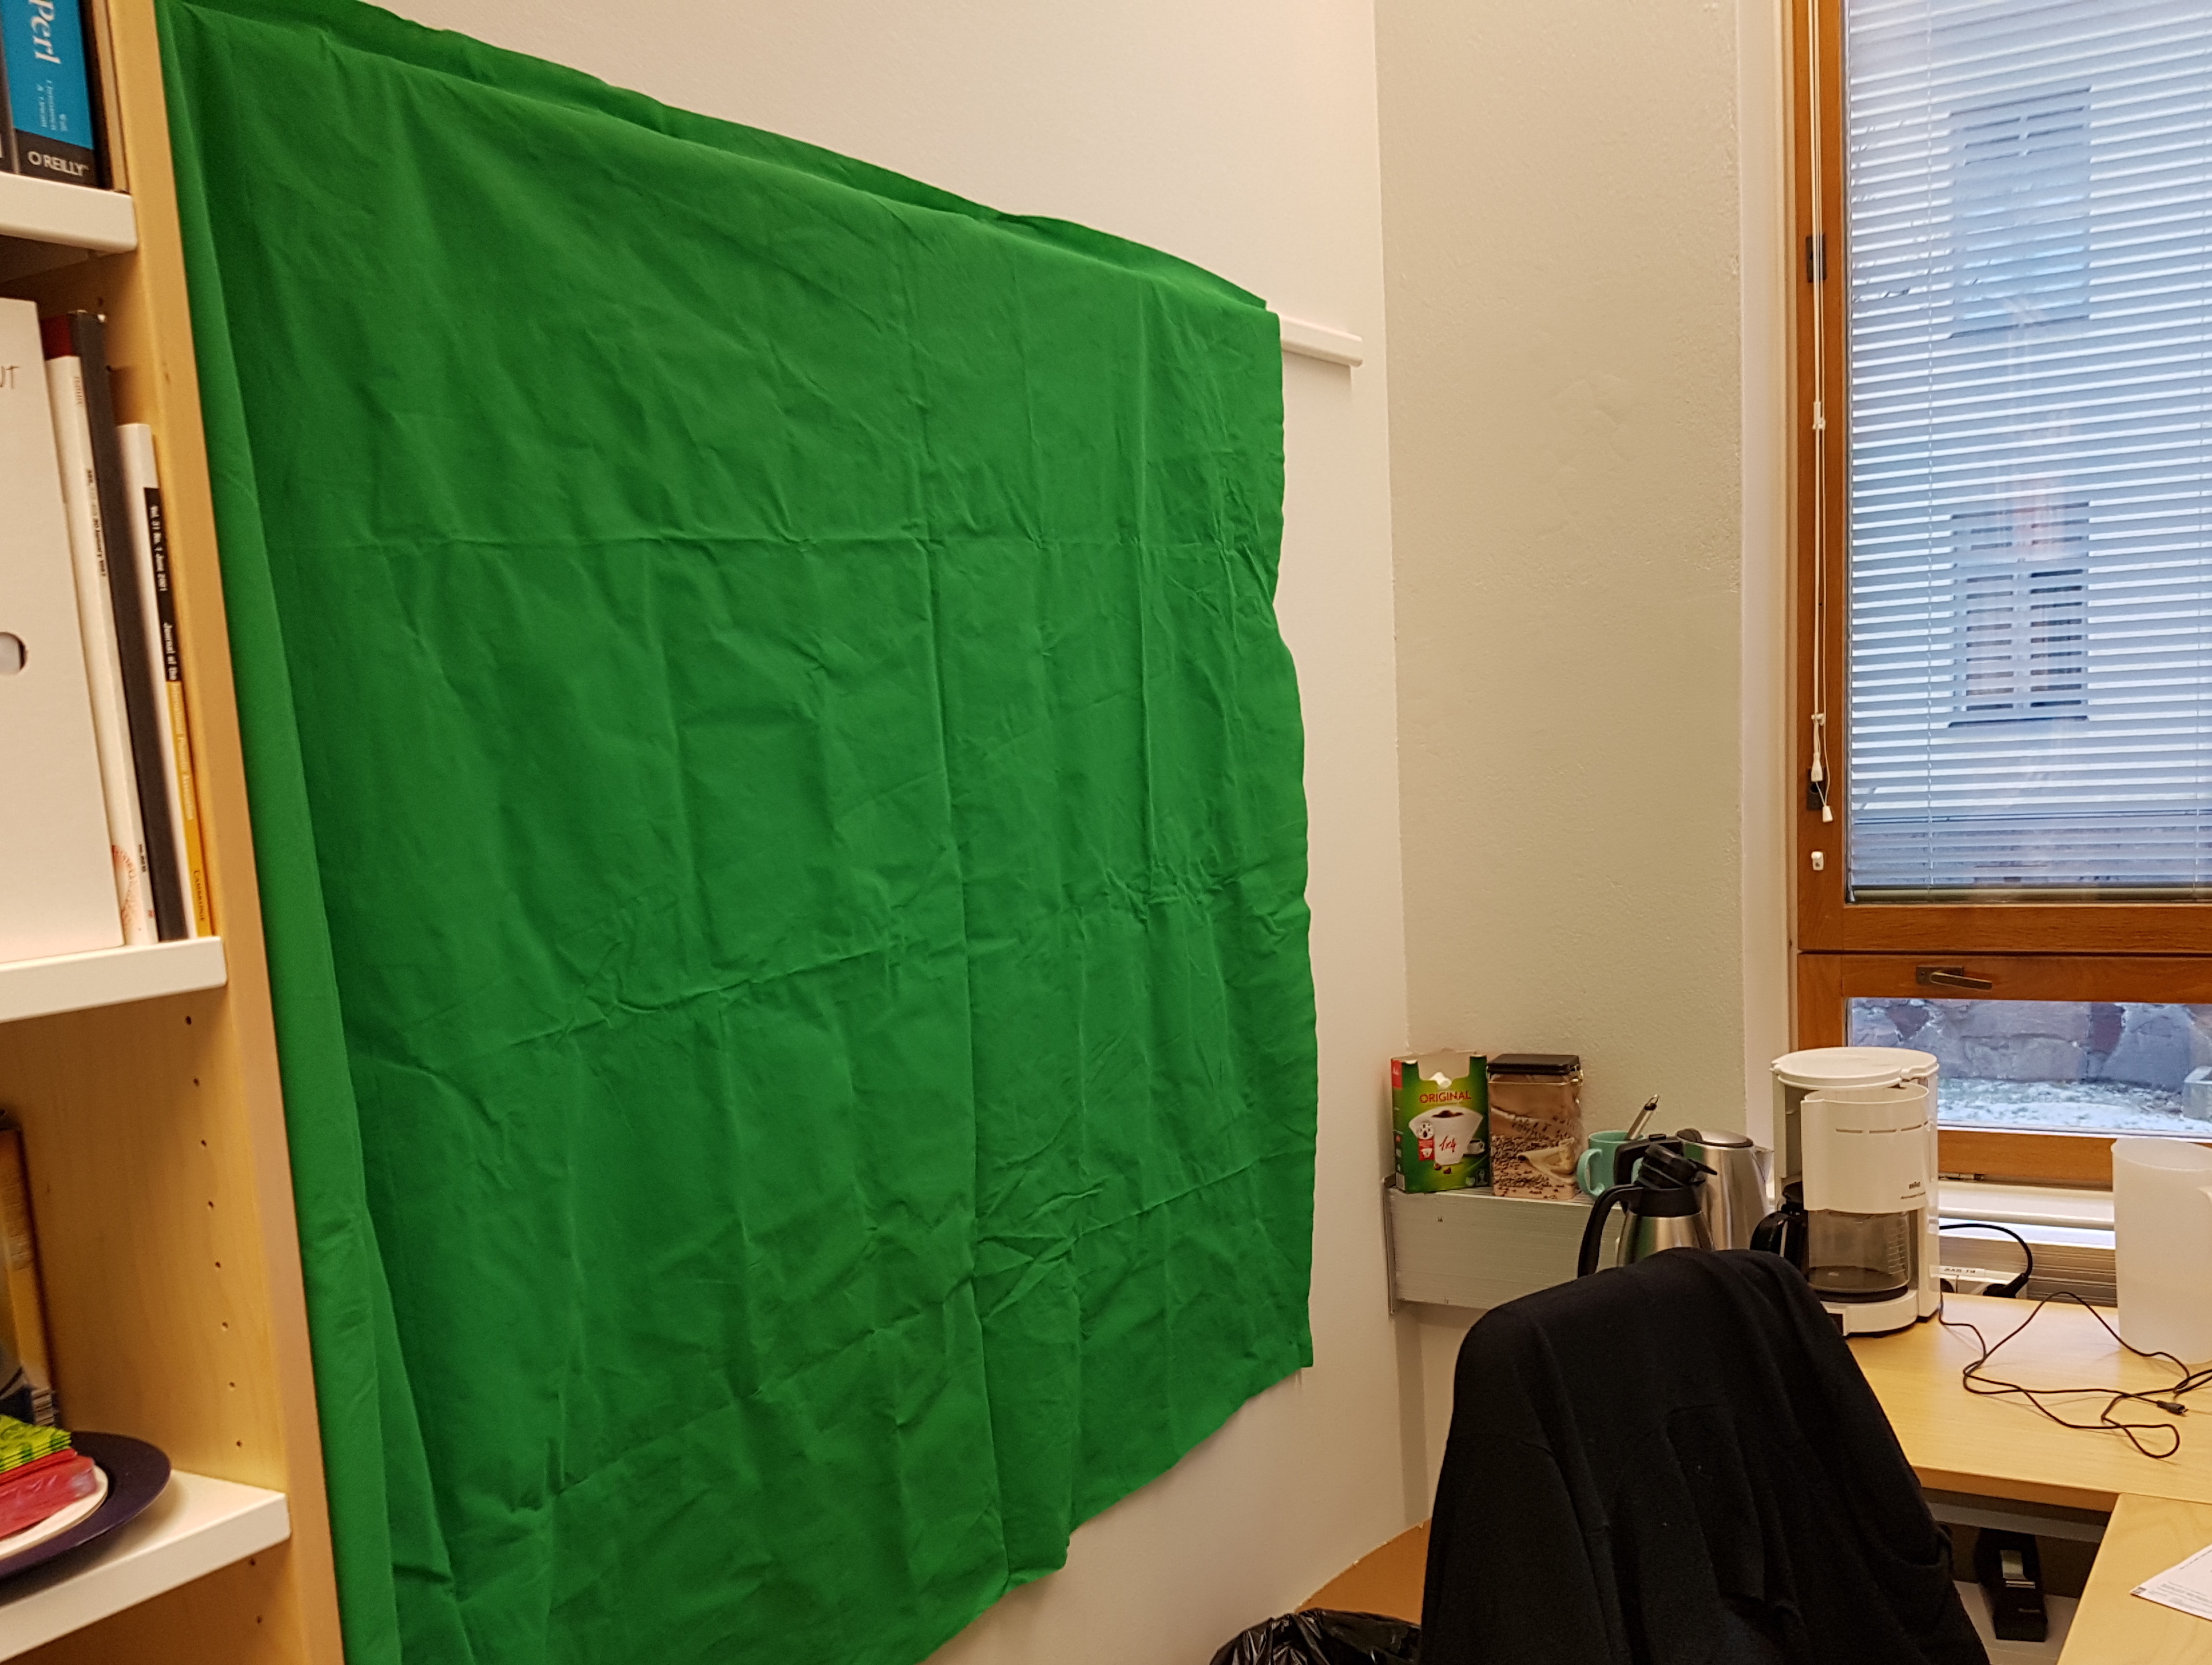
When making videos, it is important to check your slides and other content (e.g., pictures or background music) for copyrighted material. Especially in case the video might be distributed publicly and independently of the course, it may be a good idea to include license information in the video itself, for instance in the title screen.
I prefer to use the Creative Commons Attribution license, which allows people to do whatever they like with the video – e.g., add translations, embed it to their own work and redistribute modified versions of the video – as long as they give reference to the original work.
If using YouTube, the license needs to be selected in the video settings. You can additionally give others the right to translate the captions on your original video.
What if students prefer to use some other format than videos?
Some students like to review things from the slides, some like videos better. For convenience, I decided to offer links to both the slides and the videos in the course area.
On YouTube, it is possible to display the entire transcript of a video with captions, which can be useful for quick access to the content. In one of my recent courses, the students discovered that they could control the playback speed of videos on YouTube. If they get bored of listening to my slow explanations, they can speed things up! This possibility never crossed my mind before, although I had been slightly worried that my videos would be painfully slow for some students…
Why translate the course content?
A lot of students in languages at the University of Helsinki do not speak Finnish. In order to serve our multilingual department as well as the prospective international audience, I promised to translate the course into English.
But… a bilingual online course? Am I crazy?
I probably am. A bit.
It would have been a tempting option to provide the course materials in English only. However, the course is offered to many first-year students who may not yet have any experience with English learning materials. It might be too difficult for them to study and to submit assignments in a language they are not comfortable with. In addition, I believe it is valuable and useful to acquire professional and scientific vocabulary in one’s own language and to use it for discussing research. A majority of students and teachers at the University of Helsinki speak Finnish as their mother tongue.
I was the sole teacher responsible for giving the course and it does take time and effort to run it several times a year, even if everything on Moodle works technically. So, I began to see some potential pros in trying to provide the same course simultaneously in both Finnish and English.
Parallel translations of the course content
In order to serve two language groups in the same course area, I needed an identical set of instructions, study materials and assignments in both Finnish and English. Fortunately, in this case, the core content of the course was naturally very multilingual or “language agnostic”: the aim of the course is to provide basic concepts of corpus linguistics and tools for dealing with language corpora in general.
First, I needed to translate the original Finnish slides in order to make English versions of the videos. (Professional translation was simply out of the question, both financially and in the available time frame.) I was painfully aware that since I am not a native speaker of English, my quick translations were probably not entirely fluent. Hopefully they still help the students comprehend and learn something…
I decided to keep my voice in Finnish, at least for the time being. It would have been far too much work to re-speak and edit all the audio tracks in English.
In the video editor, I used the same project file for both the original Finnish variant and the new English variant of each video. I started by inserting the English slides at parallel times with the Finnish slides, but keeping the two languages on separate visual tracks. It was then easy to hide the English slides, export a video with the Finnish slides visible; then hide the Finnish slides and unhide English, and export the English version.
This video editing process keeps my materials flexible. When I find outdated or erroneous portions in the videos, I can in most cases quickly make some tiny modifications in the original video project, export the desired new versions of the videos and publish them on YouTube even within the hour. I ended up making two hidden YouTube playlists, one for the Finnish and one for the English versions of the course videos. Each of the five course weeks contains at least two of these videos. In order to remember the order of the videos in the course, I include the week number in the video title.
How students select the course language
At the beginning of each bilingual course, the students are to choose either the Finnish study group or the English one. The students can be allowed to automatically join one of the language groups the first time they enroll in the Moodle course area. This happens by typing a given group access key at the time of enrolment.
When the very first bilingual course began, I had never tried the group access key system on Moodle before. And, of course, things did not work as expected, since I was not able to test the enrolment process myself… I made an annoying mistake: I gave the students both a course key and another group-specific key, because I was not aware that Moodle only prompts for one access key when a student enrols. Clearly, I had not read the correct instructions on Moodle Docs, which I only found afterwards… And, surprise: everyone used the course key first! So, despite my good intentions and preparations, all the students ended up “groupless” in the course area and had no access to any of the group-restricted materials, until I had manually assigned the 100+ students to their respective language groups… But now I know better!
Localizing text and activities on Moodle
According to the selected language of teaching, the English and Finnish study groups were separated in the course area. Moodle allows the teacher to control the visibility of individual pieces of content and activities in many ways.
I discovered that you can make the text content in the course area obey the global language selection on Moodle. You need to use the <span class=”multilang”> tag, which you can enter in the raw text editor, like so:
<span class="multilang" lang="fi">Suomenkielinen ohjeteksti</span><span class="multilang" lang="en">English instructions</span>
However, at least in some earlier versions of Moodle, this only seemed to work with brief passages of text. If you try to insert tags inside the <span> elements, e.g., for bolding words or for paragraph breaks, the language selection will stop working.
In addition, in case you want to use the tag within the title of an activity, you needed to insert the <pre> tags around everything:
<pre><span class="multilang" lang="fi">Termien selityksiä</span><span class="multilang" lang="en">Terminology</span></pre>
If you don’t, Moodle may ignore the language setting in the activity title.
The cons: if you use the <pre>+<span> tags in the activity titles, the raw tags will be displayed within special Moodle sections, such as in the progress monitor. It is also not practical to use the <span> element in larger amounts of content, since editing the raw text gets rather tedious in the long run. So, I often prefer to duplicate the activities instead and restrict one of them to be visible for the English group of students and the other for the Finnish group.
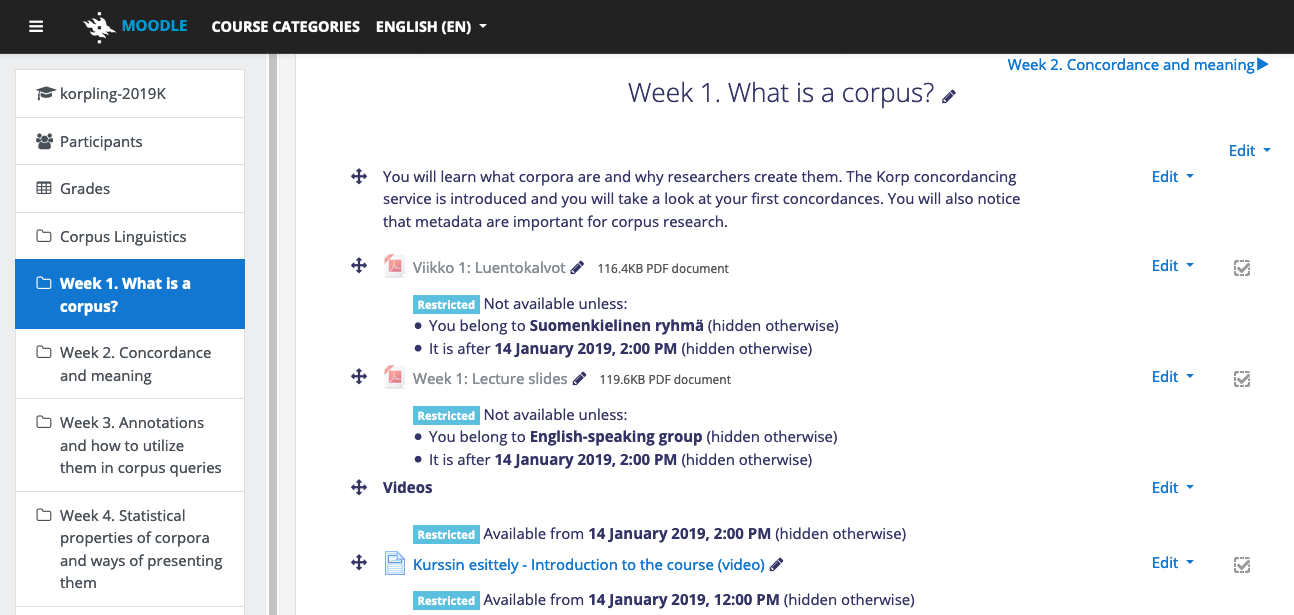
For most activities, I use access restrictions according to date and student group, like this:

The English version of the Moodle area with the restricted content will then look like this, to the teacher:
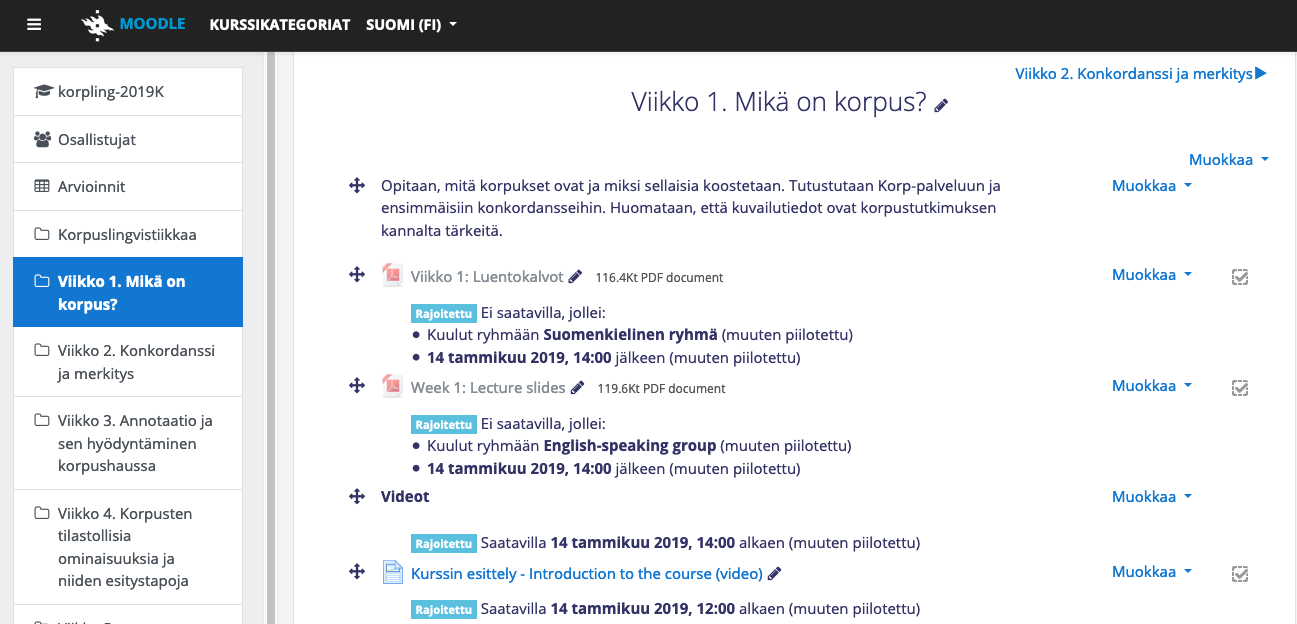
If you select Finnish from the language menu on Moodle, the same content would look like this (note the topmost instruction text and the titles that have been localized by using the <span> tags, as previously described):
Creating small groups for discussion assignments
Nowadays, I can accommodate about a hundred students in the bilingual online course area. If I get help from teaching assistants, it is possible to teach (or, rather, to provide learning services!) to an even larger crowd.
However, a hundred students cannot efficiently discuss an assignment together. Here are the settings I used in order to create small groups (approx. 11 students per group) of the English-speaking students: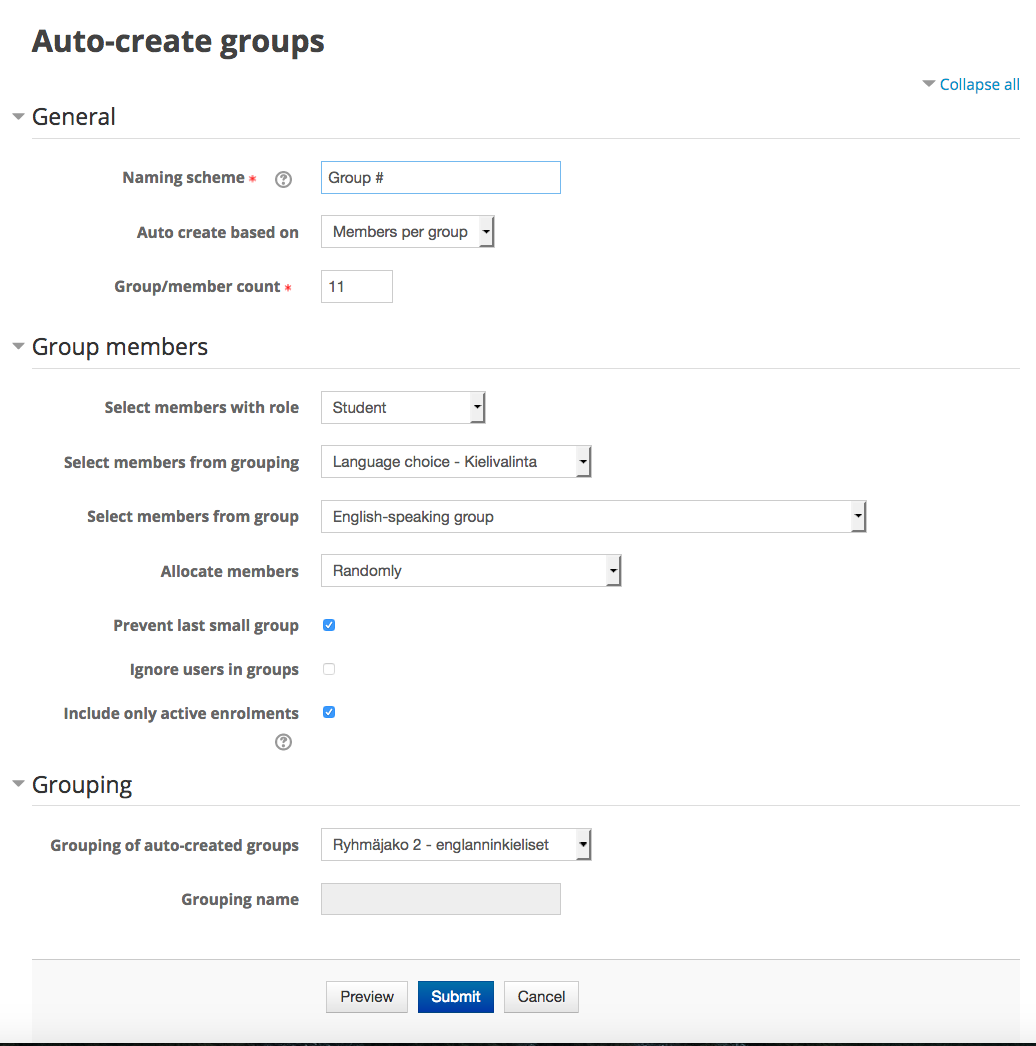
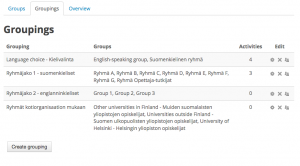
For some purposes, I also needed to separate the students according to their home organization. There can be participants from the University of Helsinki, from the rest of Finland, and occasionally individual students may participate from universities abroad. This is what the various groupings finally looked like in my Moodle course:
 Future developments

After two runs of the bilingual course, many things in the contents have already evolved. The students have reported that the videos and assignments already run quite smoothly. Technical difficulties (usually related to me updating the materials at the last minute in the middle of the course!) have sometimes delayed individual portions of the course, but there seem to be fewer and fewer glitches in each round.
Perhaps this means that at least the teacher is learning?
A bilingual online course – pros and cons
Positive:
- Once the course has been thoroughly set up and optimized, it is possible to run it over and over again much less painfully than before.
- A lot of things can be scheduled to appear and to disappear automatically for specific student groups. The students can learn things in their own native language and they are not bothered by language versions other than their own.
Negative:
- Before the course begins to run smoothly (after the first few courses), it can be rather tedious for the teacher to set up the course area and possibly to reschedule and reconfigure specific things for each new round on Moodle.
- Like on any online course, the teacher or the course assistants are still required to pop in the course area regularly in order to see that things are running and that nothing is missing or hidden by accident. Someone needs to post general news and notifications, to respond to messages from the students, and to check the non-automatically graded assignments. And, in a bilingual course, all of this happens in two languages.
- On Moodle, the front page of the course area can get terribly cluttered for the teacher, in case there are several versions of the activities and other comments in different languages.
- Moodle still needs to be developed further in order to make it easy and convenient for the teacher to maintain a multilingual course.
About the author
-
- Mietta works as a Project Planning Officer for FIN-CLARIN, at the University of Helsinki.
- FIN-CLARIN is a consortium of Finnish universities, CSC – IT Center for Science and the Institute for the Languages of Finland (Kotus).
- The Language Bank of Finland (Kielipankki) is the collection of language resources, tools and services provided via FIN-CLARIN to the research community.
- FIN-CLARIN is part of the European research infrastructure for Language Resources and Technology, CLARIN ERIC.