Grayscale pictures are very relevant, even in these highly digital days. One reason is that in print media it is much cheaper to publish images in monochrome rather than in colour. Another reason is the human visual system where, roughly speaking, there is an own channel for luminance (think how hard it is to see in colour in low light conditions). That’s why it is natural for us to view and interpret grayscale images.
Furthermore, there is a highly developed aesthetic tradition for B&W photography and other monochrome art forms. There is a feeling of focus, or concentrating on the essential, which is particularly useful for visual communication of scientific results.
There are a few basic tricks for showing grayscale images optimally. The tricks are the same for printed media and digital screens, although optimal parameters vary depending on the platform. You should think of preparing monochrome images separately for conference talks and for printed articles.
Let me first describe the basic tricks using Photoshop and then show how to do it in Matlab. My example image is this X-ray tomography image of a bunch of sugar cubes, computed from 120 projections by Aki Kallonen (University of Helsinki) using the classical Filtered Back-Projection algorithm:

While we can see the main features and many small details in the above image, there are several flaws in the presentation. There are no purely black or purely white pixels, and the overall contrast is very low.
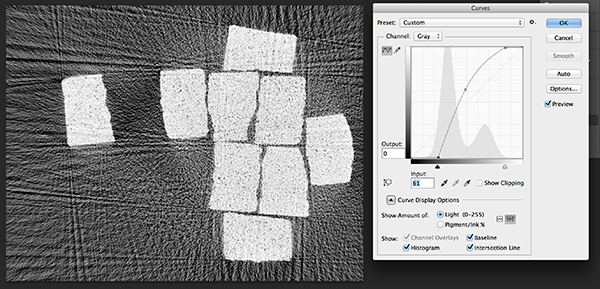
Let us open the image in Photoshop and use the Curves tool.
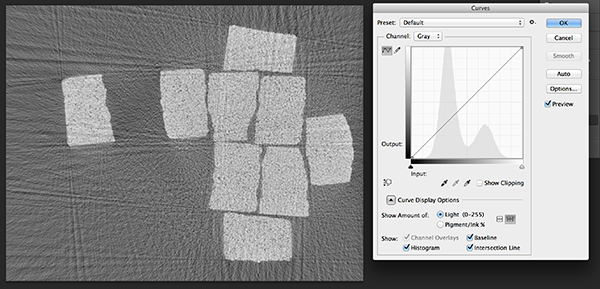
Now the histogram above shows quantitatively what we observed intuitively: the shades of gray are concentrated in the middle of the grayscale interval. Let us first correct the black end:
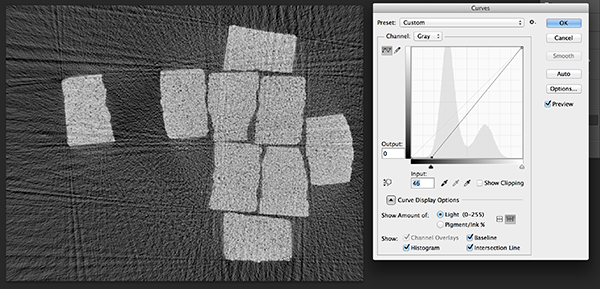
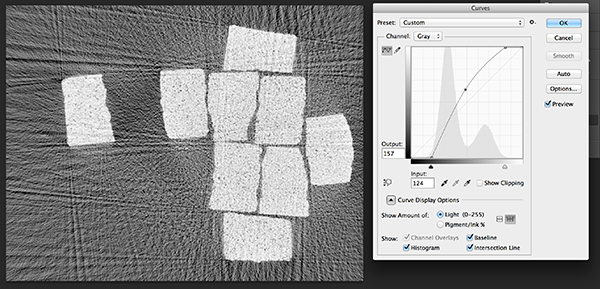
Now we see delightfully strong low-key tones. Let’s move on to correct the white end:

We see much improved contrast, and we are using effectively all of the dynamic range at our disposal. The following “gamma correction” is often useful for optimising the tones for human eyes:
Actually, the above picture looks like we have room for a bit stronger effect in the black end. Let’s move the black slider a bit further to the right:
In my opinion, we have added a nice bit of punch to the image, and all the details are better seen. Please judge for yourself:
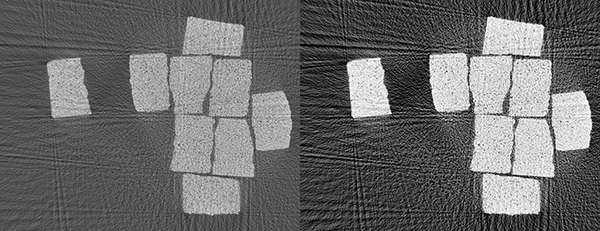
Regardless of whether you like the left or right version better above, you now have a small but effective toolkit for adjusting grayscale images as you want. Let’s see how to do it in Matlab, assuming that our monochrome image is a (double-valued) matrix called im.
Note that gamma correction values strictly between zero and one will lighten up the image, while values higher than one will make the image darker. (Why?) The following code does pretty much the same thing than Photoshop above:
im = im-min(im(:)); % Adjust minimum pixel value to be zero
im = im/max(im(:)); % Adjust maximum pixel value to be one
MIN = 0.33; % Use values greater than zero to ensure black pixels
MAX = 0.8; % Use values smaller than one to ensure white pixels
gam = 0.8; % Gamma correction parameter
imagesc(im.^gam,[MIN,MAX])
colormap gray
You can download the original image and a Matlab routine here: MatlabFiles.