NOTE (13th Dec 2012): Now that the University of Helsinki has updated from Office 2007 to 2010, I should update this when I have the time.
Microsoft Word might not be the best tool for academic writing, but it’s what most of us have to live with. Learning a few tricks can make it a lot easier.
1. Styles, always
This is the basis for everything else. Use styles for everything. Don’t apply formatting (font, spacing etc.) to individual words or chapters. Just apply a style to the chapter and edit the style. Trust me, you’ll thank yourself in the end. This is the basis for many Word functions.
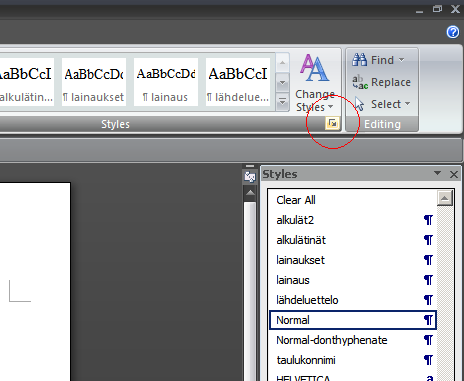
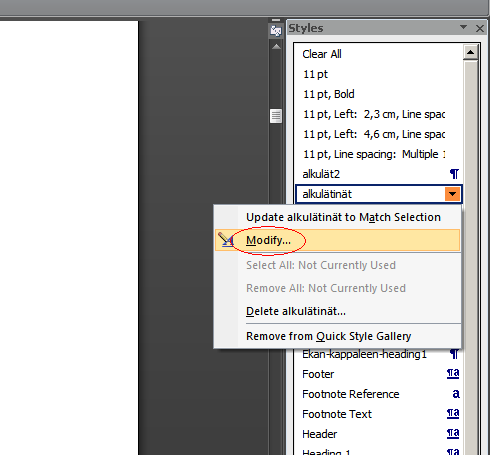
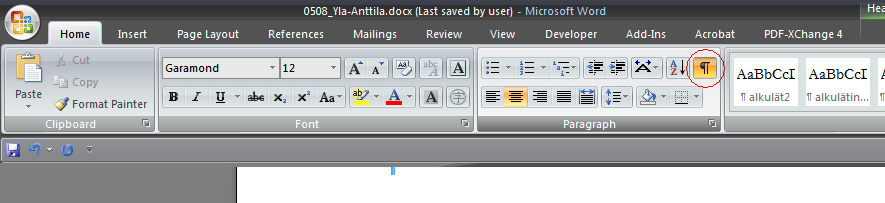
You only get the full menu of styles open on the right-hand side of the screen by clicking a tiny square button on the style bar (circled red in the picture). Keep it open. To apply a style, 1. position the blinking cursor in the chapter you want to apply the style to by clicking in it (you don’t have to drag and select text), 2. click on the style in the list on the right. To edit the style, 1. right-click on the style in the list on the right and 2. select Modify. Easy.
Use Normal for the bulk of your text, Heading 1 for main chapters, Heading 2 for subchapters, and Title and Subtitle for the main title and subtitle of your work. You’ll likely want to create new styles for your bibliography, quotes, heading of your bibliography etc.
In case the style list shows a whole lot of stuff you don’t want (like the styles starting with “11pt…” above), there’s a link that says “Options” at the bottom of the list where you can choose to show only the styles in use in the document.
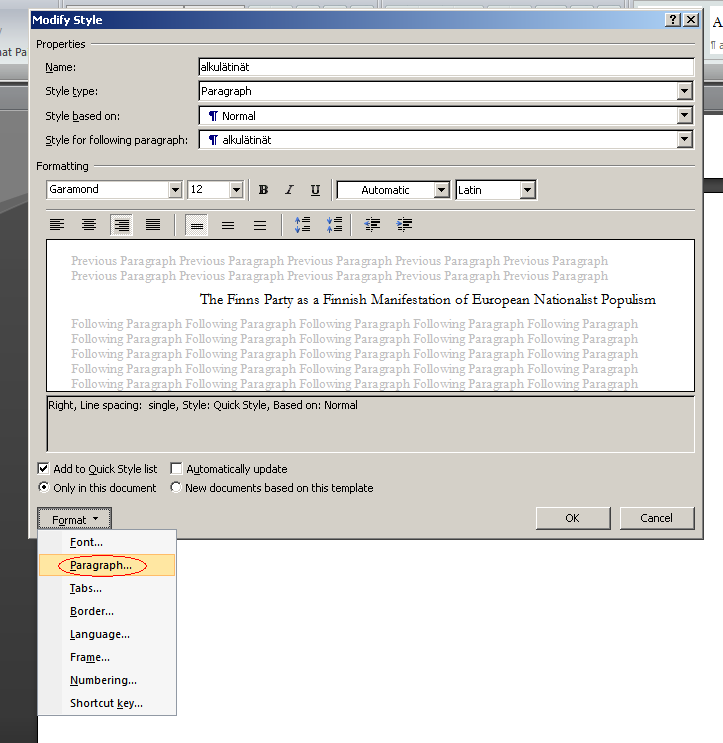
Related to always using styles, never create empty white space by pressing Enter multiple times. This will screw up page breaks, tables of contents and other things. Always do this by editing the spacing of the appropriate style. That’s found in the Modify menu under Format -> Paragraph. Only use Enter to end a paragraph. Pressing Ctrl+Enter starts a new page, and if you must start a new line by hand, do it by pressing Shift+Enter. Just pressing Enter will create a new paragraph.
2. Numbered headings
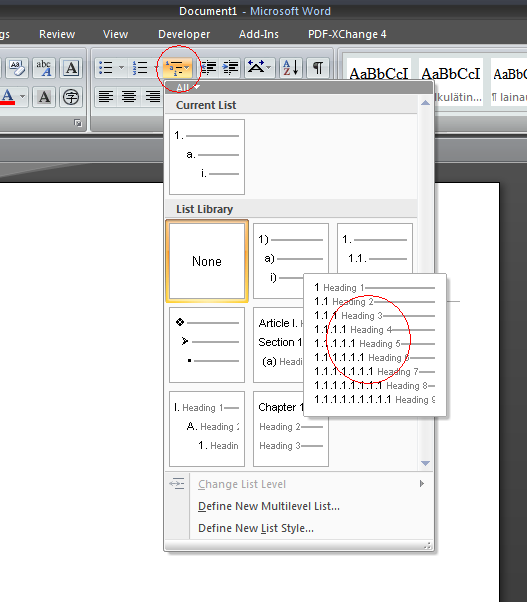
Automatic numbering of headings (like “1 Introduction”, “1.1 Subchapter of introduction” etc.) is super easy IF you use heading styles (above). Click on the “Multi-level list” button, which is very un-intuitively labeled with “i a i” (circled red in the picture), and from the menu that opens up, click on the preset that’s circled red in the picture. Done. Now every heading that you mark as Heading 1 will get numbered as a main chapter, every heading that you mark as Heading 2 will get numbered as a subheading of that etc. This makes life A WHOLE LOT EASIER.
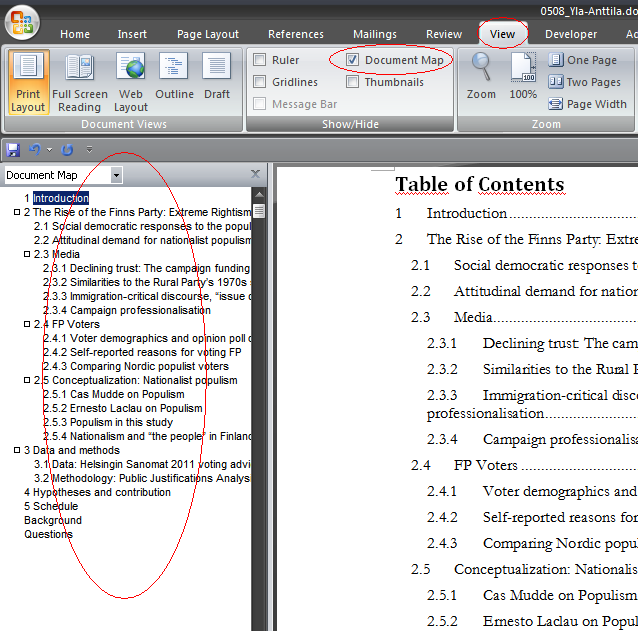
3. Document map
To move around in a large document, scrolling up and down trying to find the right spot is time-consuming. Instead, enable Document map from the View menu, and you’ll get a map to your document on the left-hand side that you can use to jump to chapters. This will only work if you use Heading styles.
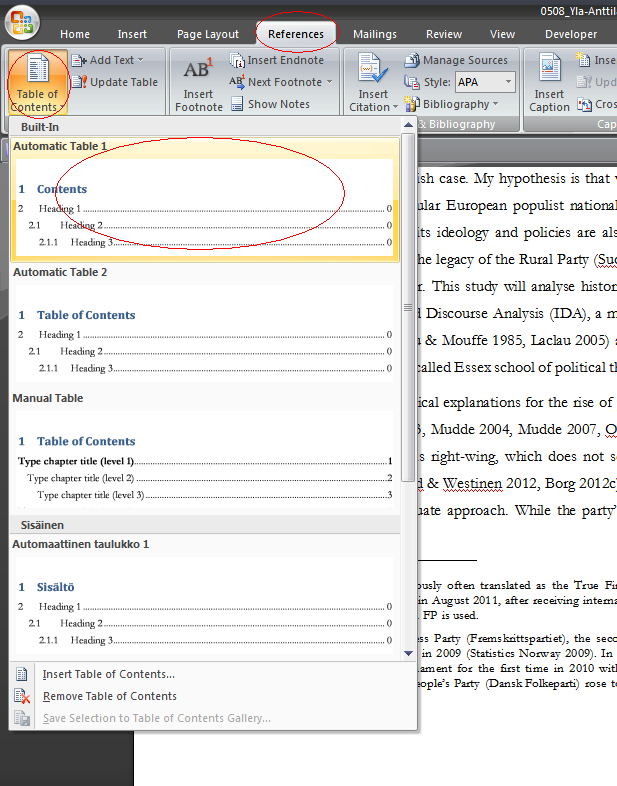
4. Automatic table of contents
Once you’ve used the Heading styles, this one’s easy. Just place the blinking cursor wherever you want the table of contents to be and click on References in the top menu, then click on Table of contents and select the first option from the drop-down menu, the one that says Automatic Table 1. Note that whenever you change anything in the document and want the table of contents to reflect that, you’ll need to right-click the table of contents you’ve created and select Update table. Sometimes (randomly?) Word also asks you whether you want to “Update page numbers only” or “Update entire table”. You always want to Update entire table, there’s no reason not to.
5. Page numbers starting after the title page, tables of contents etc.
In Master’s theses etc., you typically want to have a title page and a table of contents page first with no page numbers, and actual content starting on page 3 or later, with the page numbered as 1. For some inexplicable reason, Microsoft have made it quite hard to do this in Word, but it’s doable. There are good instructional videos on YouTube and tutorials elsewhere in the web.
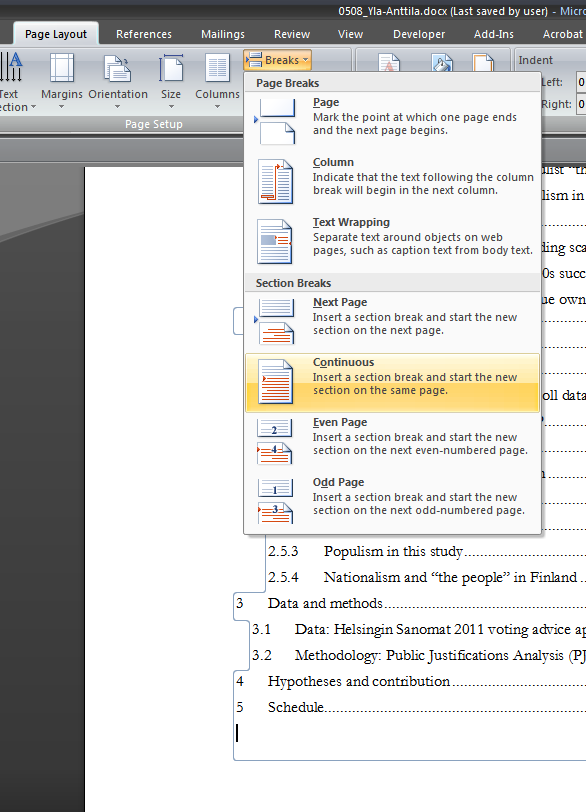
You’ll need to split your document into two sections to do this. The first one will consist of the title page, table of contents, etc. that you don’t want to have page numbers, and the second one will be the actual text, with page numbers.
This is done by placing the blinking cursor where you want the split between sections to be, usually at the end of the table of contents, and going to Page layout, Breaks. There, under Section breaks, click on either Next Page or Continuous, depending on whether you want to add a page break here too.
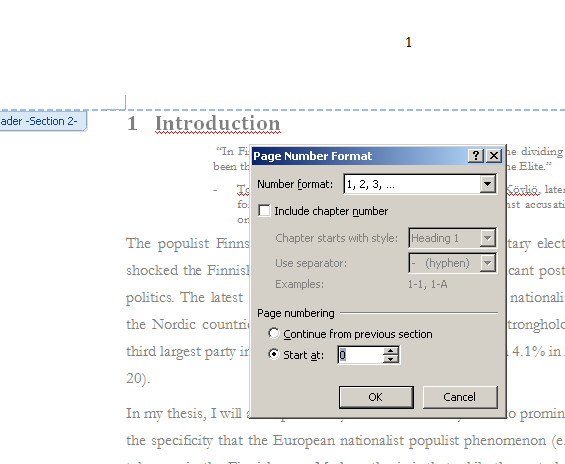
You won’t see anything happened, but your document is now in two sections. Now go to the second section, that is, the part of your document where the actual text is. Go to the header by double-clicking in the empty white space at the top of the page. You’ll note that the header has a note tag saying “Header -Section 2-“, but also another saying “Same as previous“. This needs to change. You’ll need to click off the button that says Link to Previous in the top bar that’s glowing orange. Make the glow stop.
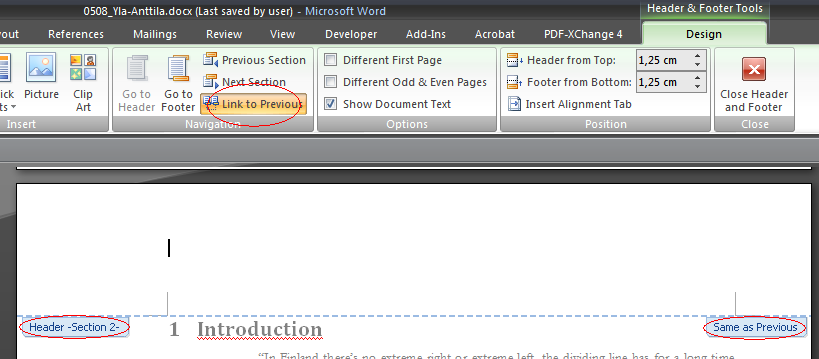
Now, the signs at the header will say “Header -Section 2-” but not “Same as previous“. This means that whatever you add to the header area will be visible in Section 2, that is, your actual text pages, but not in the previous section, which contains the title page and table of contents.
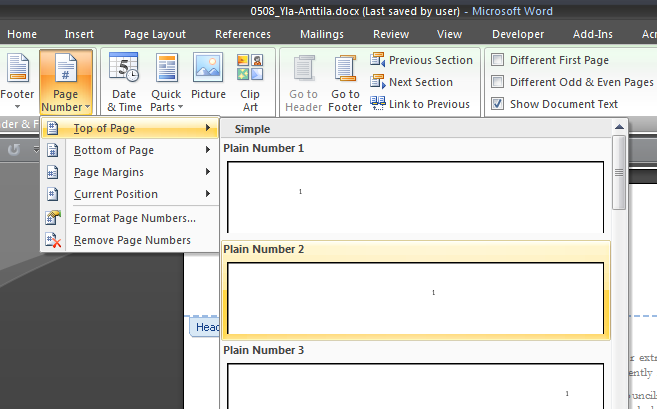
Now, just add the page number from the Page Number button at the top bar. Word usually gives you the wrong number, so you’ll have to go to Format page numbers and select “Start at: 1” or “Start at: 0”, depending on how you’ve done the sectioning. Just try which one gives you the result you want.

6. When you screw things up with page breaks, section breaks etc.
This will happen at some point. Clicking on the button shown in the picture below will make Word show all paragraph breaks (where you’ve pressed Enter), page breaks, section breaks etc.
This way, it’ll be easier to see what’s going on in the document. You can click the button again to hide the symbols.