Imtiaj Ahmed & Oswald Barral
How much do you care of your plants? Do you know whether your plants in the greenhouse are boiling, freezing, or inhaling properly? Who is taking care of your plants while you are away enjoying the summer in your “loma mökki”? Your plants might be praying that someone opens the greenhouse window, but you can’t hear their voice, you can’t understand their language. One solution might be to hire a plant-human translator, so that he can translate their language for you, understand their claims, and open or close the door or window of the greenhouse accordingly. This solution might sound quite reasonable to you, but we believe that our proposed alternative will make you think otherwise, as you will never have to worry again for the wellbeing of your plants.

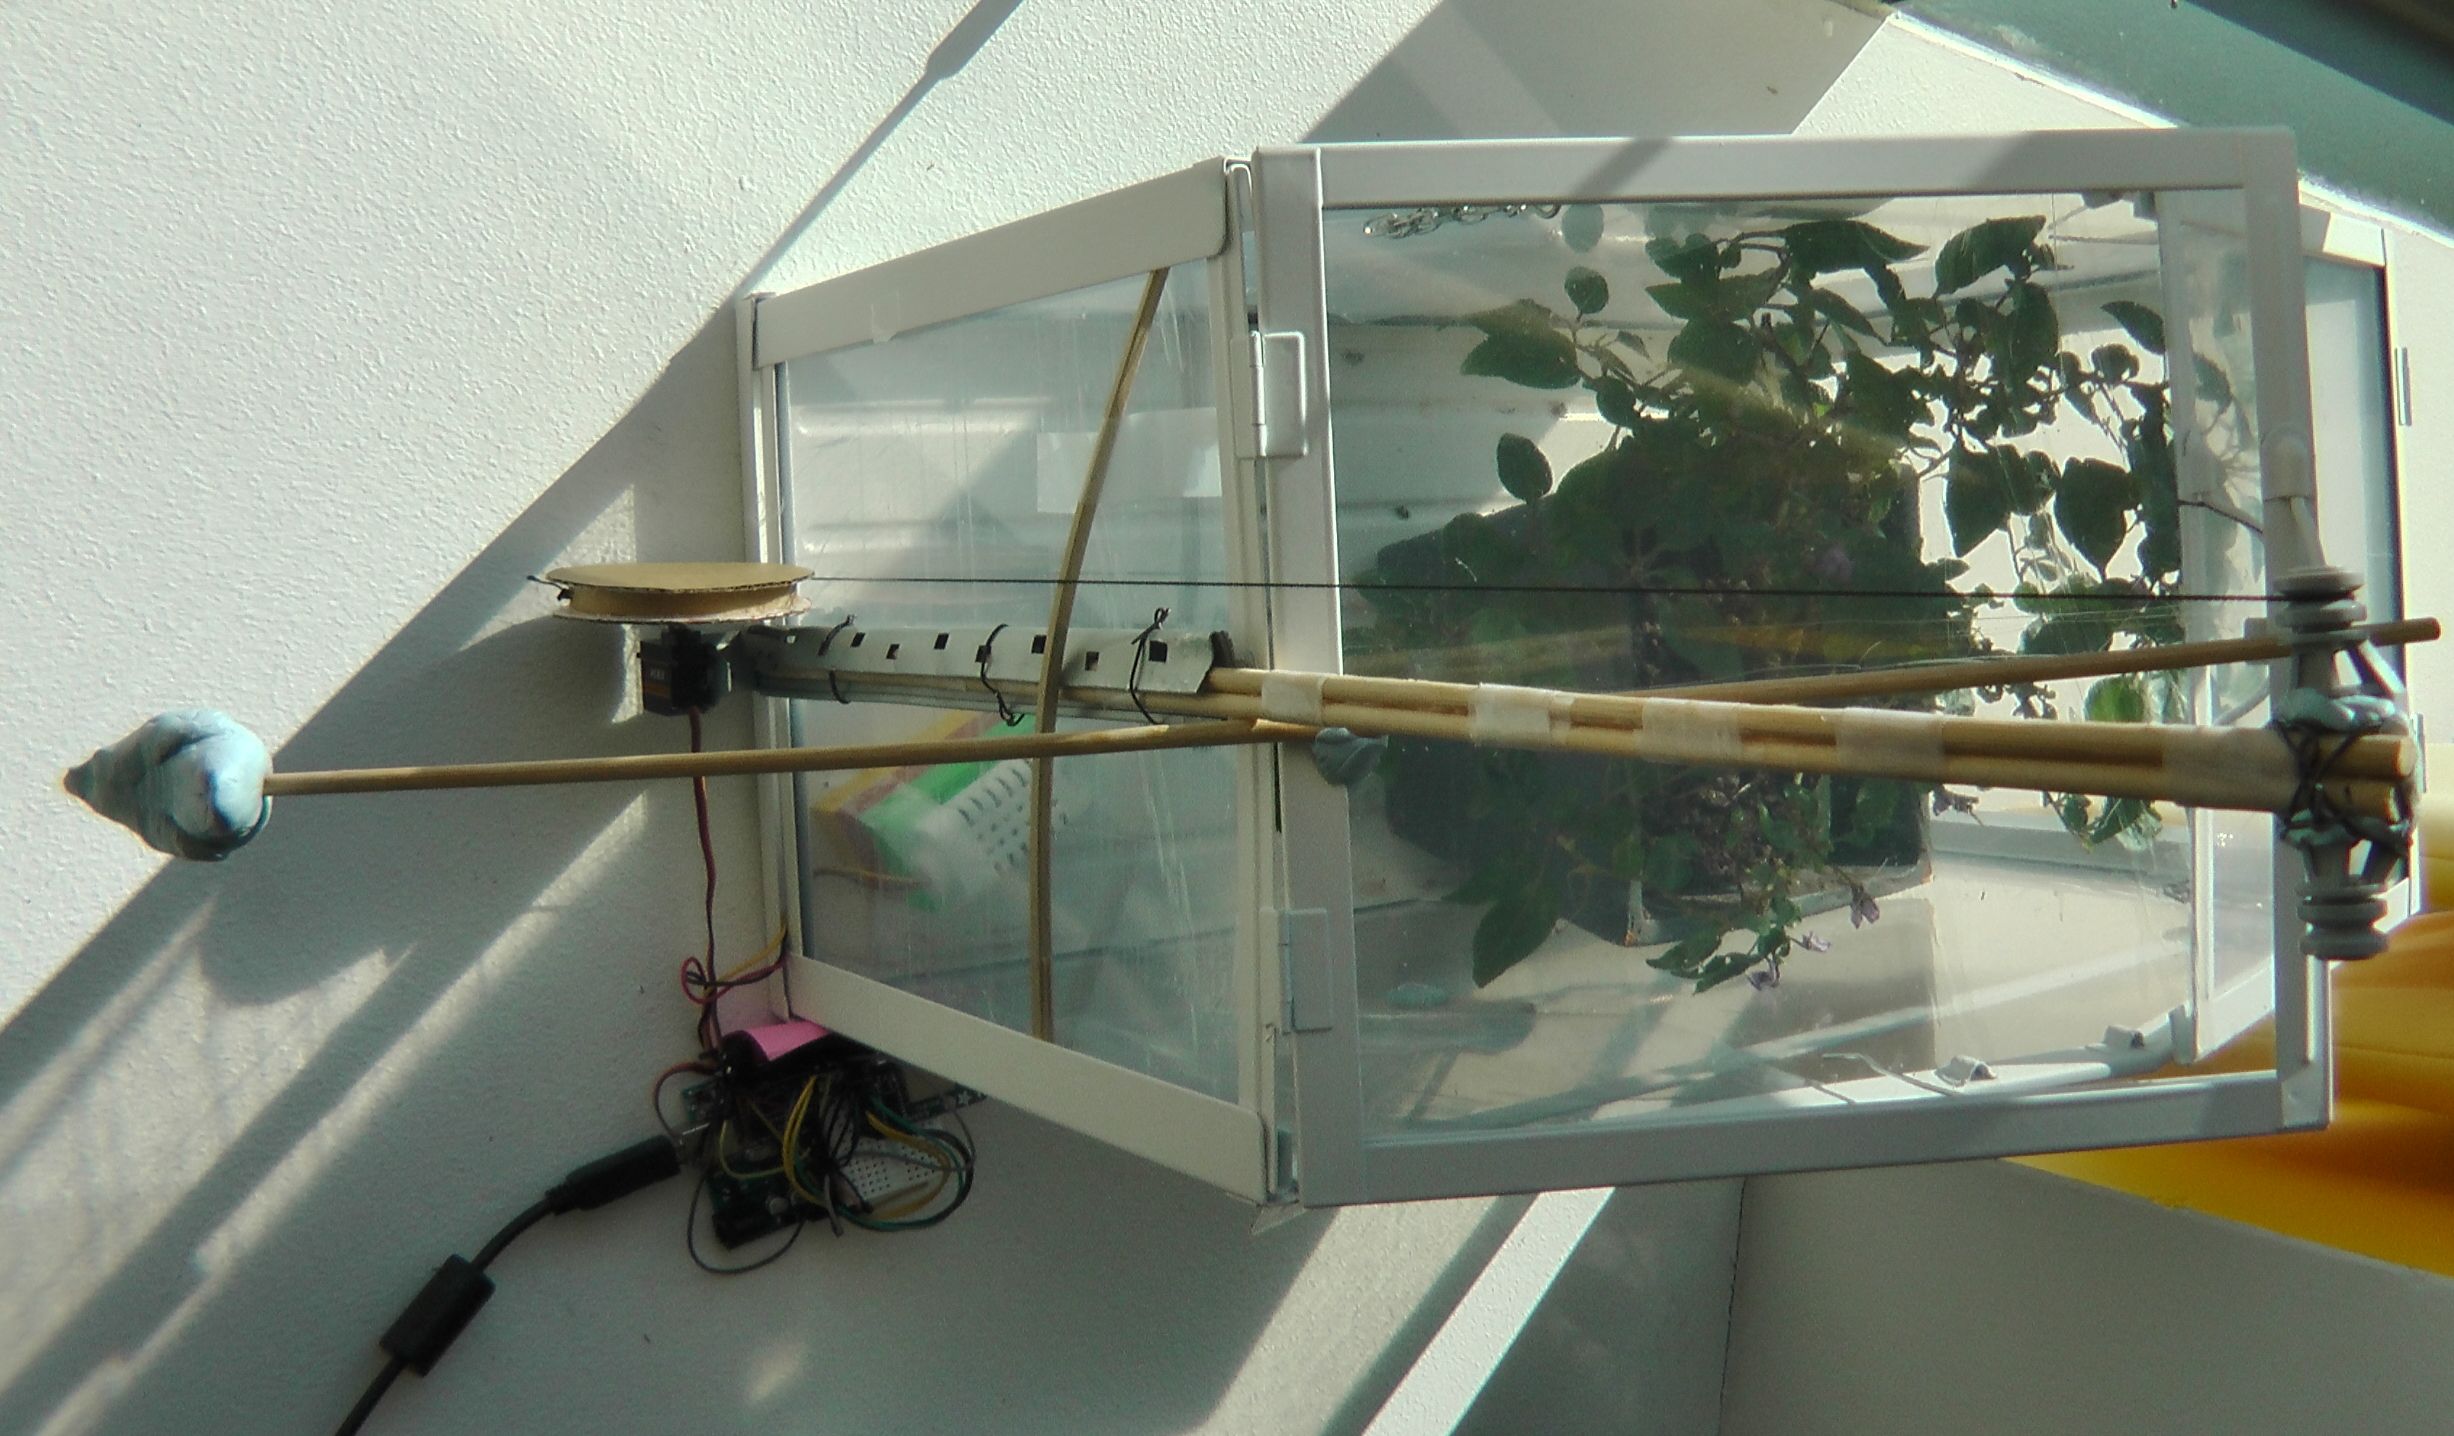
Side view of the system and mini greenhouse.
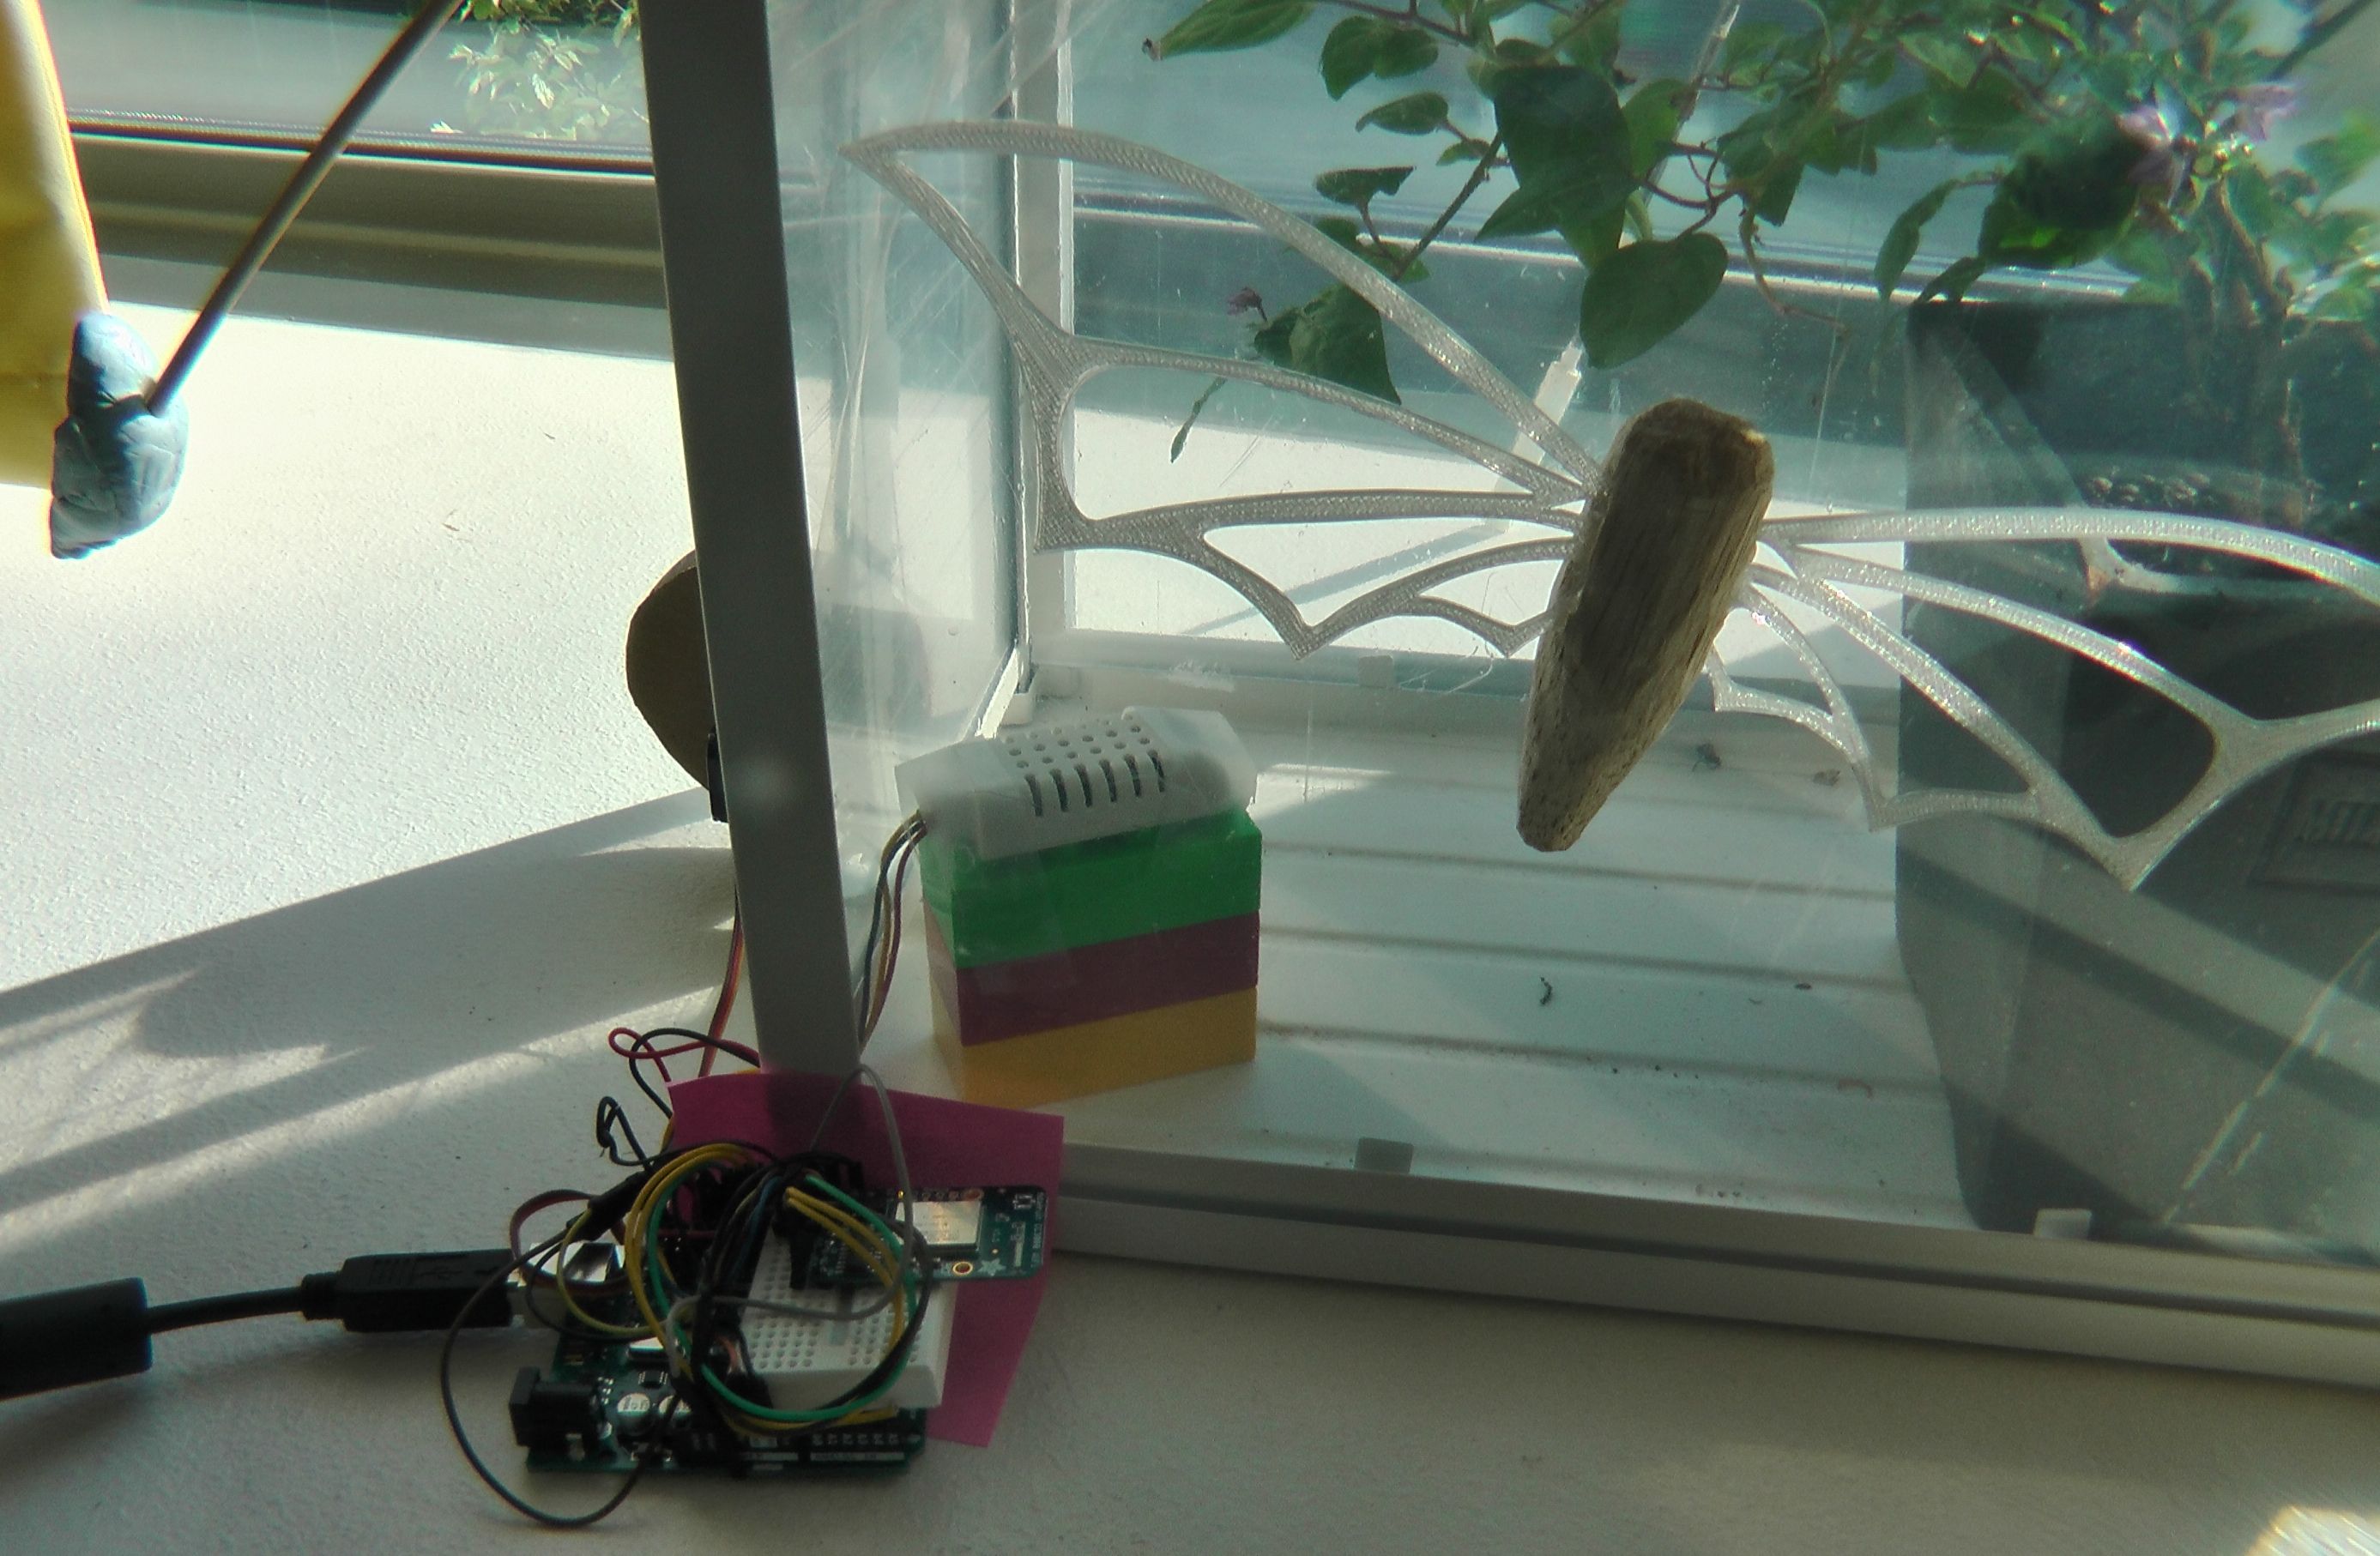
Arduino, adafruit cc3000, and dht22 sensor. Count also the beautiful butterfly.

Circular lever (using paper) and a bird as a counter weight (using blu tack reusable putty)
Top view of an artistic hand work.
Materials
We built a greenhouse Auto Ventilation System. In order to prototype our system, we used a mini greenhouse made of transparent glass. An Arduino UNO microcontroller was used to control the system. A wired dht22 sensor (Adafruit AM2302 wired, http://www.adafruit.com/products/393) was used to sense the temperature and humidity of the greenhouse, and a servo motor was used to open or close the window of the greenhouse according to the signals from the microcontroller. Additionally, an adafruit cc3000 wifi breakout board was used to connect to the internet in order to feed on-line the sensor readings to to a data server.
Wiring and Code Library
We followed the wiring and source code library of adfruit cc3000 from https://learn.adafruit.com/adafruit-cc3000-wifi , dht22 sensor from http://www.adafruit.com/products/393 (another source, http://playground.arduino.cc/Main/DHTLib ) and Servo motor from http://www.arduino.cc/en/Reference/Servo. The following figure shows the complete wiring.
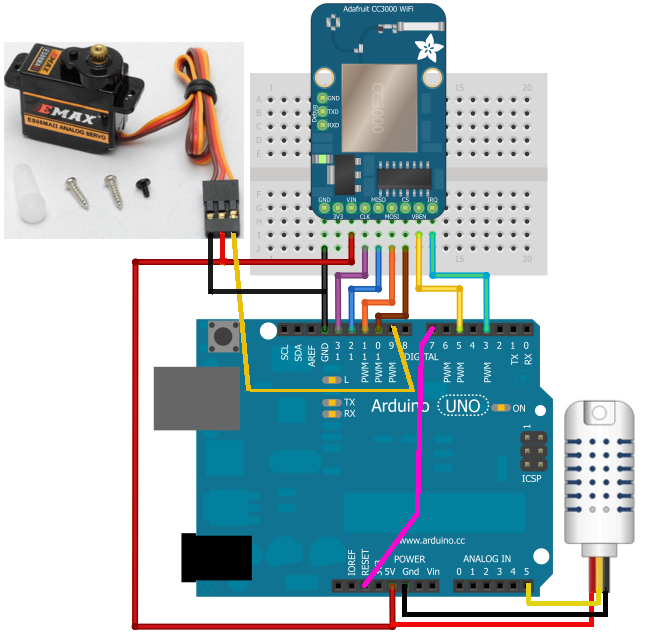
Wiring diagram.
Control Logic
Arduino UNO reads the temperature and humidity data from the Adafruit AM2302 (wired DHT22) sensor every ten minutes, controlling the opening or closing of the greenhouse window through the rotation of the servo motor. The rotation of the servo motor rotation angle (0º – 180º) is mapped to the temperature (20ºC – 30ºC) and to the humidity (25% – 50%). Arduino UNO sends the temperature, humidity and servo motor angle data to a data server through the Adafruit CC3000 WiFi module. Data in the server is logged together with the corresponding timestamps. Additionally, an automatic plot is generated to facilitate the interpretation of the sensor data over longer periods of time.
Data cloud
Following the easy tutorial from sparkfun (https://learn.sparkfun.com/tutorials/pushing-data-to-datasparkfuncom/all) we pushed the data to the sparkfun’s cloud data server https://data.sparkfun.com. You can see data from our system at https://data.sparkfun.com/iot_uh_ia_os.
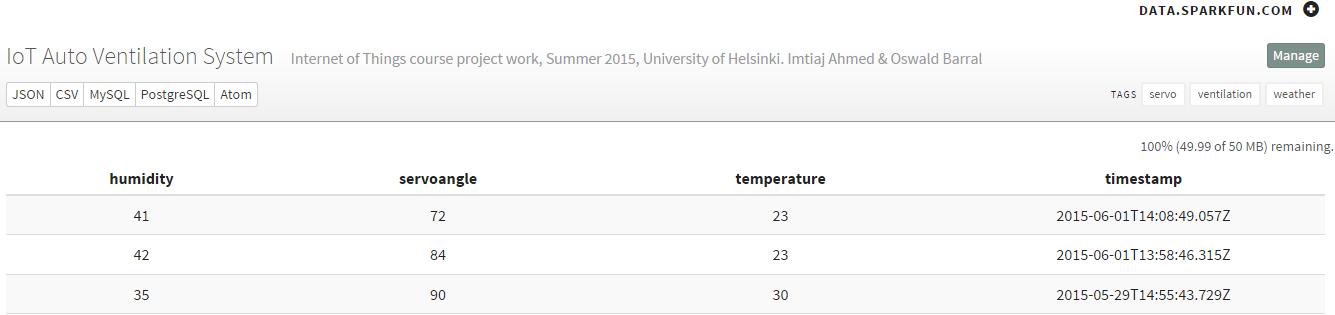
Sample Readings.
Next comes the visualization. We followed the tutorial and sample source code from http://phant.io/graphing/google/2014/07/07/graphing-data/ of using google chart to draw the live chart from the data cloud. To draw chart we used data only from first page of the data server. You can see the live chart at http://www.cs.helsinki.fi/u/iahmed/iot_graph.html .
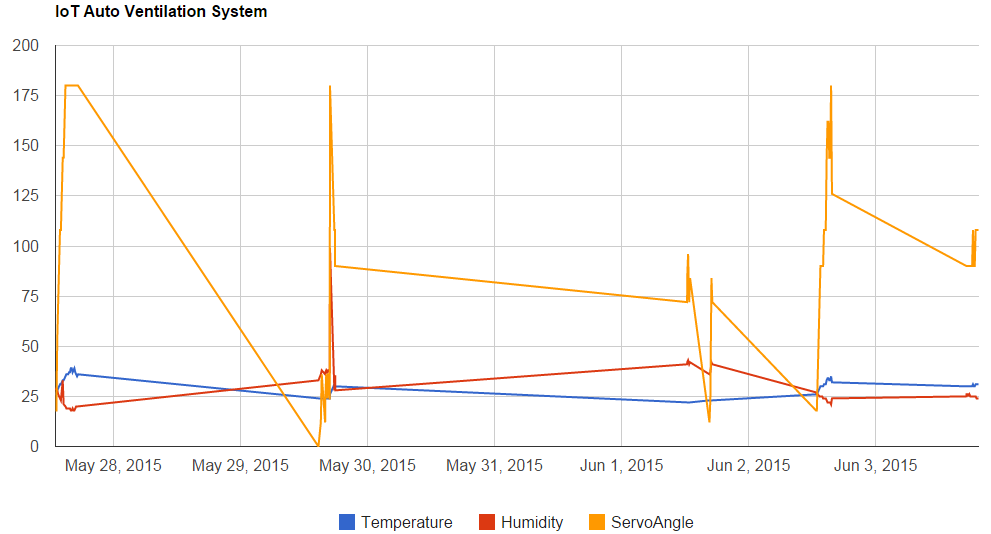
Sample Chart.
Source Code
The complete source code can be downloaded from here in Github, https://github.com/ImtiajAhmed/IoT_AutoVentilationSystem
Problems
Problem-1
After a pilot test of 2 days we figured out that the cc3000 wifi module was getting stuck after a couple of attempts to connect to the server, if the gateway or server were not responding. We then started to surf on the internet and forums to find a solution to the problem, but we could not find any suitable solution. The best way we found to solve the issue was to restart the system when it was getting stuck. In order to do that, we connected the reset pin with the digital input pin 7 using a wire, and added some chunks of code where necessary that sent a low pulse to the reset pin, via the digital input pin 7. With thefixed issue, we tested the system for about a week. We realised that our system was working fine, but the data.sparkfun.com server most of the time causes “504 Gateway time out error”. In the future, we are planning to change the data server with a more robust one.
Problem-2
We used Serial. print command to get some feedback from the Arduino to know what it is doing, for debug purposes. It works fine when we plug the Arduino into the PC, but stop working after a while if we run the system without connecting to the PC or any other serial receiver. Then we figure out that the Serial.print command blocks the system because the output buffer of the serial transmitter is getting full.
We went through the source code of the Arduino library, and found in HardwarSerial.cpp, there is a code line that blocks the system until the transmitter’s ring buffer gets a free space.
while (i == _tx_buffer->tail);
We changed this with the following:
int tmpCounter = 0;
while (i == _tx_buffer->tail) {
tmpCounter++;
if(tmpCounter>200) //wait for a while; give a chance to the serial device to receive data, if //connected.
return 0;
}
Now it’s working fine.
Learnings:
It is always fun to work with arduino and physical devices and hardware. It forces you to take into account all the different components involved in the designing and implementation in the early stages of a system, taking care of the electronic circuits, controlling logic, power, filter, resistances, wiring and soldering, and so on. The Internet of Things course helped us to re-learn those. Additionally, the course made us leave our comfort zone, and think out of the box, as we faced multiple software, hardware and even physical (such as when building the mechanism to control the window) challenges. The best part is that we really enjoyed solving them, especially the latter ones!