From the land of the Angry Birds, now you can get a whole new level of entertainment by making those birds angry yourself!! If being the good guy of the story does not go with you then join the dark (and fun) part of the story.

This prototype aims to scare unwanted pigeons on the rooftop of Kumpula Kampus. The main idea emerged from being wondering what I could do to help the plants from my family garden. Initially, I thought of a common problem we had in the front yard where it is common that random dogs goes to the garden and pee on the grass or plants we own. Thus, I thought that spraying water every time they come close might scare them and keep the garden safe from unwanted visitors. At the same time, I was searching for other ideas, one of them involved trapping small animals or taking pictures of them which sounded interesting but, not convincing enough. After a small talk and many jokes about the project, Samu Varjonen mentioned that trapping animals could be interesting since they have a problem with pigeons on the rooftop of the campus.
This talk lead to the creation of this fast summer project but, many small details were missing yet. Trapping pigeons might not be the best way to get rid of them, or at least it sounds like a heartless option, thus spraying water on them to scare them could be a potential option … as long as they do not start taking summer showers up there. I started to find projects that might be doing something similar. I found a project using Arduino and a motion detector to shots water at a random direction once the sensor detects movement. This project brought an important piece of information to this summer project, using a windshield water pump to not only spray water but aim to the target. You can see this project here.
Now with a more concrete idea and the previously mentioned project in mind, I wanted to extend it. Since I had no motion detectors at hand and I was in a hurry to start, I decided to use a camera which I was able to use not only for detecting motion but approximate the location of the target. Therefore, creating the final prototype for this summer project.
Prototyping
Requirements
The software and hardware required for the project includes:
- Raspberry Pi 2 with Raspbian
- A camera
- OpenCV library for the camera
- Windshield water pump
- Servo motor
- Diode
- TIP122 Transistor
- Two 1k Resistors
- Power supply for the motor, in this case a small laptop charger (12v – 3 amp)
Extra (Not used but could be easily extended)
- 2k resistor
- Extra 1k resistor
- URM37 ultrasonic sensor
Development
First, we have to install OpenCV on the Raspberry Pi. There are some tutorial available online in how to do it. The original library page is can be found here and one of the tutorials I considered really useful can be found here.
Second, we have to plug all the hardware. The following diagram contains 3 out of the 4 basic parts for creating this project. On the right side is the servo motor, which was directly plugged to the Raspberry Pi and contains only an input signal which modulates the direction. On the middle is located the control for the pump, in this project the power supply was a small laptop charger which Samu helped me to build. The left side, which is not included in the code of the project but I think that it can be easily extended is the sonic sensor, expected for avoiding shooting at far objectives and improve aiming accuracy. This feature was emulated here using the camera and will be explained in the following paragraphs. The fourth part is the camera but, in this case I plugged via USB and therefore it is not included in the diagram.

Once we have installed OpenCV, we can use the library for creating a motion detection system. In a nutshell, the system first have to chose a background image. In order to avoid problems with the first frames received and approximating the background image, the code read continuous frames in gray scale, smooth them using Gaussian blur and calculate the mean of squared error until a sequence has a similar value. This calibration only happens at the beginning of the program but, I think this should be calculated once in a while in order to adapt to small changes in the environment. Once it is calibrated, the system keeps reading frames and calculating the absolute difference. The difference can be used as motion detection since they are changes in the background but, in order to avoid noise and not significant changes, only the biggest change is taken into account and it has to go beyond an empirical threshold in order to be considered as movement. The movement is enclosed into a circle using the library and based on the location on the screen and the size of the circle we can approximate the position to aim for and a naive distance to the target.
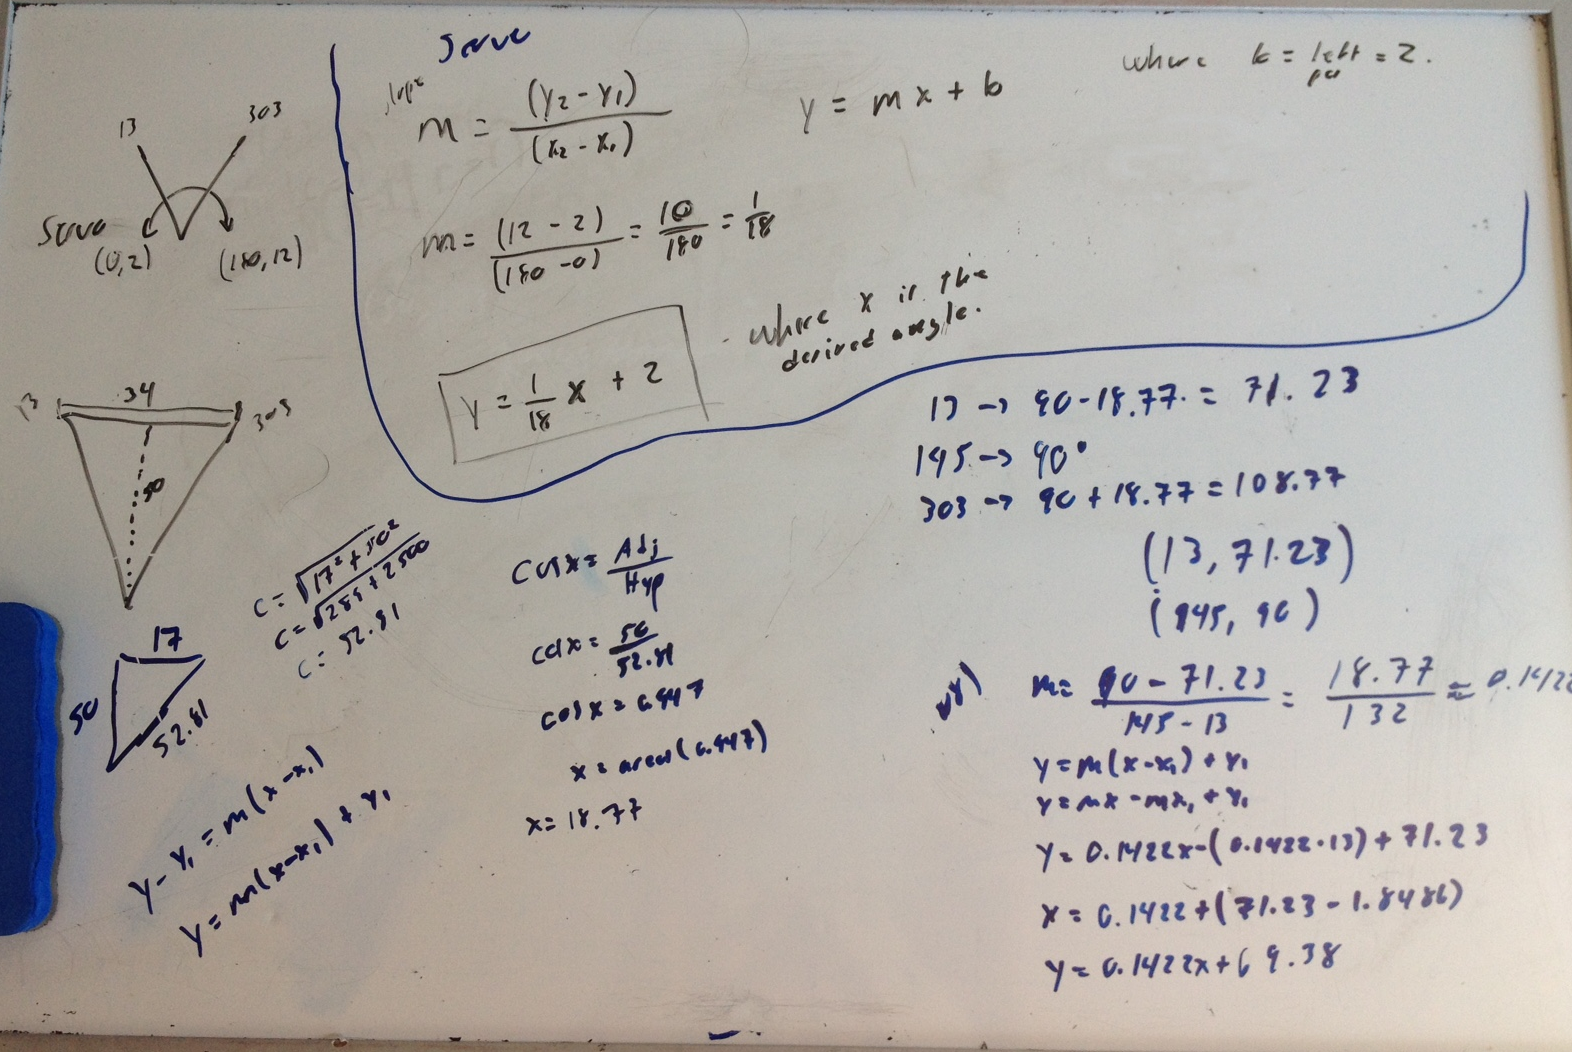
The position of the servo with respect to the location of the movement in the frame is approximated using basic algebra. I measured the width of the camera vision at some given distance. Thus, we have a triangle with two known values which were used to calculate the angle of aperture. Hence, this angle can be given to the servo for aiming to our target.
In a similar fashion we can calculate the required duty cycle for each angle. For instance, we can easily obtain the values that give the rightmost and leftmost positions for the servo and then calculate the rest using those values.
Finally, for the pump we only require to send a high signal to the GPIO in order to shot, and return it back to low after some given time. Therefore, completing the required code and completing the system.
The source code can be found here.
Eventualities
During the development I experienced some small eventualities that delayed the development and I would add here as warnings since some of them might be crucial. First, beware of the power supply you are using for the Raspberry Pi since it was the cause of many of my problems that showed as random errors or low performance in the best of the cases. Second, beware of the use and abuse of threads in the Raspberry Pi. Threads can increase performance in many cases but the Raspberry Pi has its limits thus, decide what would help the system if running on threads. In this project I only left the frame capturing part in a thread but only the capturing part since adding some calculations on the same thread stuck completely the system. Finally, while applying divide and conquer with the different tasks works great for developing and testing, keep in mind that the Raspberry Pi would have some problems once everything is running at the same time due to its limited power. This last eventuality made me rework half of the code in order to improve its performance.
Testing
Demo
Author
Angel Gallegos