Calendar and timetable
The University of Helsinki has several online services that include calendar functionality. For example, the calendar in the My Studies page shows a timetable of the courses you have registered for.
More information about planning your studies can be found in chapter Scheduling your studies.
Office 365 calendar
Unlike services that offer limited calendar functionality, the University of Helsinki’s Office 365 e-mail account includes a comprehensive calendar with features such as the following:
- receiving and processing incoming calendar invitations
- inviting other users to your events by e-mail
- importing events from other calendars and timetables
- synchronising your events with other systems, such as the calendar in your phone
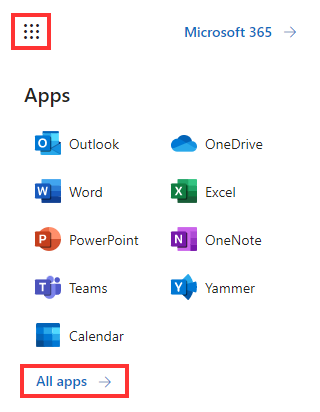
You can access your calendar via the Outlook Web App (OWA) by clicking on the “waffle button” at the top left corner and selecting Calendar (see the image below).

On some mobile devices, the calendar button may be located at the bottom of the display!
Creating a new calendar event
Once you have opened your calendar, you can create a new calendar event for your own use or to be shared with others by clicking the New button.
First choose the start time and duration of the event from the Start and Duration menus. You can also set a personal Reminder to be displayed a specified amount of time before the event.
Type a name for your event in the Event row and indicate its Location. You can reserve a room from the facilities available to you (such as the group work rooms in Aleksandria) by clicking the Add room button. This will display a list for you to choose an address and room and reserve it for your event, provided that the room is available.
If you wish to invite others to your event, you can add them by typing their e-mail addresses – or if they are university students or staff, their names – in the Attendees row. If the invitees are found in the university address book, OWA will automatically suggest matching names as you type.
Confirm your choice by pressing Enter when the correct name is highlighted (or when you have entered the e-mail address in full) and repeat the process for other invitees. You can also send an invitation to a mailing list, in which case all of the list’s members will receive it. However, please refrain from spamming and remember to follow the Terms of use of the University of Helsinki’s information systems and the Terms of use for Microsfot 365 when using the calendar!
Processing calendar invitations
The event you created will appear in your calendar and the persons you invited will receive an e-mail request to either Accept or Decline your calendar invitation.
To inform the inviter of your participation, you should acknowledge the invitation with a response, regardless of whether you accept or decline the invitation. If you want to compose a response message to the inviter and include it in the confirmation message, choose Edit the response before sending.
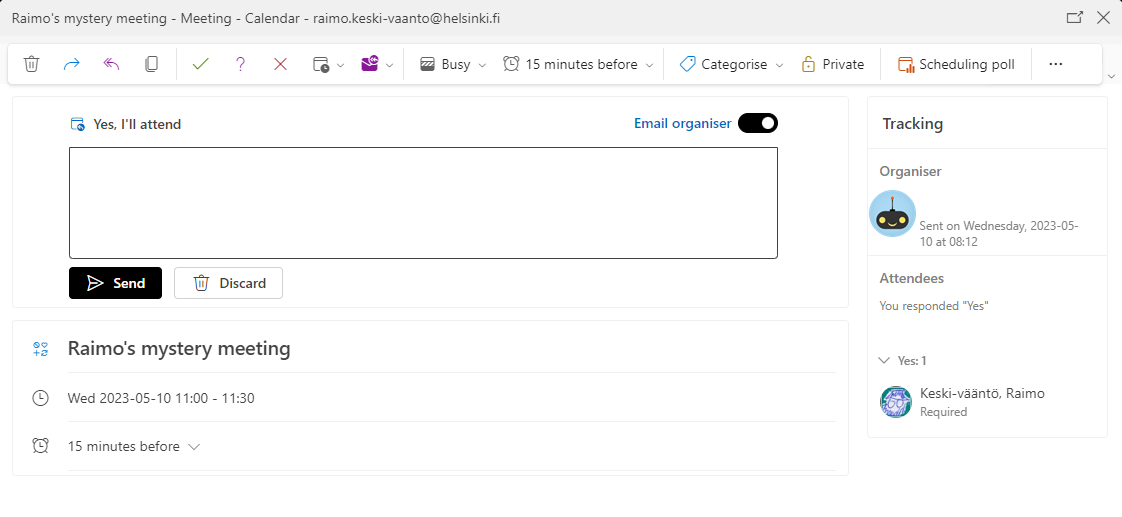
If the proposed time is not suitable for you, you can also send a Tentative acceptance or Propose new time.
If you want the inviter of the event to be informed of your participation, choose to send the response. An invitation which has been accepted without a response does not show to the inviter of the event in any way!
Synchronising the calendar
If you start using the university’s Office 365 e-mail on your mobile device, you also have the opportunity to synchronise the calendar in addition to your e-mail. The events and changes in your Office 365 calendar are then also shown in real time in the calendar application of your mobile device. As you can automatically import events to the calendar from several sources (such as a Google calendar), you should collect all the calendar events related to your studies and your free time to the same place.
Contact information and address book
When sending e-mail, it is recommended that you check the recipient’s exact address from Outlook’s University of Helsinki user directory before sending the message – particularly if the recipient’s name is quite common. In addition, in your own address book you can find the contact information for people you have exchanged messages with or otherwise added to your address book.
Office 365 user directory
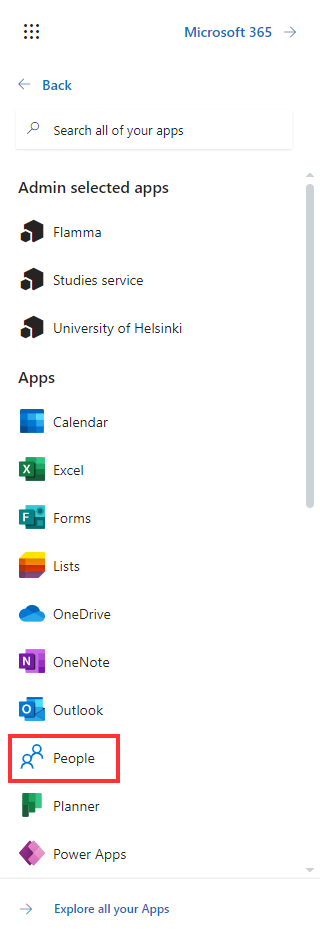
University students and staff can find each other in Outlook’s user directory. In the Outlook Web App browser application described below, the user directory can be accessed by clicking the “waffle button” in the top corner of the display and then the People icon.
- Click My contacts on the left-hand side of the directory to display your address book, which contains the contact information for everyone you have exchanged messages with using OWA or whose contact information you have otherwise added to the address book (this can be accomplished, for instance, by clicking the New button at the top left corner of the display).
- Click Directory on the left-hand side of the directory to display all users who have a University of Helsinki user account.
- You can search for a person by entering the person’s name or address in the search field with a magnifying glass icon and pressing Enter. Click on the X symbol next to the magnifying glass to cancel the search and return to the previous screen.
- You can also browse information on groups and mailing lists accessible to you as well as facilities that you are authorised to make reservations for.