Most word processors have a feature for creating Tables. You can create a table with the table feature of the program or draw the table with another program and then import it to the word processor document. Note that you can often create tables within tables, too.
Creating a table
To create a table where the cursor is currently, click on Table on the Insert tab and select the number of columns and rows you want from the list that opens:
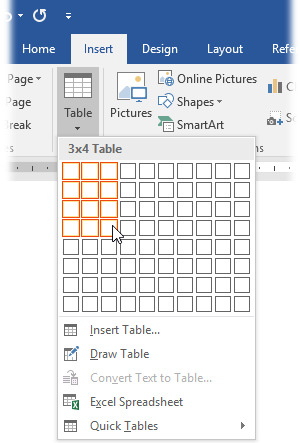
After making the selection shown above, the following table appears:
Write the data into the table. You can go from one cell to another with the arrow and tabulator keys.
Navigate inside the table with the following keys: Arrow keys: go up, down, or to the sides
Shift + Tab: go to the previous cell
ALT + Home: go to the first cell in the row
ALT + End: go to the last cell in the row
ALT + Page Up: go to the first cell in the column
ALT + Page Down: go to the last cell in the column
Enter: start a new paragraph inside the cell
Tab at the end of the last row: add another row
Moving a table
The easiest way to move a table from one place to another is to pull it in the desired direction by the handle in the upper left corner. You will see the handle when you move the cursor on top of the table.

Changing the size of a table
You can use the size handle to change the size of a table without changing the properties of the rows and the columns. The size handle appears when you place the cursor over the lower right corner of the table.
Selecting table objects
When you want to modify a table, first select the part of the table that you want to modify.
| Task | Method |
| Selecting a cell | Click on the left edge of the cell |
| Selecting a row | Click on the left of the row |
| Selecting a column | Click on top of the column |
| Selecting several cells, rows or columns | Roll the mouse over the cells, rows or columns with the button pressed down |
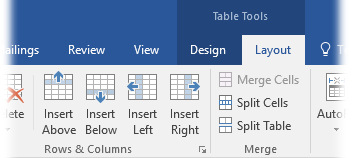
Inserting rows or columns
Add rows or columns by selecting a) the row above which you want to insert a new row or b) the column on the left of which you want to insert a new column. In the Layout tab of the ribbon menu, select the direction of the table in which you want to add rows or columns.
You can also add a new row at the end of a table by pressing down the Tab key when the cursor is in the last cell of the table.
Deleting rows and columns
To delete a row or column, select it, then open Delete on the Layout tab, then select Rows or Columns in its sub-menu.
Merge and split cells
If you want to merge the cells of a row or a column into one cell, select the cells that you want to merge. Then select Merge Cells on the Layout tab.
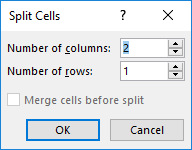
If on the other hand you want to split a cell into several cells, select the cell you want to split. Then select Split Cells from the Layout tab. Specify how many rows or columns you want to split the cell over (see image below). Accept by clicking on OK.
If you want to split the whole table, select the point where you want to split it, then click on Split Table on the Layout tab.
Changing column width
To change the width of a column, place the cursor on top of the edge of the column. the cursor will change into a double arrow (see image below). Press down the mouse button and stretch the column to the desired width.
You can also change the column width according to exact measurements by selecting the columns, then clicking on the arrow button in the lower right-hand corner of the Cell Size group on the Layout tab. Go to the Column tab and write the width you want for the column in the Preferred width box.
Sometimes the last column of a table spills over the side of the page so that you cannot adjust its width from the right edge. In such cases, select the column and make it narrower through the menu window described above!
Changing row height
When you want to change the height of a row in a table, place the cursor at the bottom edge of the row you want to change. The cursor will change to a double arrow. Press down the mouse button and drag the row to the desired height.
You can also change the row height to a certain measurement by selecting the row and then clicking on the arrow button in the lower right-hand corner of the group Cell Size on the Layout tab. On the different tabs of the window that appears, you can do the following, among other things:
- The Row tab: specify the height of the row. At Allow row to break across pages you can specify whether the page can break in the middle of a cell.
- The Table tab: specify the exact location of the left edge of the table at Indent from left. You can also position the table horizontally on the same tab at Alignment > Left, Center or Right.
Table formatting
The tables can be formatted through the styles, but you can also use most tools in the Font and Paragraph groups on the Home tab, as well as the features in the Font menu window. Always select the cells, rows or columns you want the formatting to apply to before formatting them.
Character formatting
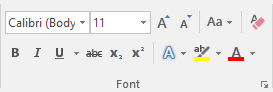
Format characters with the help of the buttons in the Font group on the Home tab.
Alignment
To change the Alignment of the table cells, right-click on the selected table and select Table Properties… from the window that opens. Select the alignment you want. This will define the alignment of the text inside the cell both horizontally and vertically.
Borders and shading
You can format the borders of a table by selecting the area in the table that you want to format. You can shape the border lines of a table by selecting the area of the table to be formatted and clicking the arrow next to the Borders button in the Table Design tab. The program will show you different border alternatives (see image below). Select the border style you want with the mouse. If you want to delete the borders from the selected area, click on No Border. If you delete the borders of a table, the program will still show them in greyscale, but they will not be printed out on paper.
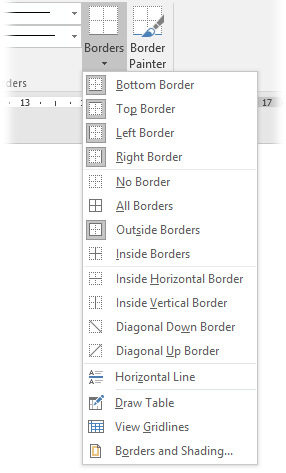
You can shape the border lines of a table by selecting the area of the table to be formatted and clicking the arrow next to the Borders button in the Table Design tab.
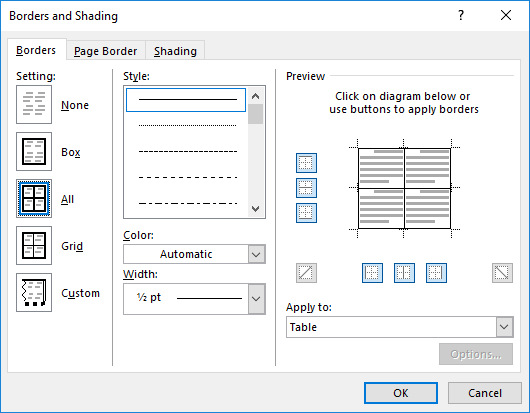
Select the style from Style, the colour of the borders from Color, and the width of the borders from Width. The area shown in Preview is the part of the table that you have selected. Click on the place where you want to insert the borders you have formatted. When you have formatted all necessary borders, accept the changes by clicking on OK.
Borders are handy for formatting other parts of a document than just tables; you can add borders o e.g. tabulator lists, headings and paragraphs.
Table styles
If you want to finish off the layout for your table you can use one of the table styles in Word. To access them, open the Table Design tab and click the arrow button at the bottom right of the Borders tool group. A list of different ready-made styles will open up. You can see how they will affect your table by rolling your mouse over each style. Select a style by clicking on it with the primary mouse button.