
This page covers the following topics:
- Page numbers
- Table of contents
- Setting page numbers on a part of a document
In most word processing programs, you can automatically add different parts, such as page numbers and tables of contents, to the document. This page contains information on how to use these functions. The instructions are for Microsoft Word, but the same principles can also be applied in other text processing programs.
Page numbers
Nearly all word processing programs have the ability to automatically add page numbers to a document. You should never add page numbers manually!
Adding page numbers
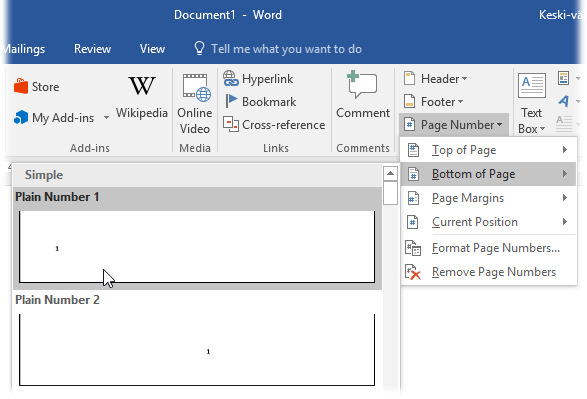
To add page numbers to your document, select the Insert tab on the ribbon, find the Header & Footer group and select Page number. A menu will be displayed (see image below), allowing you to select the location of the page numbers (top or bottom of page, page margins or the current position of the mouse pointer). Move the pointer to the desired location choice and select the suitable style from the alternatives in the submenu.
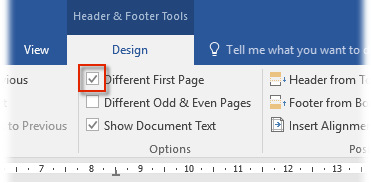
If you do not wish to add page numbering on the first page, select the Different First Page check box on the Header & Footer Tools tab, which comes up when the header and footer of the document are active. For more information on headers and footers, see chapter P.2 Word processing – Headers and footers.
Removing page numbers
The page numbers are located in the header or footer of the document, depending on where you have chosen to add them. If you wish to remove a page number added in the way described above, follow these instructions:
-
- Go to the identifier in question You will see the page number in a text box.
- Click on the box to activate it.
- Remove it by pressing Delete.
Setting page numbers on a part of a document
If you divide the document into parts, you can add page numbers to just one specific part of the document. For instance, for a Bachelor’s or Master’s Thesis, you usually do not want to have page numbers on the covers or the table of contents, so they should start with the actual body text.
When you want to divide the document into parts, follow these instructions:
- Remove the earlier table of contents, if your document had one.
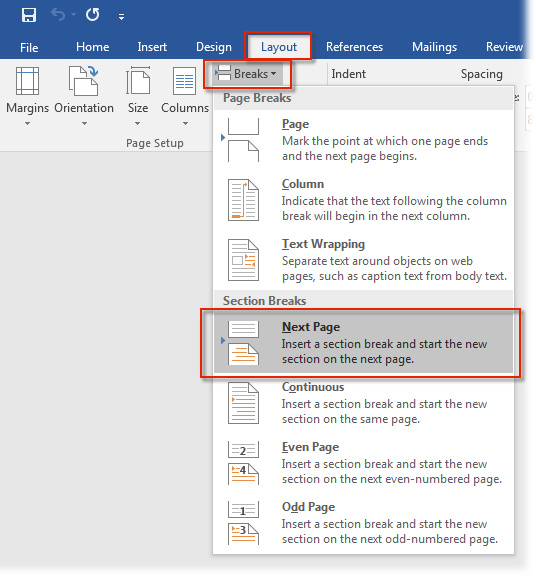
- Move the cursor to the end of the last page on which you do not want to have a page number. In this example, the page would be the one after the table of contents. Insert a page break through the Layout menu here.
- Select the option that has the next section begin on the next page (Breaks > Section Breaks > Next Page).
- Move the pointer to the page on which you want the page numbers to start. Activate the footer by double-clicking the bottom margin of the page. The actual text in the document will be displayed gray, and you will be able to edit the footer.
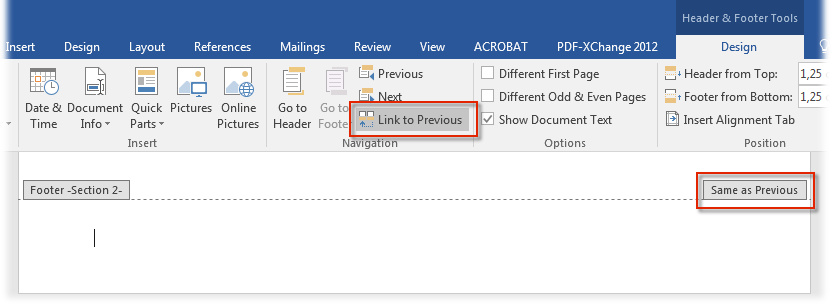
- The text Same as previous indicates that the footer continues unchanged from the previous section.
- Click Link to Previous in the menu.
- The text Same as previous should have disappeared from the bottom right corner. Now you can edit the page numbers of the section regardless of the numbers on the previous section.
If you need to add elements such as a cover page, several different page number systems or lists not included in the page numbering, section breaks are the key to creating them in your document!
Table of contents
Setting up a table of contents is easy if you have used the heading styles (Heading 1, Heading 2, etc.) to format the headers in your document. When you create a table of contents, the program will find the headings formatted using the styles and use them to generate the table of contents. The table of contents will show the document’s headings in the page order.
Word processors offer different predefined formats for tables of content. You can also change the appearance of the table of contents by editing the style of the table of contents. Styles for tables of contents are normally named from TOC 1 to TOC 9: the name of the style comes from the words Table of Contents, and the numbers refer to the heading levels.
If you change the appearance of the table of contents by editing it, any changes you make will disappear when you update the table of contents! To achieve permanent changes, edit the style used by the table of contents.
Creating a table of contents
To create a table of contents, your document must use heading styles. Move the cursor to the location where you want to place the table. Usually it is created on a blank page at the beginning of the document. You can create a new blank page in the document by placing the pointer at the beginning of the document and selecting Blank page on the Insert tab.
Then select the Table of contents icon in the Table of contents group under the References tab. A menu will open displaying the list of automatic table of contents styles available in the program, allowing you to select one to use in the new table of contents.
Customising the table of contents
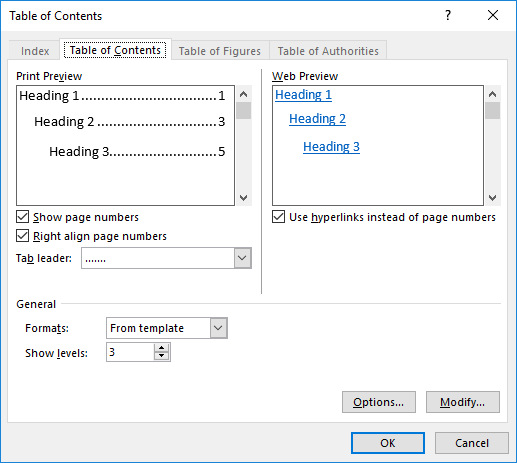
Alternatively, you can customise the table of contents of your document as you wish by clicking Custom Table of Contents. This will open a dialog box (see image below). Now you can customise the appearance of your table of contents to suit your wishes. The Preview window displays the different options. At the bottom of the window, you can specify the settings for page numbers, the number of heading levels included in the table of contents, and the leader character to be used.
If you want to customise the appearance of the table of contents yourself, select From template. Then click Modify to open the Style dialog box. In the dialog box, you can make changes concerning fonts and other settings for the table of contents. Accept each change by clicking OK, and approve the settings by clicking OK. The program will create a table of contents at the location you specified.
Please note that the table of contents must be created in the document where the actual text is. Otherwise the table of contents cannot be updated.
Updating the table of contents
The table of contents is normally not updated automatically. When you add or remove text in the document, you also have to update the table of contents.
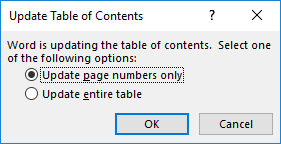
In Word, you can perform the update by right-clicking the table of contents and selecting the command Update Field in the pop-up menu. If you have added any new headings in the document or changed them, select Update entire table. In other cases updating the page numbers only, is likely sufficient. Accept the update by clicking OK.
Multilevel list as a heading style
You can create multilevel lists as their own heading styles in the Styles menu on the Home tab. This will allow you to automatically number headings in the text. The numbers will also change automatically for each heading level and in the table of contents in case you insert new paragraphs and headings.

 To create a new multilevel list, go to the Home tab and in the Paragraph group, click on Multilevel List and then select Define New Multilevel List. In the window displayed, you can define the formatting and linking separately for each level.
Define a multilevel list in the following way:
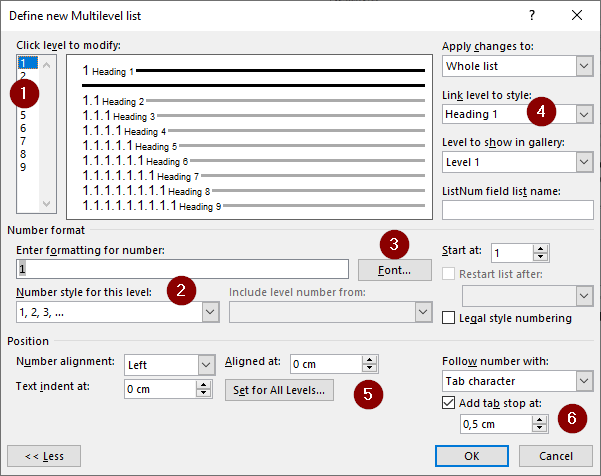
- First, select the level you want to edit. Start with level 1.
- Select the numbers in the Number style for this level In the Enter formatting for number field, enter the character you would like to include after the number, such as a dot or a bracket. To include numbers from previous levels in the heading, move the cursor in front of the number and select the numbers to add to the heading in the Include level number from menu. Always start with Level 1 and then add the other levels in order. You can also insert characters between numbers.
- The Font button allows you to edit the font settings of the numbers. This setting only changes the formatting of the number.
- The Link level to style button allows you to link the level to a specific heading level. Level 1 is linked to Heading 1, Level 2 to Heading 2, and so on.
- Use the Position field to define the position of headings. We recommend left-aligning the number. If you want all the headings to be at the same distance from the left margin, define the same number for each level in Aligned at. Text indent at defines where the text starts if the heading is divided across two lines. If you define the same value for Aligned at and Text Indent at, both lines will be aligned.
- Tab stop defines where the text of the heading starts after the number.
- To change the font and paragraph settings for the heading, go to the Styles group in the Home tab, right-click on the style you want and select Modify. Click on Format to access more formatting settings, including advanced font settings and paragraph settings.
