This material is not fully accessible and is not part of the accessible exam.
Before you start editing
Often, it is necessary to edit the recorded video. In the easiest case, this involves a single video file (a “clip” in video editing jargon) with an unnecessary part that you want to cut out, or the volume levels might change disturbingly between different scenes and you want to smooth this out. More ambitious video projects can contain material from several different sources in tens or hundreds of separate clips that need to be combined into a single video. In this case, prepare for more work, because editing a video can be very time-consuming!
As with any other project, a good script will help keep things under control. Make sure your video files are in good order and that the computer you are using to edit the video has enough free storage space.
Video captions
According to the accessibility requirements of the Act on the Provision of Digital Services, videos must have captions of they are published in an online service for public use. Stored videos must be equipped with captions within 14 days of publication. Finnish videos must have Finnish captions, Swedish videos Swedish captions, and English videos English captions.
Live video broadcasts and videos available in a closed environment for a limited time, such as individual Moodle courses with a limited audience, are not required to have captions.
For general instructions on video captions, see Helpdesk’s page on captions.
Editing software
Most video editors are non-destructive in nature, which means that the editor does not modify the recorded video files as such, but leaves the original videos intact. The editing software creates a “project file” of the individual video clips, and the changes made in the editor, any added subtitles and other modifications are saved in the project, which is then exported as the new video file in the desired format.
Unlike many other programs, video editors do not damage original files, but rather refer to them. That is why you should also be careful where you initially save the videos because moving them from one place to another might cause some projects to stop working. On the bright side, if anything goes wrong in editing and you do not notice in time, you can simply create a new reference to the original video file within the project and make the necessary changes.
Video editing with ScreenPal
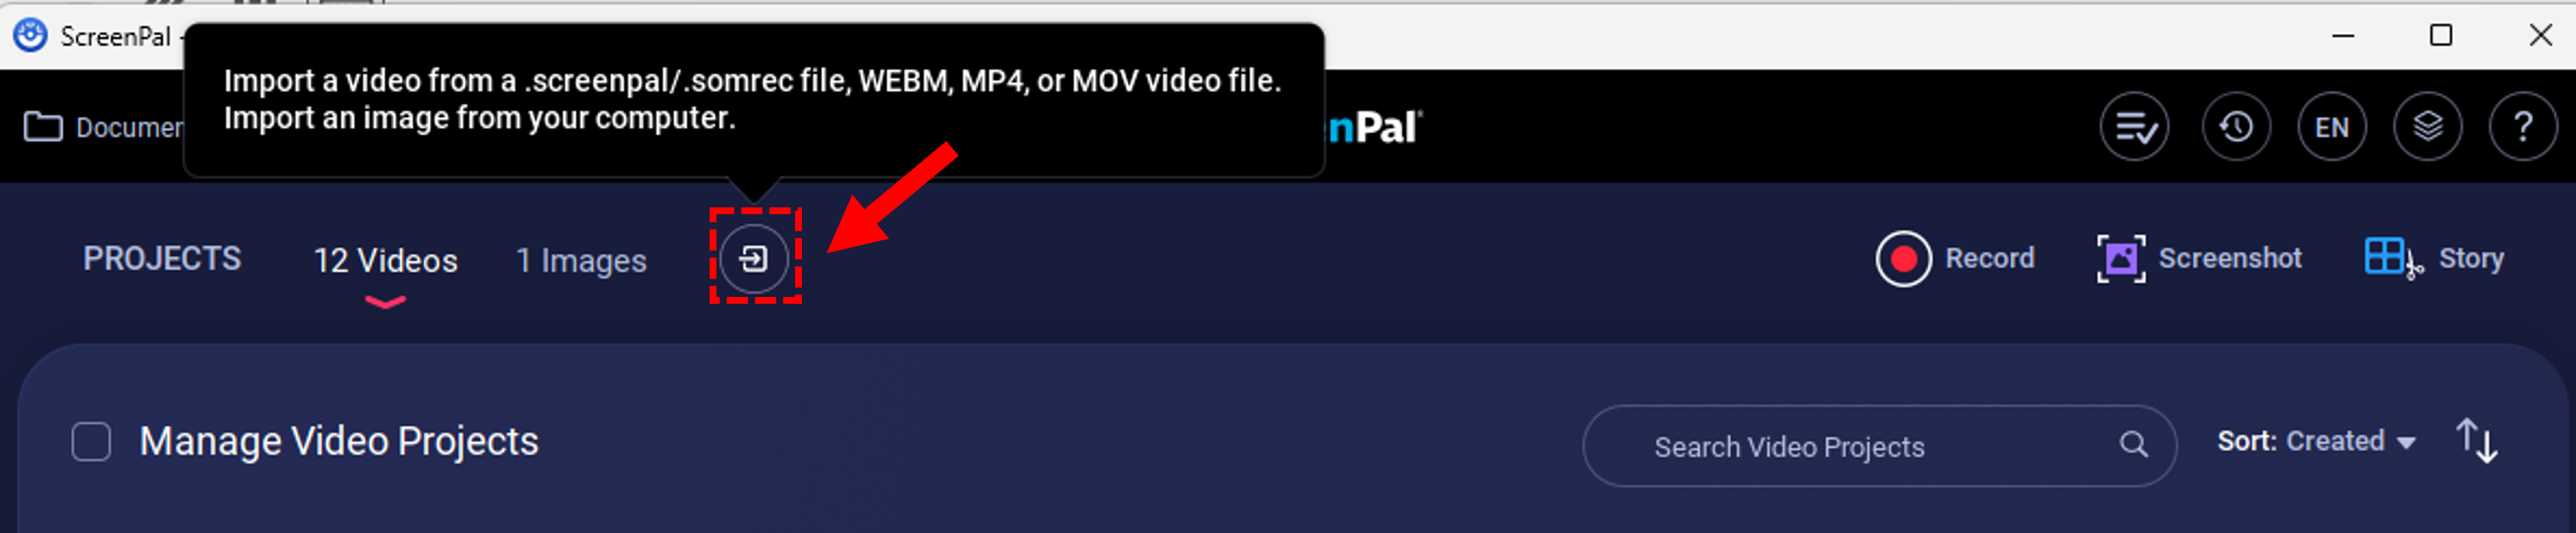
The previous chapter dealt with creating a screen capture video using ScreenPal, but the software can also be used to import a video created elsewhere for editing with the ScreenPal editor. Use the Import-button on the front page to add a video from your computer to the list of available ScreenPal projects.
At this point it might help to open a browser window with the Helpdesk’s ScreenPal help page.
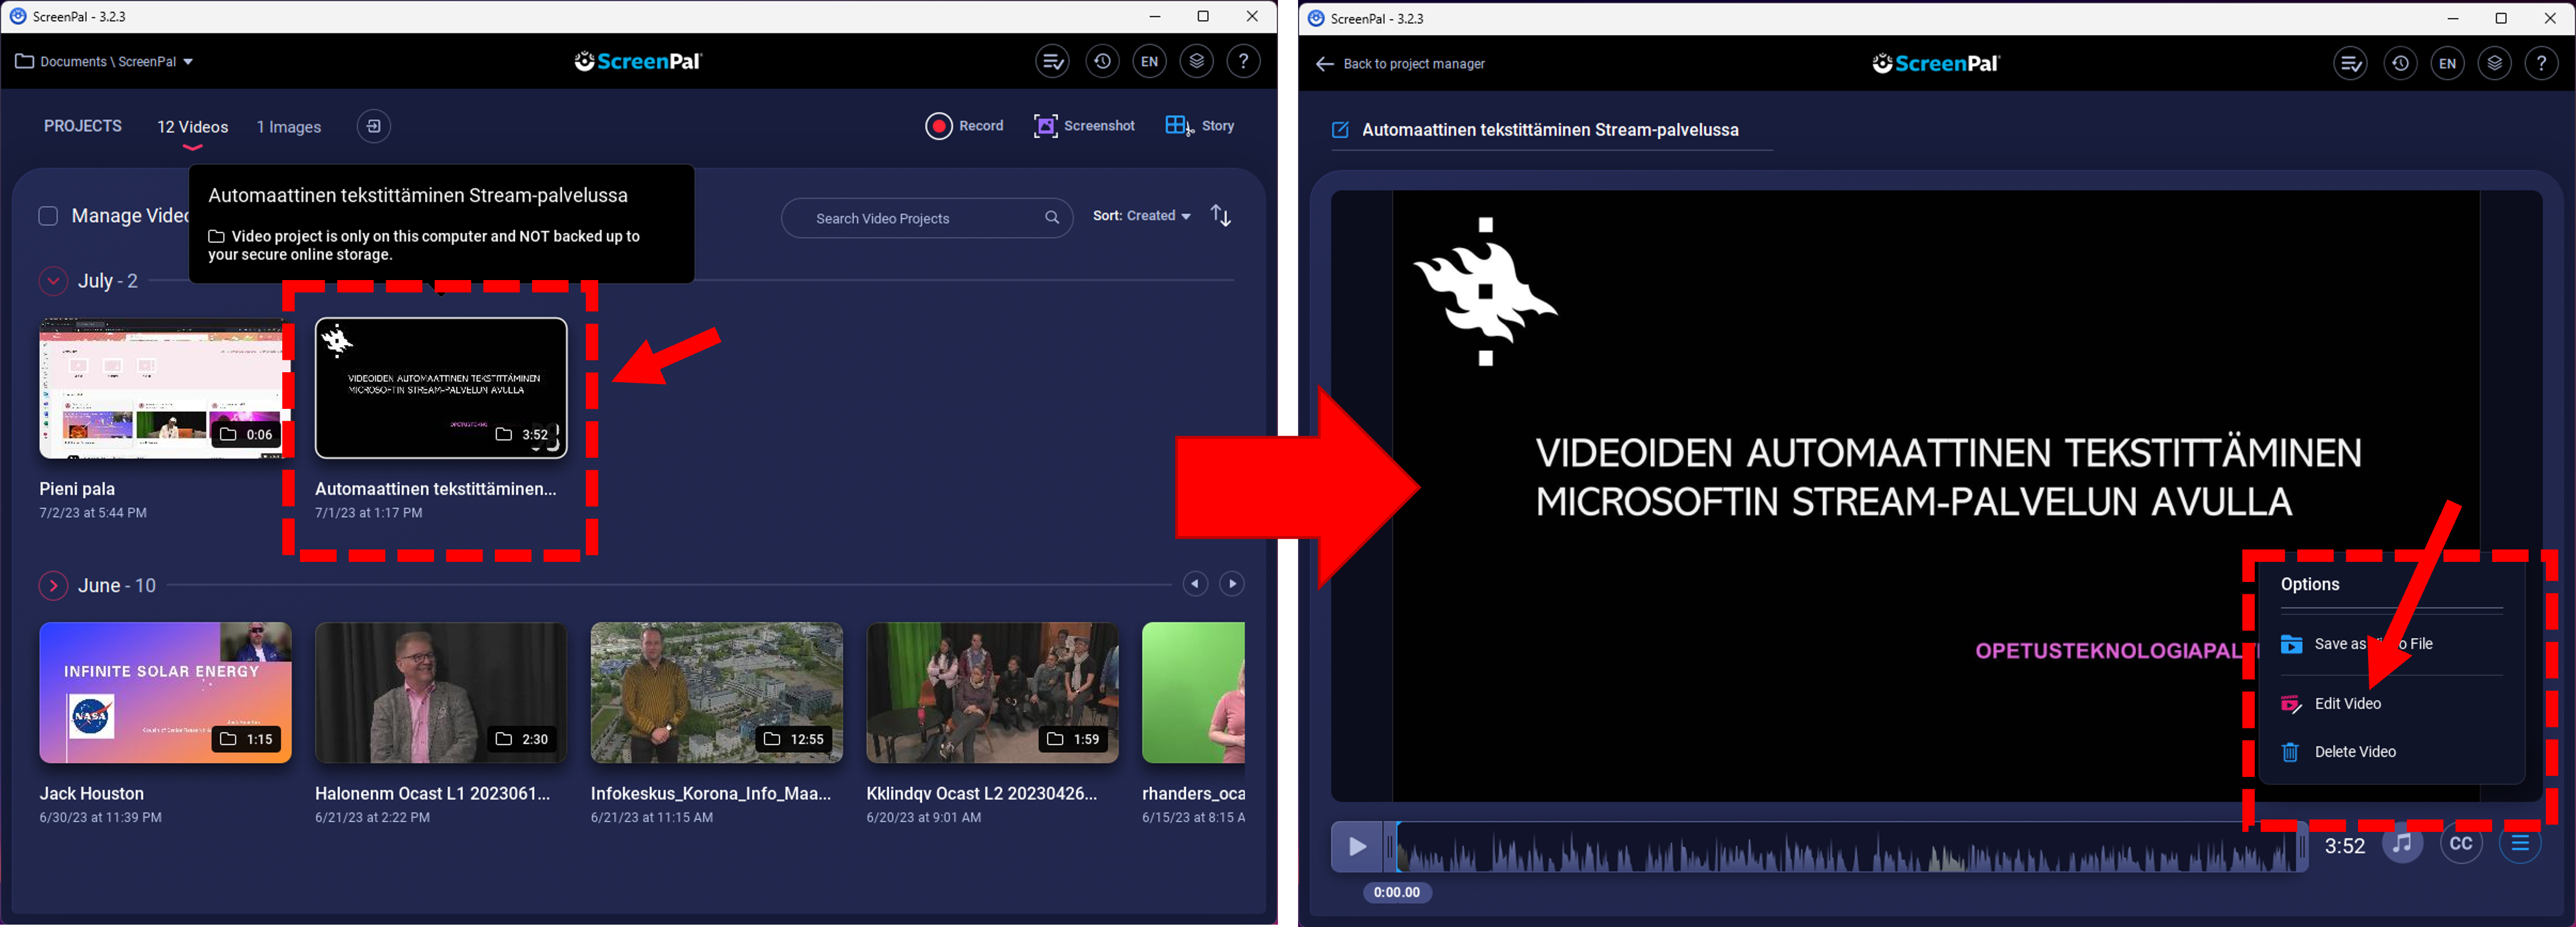
- Click on the ScreenPal project you want to edit by clicking it, and a preview windows opens. Here choose Edit Video to enter the editing view.
- Now you see the preview of the video taking up most of the space and around it are a number of helpful settings and tools for manipulating the video. The most important tool is the timeline at the bottom of the screen, click on it allows you to move to any timeframe in the video which is then indicated by a blue marker. Above the blue marker is a Tools-button that lets you choose an editing function that will be used at that precise point in the video. Next to the Tools-button is a “+”-button that shows the previously used tool, in order to help with repeated edits using the same function.

- Clicking on a video timeline opens the Tools menu, where you can choose from a number of effects and actions that can be applied to the video. For a description of all available tools, read the Helpdesk instructions.
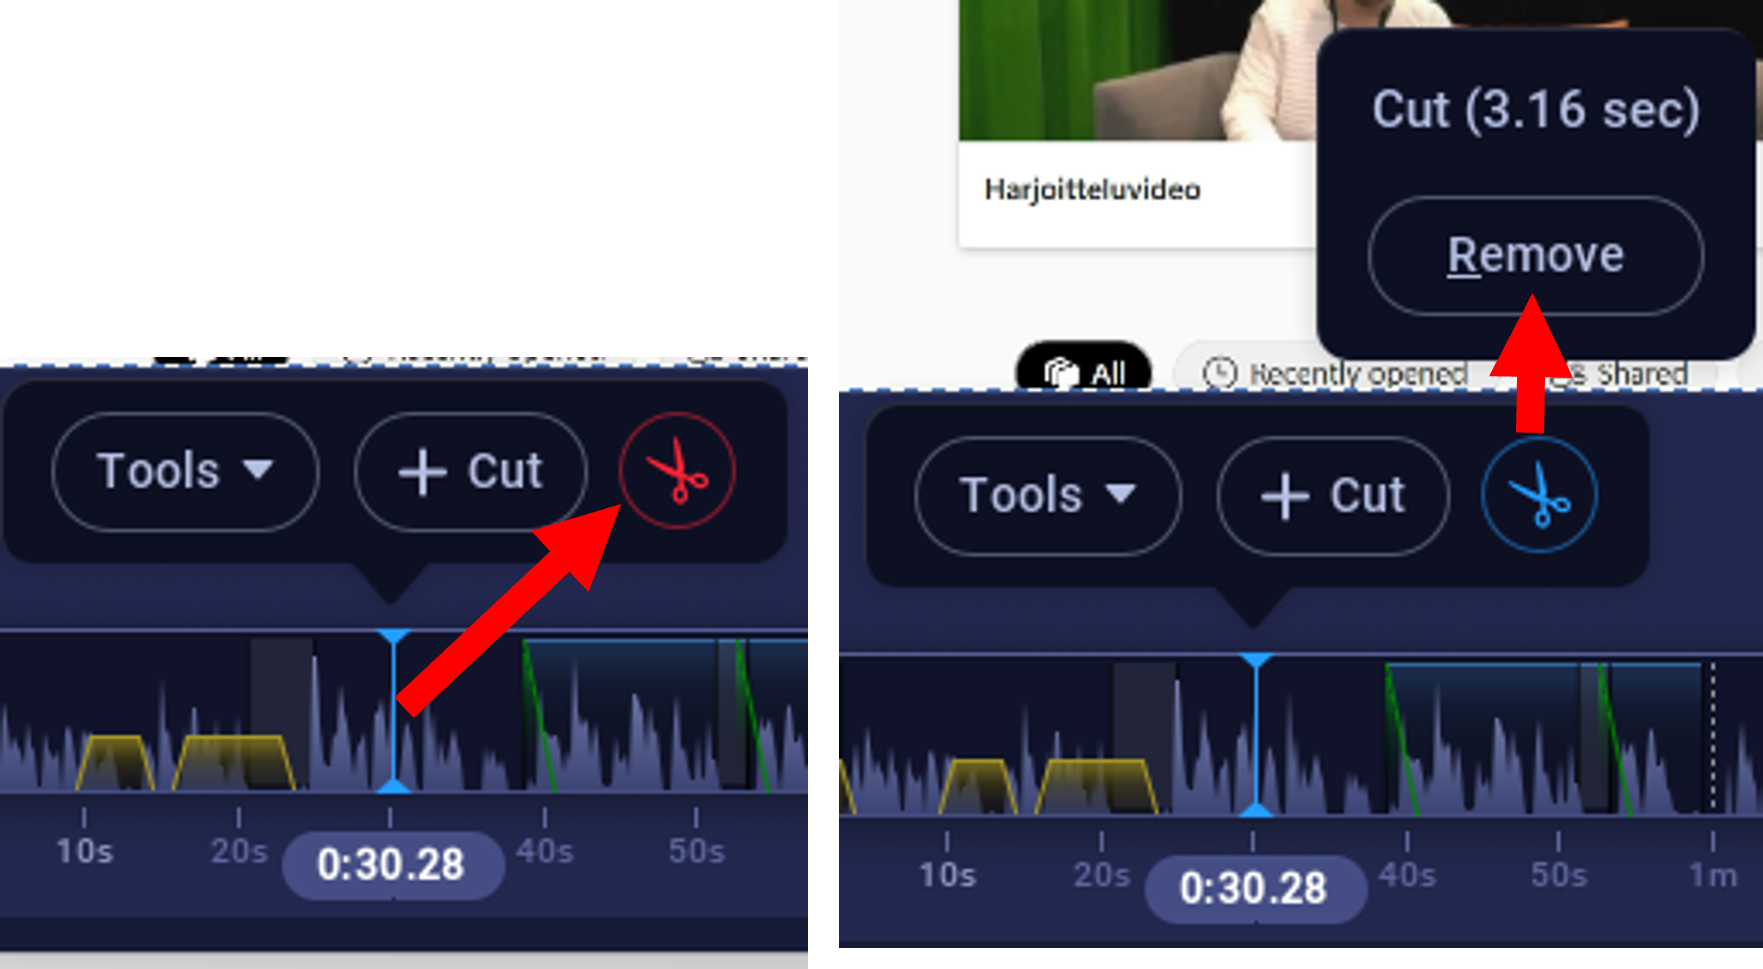
- The most common editing tool is the Cut function which allows you to remove unnecessary bits and pieces from your video. Choose Cut and then using the mouse paint the area that you want to remove with red. The settings for the tools you have chosen are shown above the timeline: next to the Cut-icon you see in seconds how big the cut is that you are going to make, the question mark opens up the quick help for the function, the little Play-button shows you a preview of how the cut will affect the video, Cancel exits the function without making any changes and finally pressing OK will apply the tool to the video.
- The different colours in the timeline correlate with the Tools menu and tell you what effect has been applied – for example, cuts are marked with red. You can alter the settings of effects afterwards by clicking on their colour coded position in the timeline and then selecting the effect icon from the shortcut menu that opens. You can also remove the effect completely by choosing Remove. This means that you can also restore any part of the video you deleted previously using Cut.
- Any recent changes you’ve just made to the video are easiest to cancel with the Undo-button in the upper right corner. Because only the ScreenPal project is being edited, you can always go restore your videos because the original video files are intact.

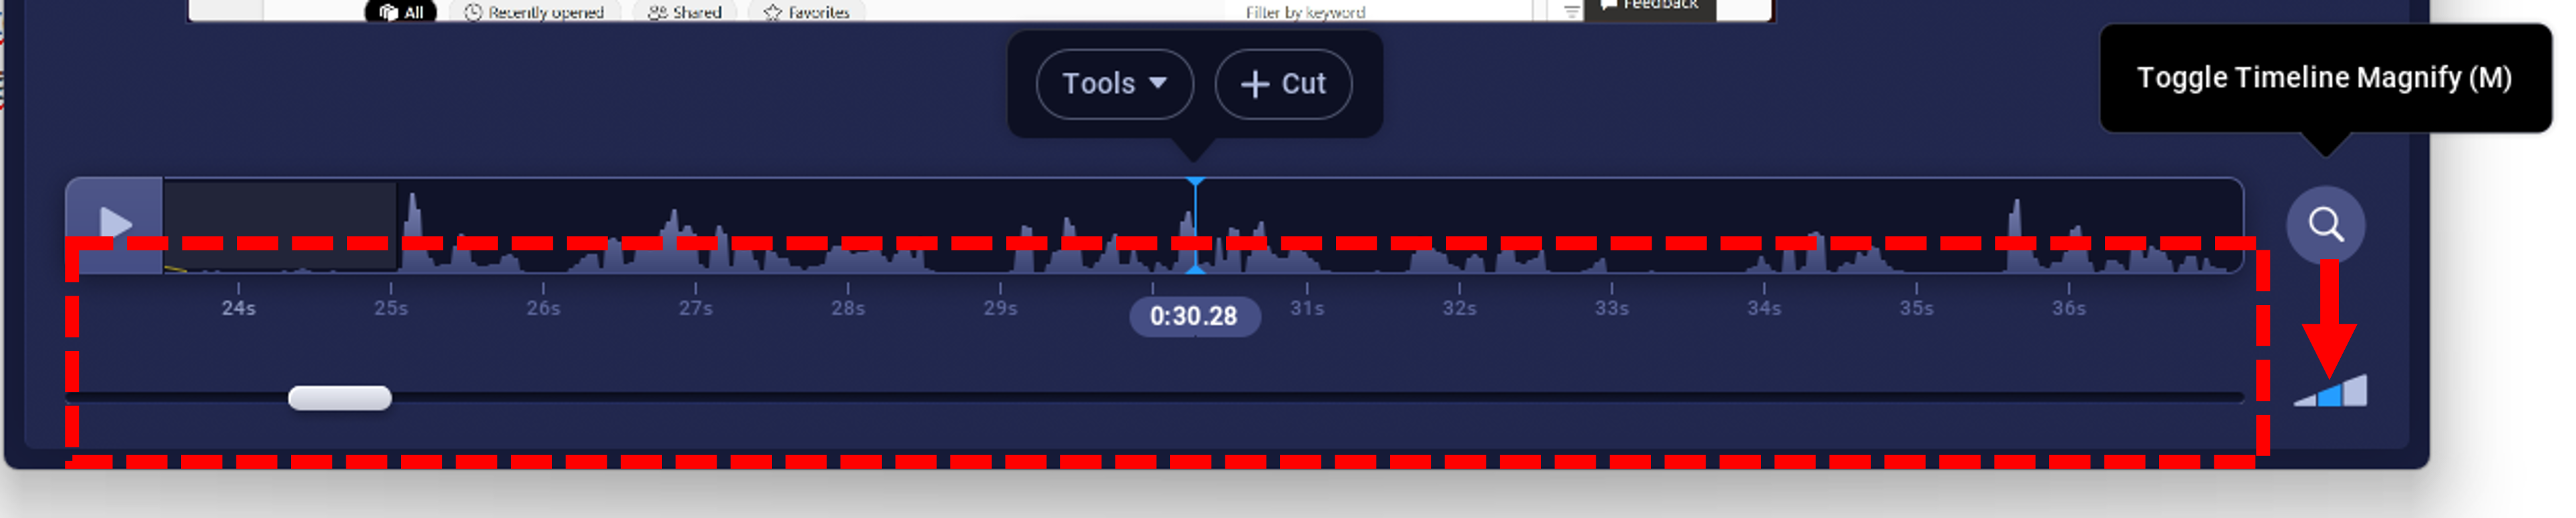
- By clicking on the magnifying glass in the lower right corner, you can select how close to the timeline to zoom, making it easier to choose parts of a long video more precisely. Another way to select a point in the timeline more accurately is using the left and right arrow buttons on the keyboard instead of the mouse.
Combining several videos in ScreenPal with the Insert-tool
We previously used the Tools > Cut -function for editing the video. Another important function in the Tools-menu is Insert, that you use for combining multiple videos.
1. Click on the Tools-button at the point on the timeline where you want to add another video.
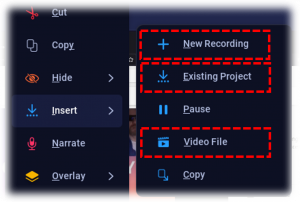
2. Choose Insert and then you may further select the type of video you want to add, for example:
- New Recording: create a whole new screen capture video at this point (see the previous chapter)
- Existing Project: use another ScreenPal project from the front page – that may contain its own edits already! – and it will be added to the project here. This enables you to edit video clips separately and then combine them later into one big project.
- Video File: choose any video from your computer and insert it on the timeline
These simple examples showed you how to cut parts of the video and combine multiple videos in ScreenPal, but the Tools-menu has a lot of other functions too – read the Helpdesk instructions for ScreenPal in order to get the most out of the software!
You can also watch the video below to see how editing works in the older, but functionally identical Screencast-o-matic.
P.6 Editing with ScreenPal – text equivalent
Watch the video above, Basic video editing guide (5:29)
Other options
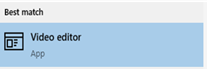 Windows now has the simple built-in video application Video editor. You can find it by searching for ”Video” in the Windows search box, for example. The program is practically part of the Windows Photos image viewer, meaning it can also be started from there, although that is somewhat unintuitive.
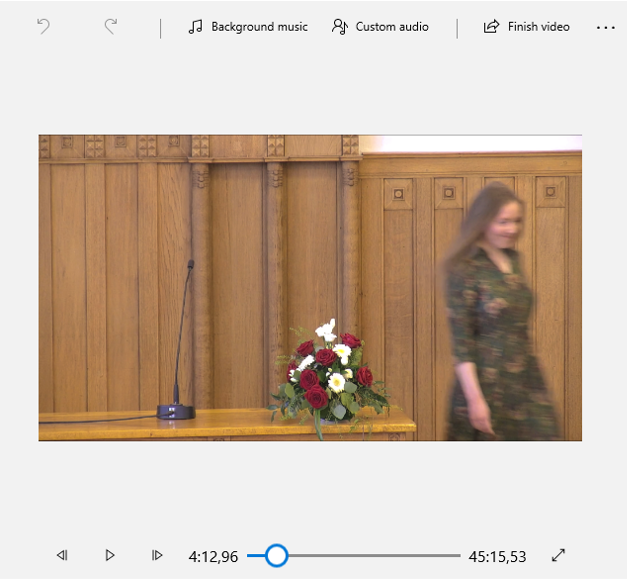
Simple edits, such as removing unnecessary parts, are easy to do using the Trim and Split functions. Unfortunately, audio processing is very basic in this program.
In Windows 11, Microsoft offers a slightly more advanced video editor called Clipchamp.
Apple, Android and Linux
Users of Apple devices are fortunate to have access to the free and user-friendly, yet fairly versatile iMovie for light editing. The ScreenPal program discussed in this manual is also available for Mac, iPhone and iPad.
ScreenPal is also available for free for Android devices and Chromebooks.
There are several free, open-source video editing programs available for Linux computers, of which Kdenlive (also available for installation on UH workstations from Software Center) is recommended for more demanding work and Shotcut for light editing.