Note that the examples on this page are for newer versions of Microsoft Word. The menus are presented in a different way compared to older versions of Word and other word-processing programs. However, other word processors, e.g. OpenOffice Writer, mostly have the same features as the ones presented here.
Always use styles when formatting a long text document (learn more about styles). If the document is very short, you can use character and paragraph formatting to make minor formatting – that is, by specifying the font type and size that you want for the text directly, for example.
Selecting an area for formatting
Any changes to formatting are usually made to a selected area; in most programs, the selected area is shown in inverted colours. Next we will describe the different ways of selecting an area.
Selecting with the mouse
| Selecting methods | Area chosen |
| Selecting an area with the primary mouse button pressed down | Anything between one character and a whole document – you determine the area. |
| Initial click + Alt + final click | – || – |
| Double-clicking a word | The word in question |
| CTRL + click inside a sentence | The sentence in question |
| Click on the left of a line | The line in question |
| Triple click inside a paragraph | The text paragraph |
| CTRL + click in the left margin of the document | The whole document |
| CTRL + double clicks on certain words | Many objects on the same page |
Selecting with the keyboard
Move the cursor to the point where you want to start selecting. Then use Alt, arrow and other keys in accordance with the following table:
| Selecting method | Area chosen |
| CTRL + A | Selects all |
| Alt + left or right arrow | One character at a time in the direction of the arrow. |
| Alt + arrow up or down | One line at a time in the direction of the arrow. |
| CTRL + Alt + arrow | One word at a time in the direction of the arrow. |
| Alt + End | From the cursor to the end of the line. |
| Alt + Home | From the cursor to the start of the line. |
| CTRL + Alt + End | From the cursor to the end of the document. |
| CTRL + Alt + Home | From the cursor to the start of the document. |
Text formatting
You can make a document more easily readable with different formatting. You can either set the formatting while writing the text, or you can set it afterwards. When you want to format the text, first select the area you want to format, and then choose the formatting you want.
Most word processors have a separate toolbar with basic tools for formatting. The image below shows you the Font group in the Home menu ribbon in Word:
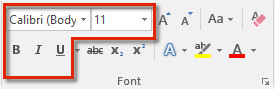
The main formatting tools marked inside the red box above from left to right:
- changing the font
- changing the font size
- bold text
- italics
- underlining
The functions for bold text, italics and underlining function according to the on/off principle. If you want to remove some formatting, select the text area and click on a formatting button. Please keep in mind that an academic text should contain less accentuations than normal text.
In addition to the formatting described above, word processors contain other methods of formatting text, such as different kinds of underlining, font colours, upper and lower indexes and strikethrough. You can remove the formatting from a selected piece of text by clicking on the Clear Formatting button at the top right-hand corner as shown above.
With Word, you can also do the formatting described above in the following way: Paint the text you want to format, click on the Font button in the lower right-hand corner of the Font group, or press Ctrl+D. Choose the formatting you want and click on OK.
Paragraph formatting
In word processors, a paragraph is a text body with one pressing of Enter at the top and another at the bottom of it. Paragraph formatting always applies to the whole paragraph. Such formatting includes alignment and indentations. Paragraph formatting can also be done before starting to write the text or after it is finished.
Line spacing
With most word processors, the vertical line spacing has been set as default (the value is 1), but you can change line spacing according to your needs; in addition to 1, frequently used values are 1½ and 2. With Word, you can change the line spacing by painting the paragraph, clicking on the Home tab and selecting Line Spacing in the Paragraph group (see image below). Select the line spacing you want.

Please observe that you can format the line spacing and the other formatting described on this page through the styles, as well – and it is often worth it! Read more about styles from chapter P.2 Word processing – Styles.
Text alignment
You can align text in four different ways: left, right, centred or justified.
Set alignment by selecting the paragraphs to align. If the formatting should only apply to one paragraph, you only have to put the cursor inside that paragraph. The click on one of the alignment buttons in the toolbar:
![]()
Indentations
Indentation means that a certain part of the text starts further from the left edge than the rest of the text (e.g. headings). indentations are also used when wanting to write the heading and the first line of the paragraph on the same line. you can indent the text before or after you have written it.
 |
 |
|
| Left indentation | Hanging indent |
For a left indentation, do as follows:
- First make sure that you can see the ruler of the word processor. If the ruler is not visible, set it by opening the View tab and then checking the box by Ruler in the Show group.
- If you have already written a paragraph, put the cursor in the paragraph. If you have not written it yet, put the cursor at the start of the line where the paragraph will start.
- Click on the button Increase Indent on the Home tab.
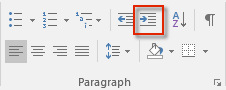
- The indentation will increase according to the default tabulator space each time you click on the button. keep an eye on the indentation mark on the ruler:

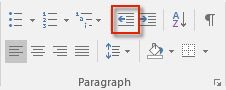
When you want to write in the left margin again, you have to remove the indentation:
- Move to the next empty line by pressing Enter.
- Click on the button Decrease Indentas many times as needed to return to the original indentation.
- Do not forget to watch the ruler!

“Hanging indents” are sometimes used in documents; it mans that the heading is written on the same line as the first line of the paragraph. Make a hanging indent as follows:
- Write the heading on the left side of the document.
- Press CTRL + T once or several times, until the lower triangle of the indentation mark moves to where you want to start the actual paragraph.

- With the tabulator, move the cursor to where you want to start the paragraph.
- Write the paragraph.
- When you want to write a new paragraph, change paragraphs with Enter. You will see that the cursor moves to the left edge again. From the ruler, you can see that the hanging indent is still in place. Write a new heading and continue in the same way. If there is not heading for a paragraph, you can go directly to the starting point of the paragraph with the tabulator.
To remove the hanging indent:
- Place the cursor in the paragraph where you want to remove the hanging indent, or to the next empty line below the text.
- Press CTRL + Alt + T until both triangles in the ruler are at the left edge.
Special characters and symbols
At times you may need characters which are hard to produce using the keyboard (such as ß, ç and æ). For adding such special characters to a text, most word processors have their own symbol libraries.
With Word, you can add special characters by placing the cursor where you want to add the character in the text, then opening the Insert tab and clicking on Symbol, then click on More Symbols in the menu that opens. A window like the one shown below will appear, where you can choose the symbol you want. Add the character by clicking on Insert.
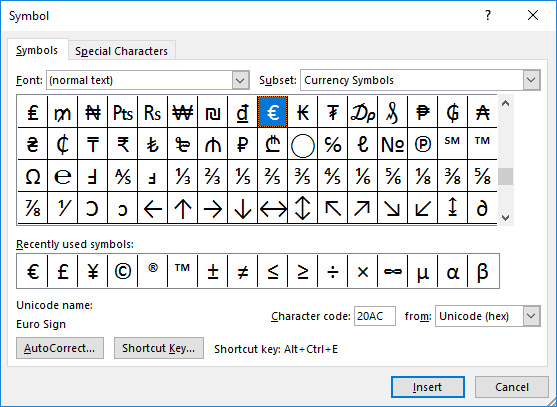
Please note that different fonts contain different symbols. if you do not find the character you want, try another font in the Font list. If you are inserting the character into normal text and want it to look like the same font as the rest of the text, choose the character from the alternative Normal text.
You can also enter mathematical formulas into your document. They are available on the Insert tab under the Equation icon.
Even the most common fonts do not contain all kinds of special symbols which exist (e.g. mathematical symbols or letters in foreign languages). You can ask the computer liaison at your department about such special characters.